

Design a Seat Map With the Editor
The seat map editor turns a floorplan into something buyers can click. You draw a shape over each section or table, tell that shape which seats it represents, and the cart does the rest — showing what's free, what's taken, and what a buyer just picked.
Opening the editor
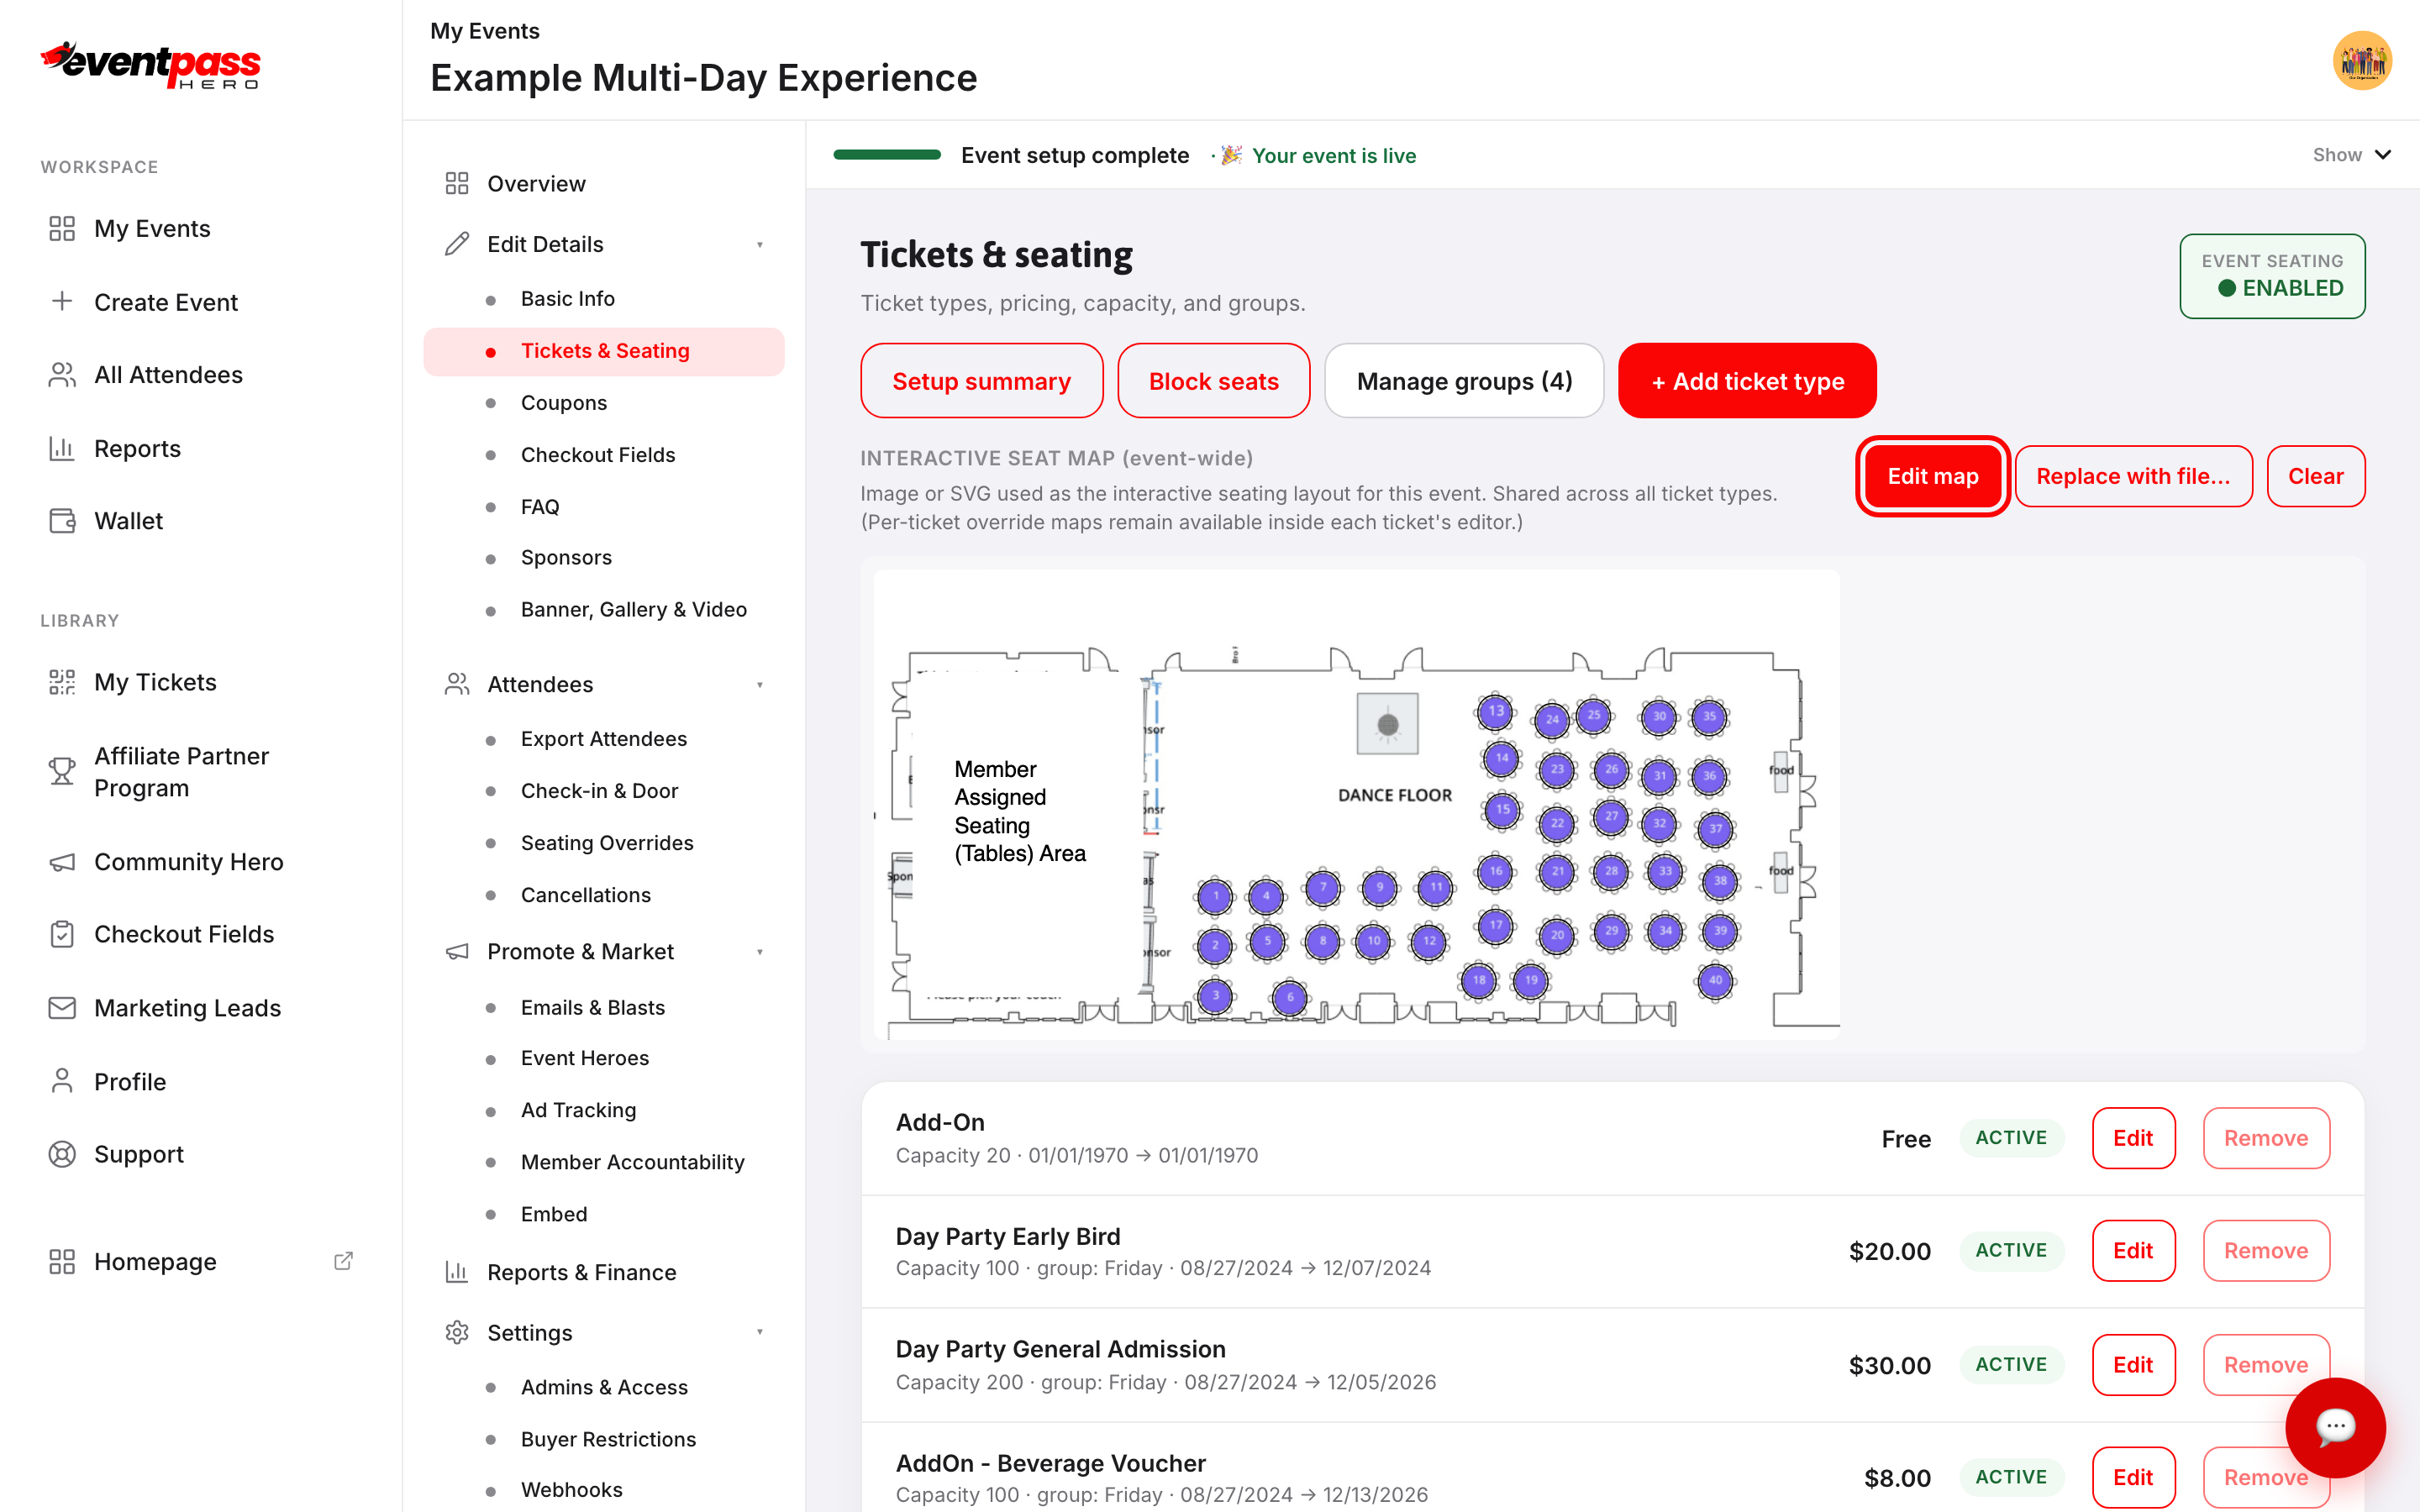
Go to Edit Details → Tickets & Seating. If the event already has a map you'll see Edit map; if it doesn't, you'll see ✨ Create interactive seat map.
The heading tells you what you're editing. Seat Map Editor · event-wide is the map every ticket type shares. · ticket override #… means you're editing a map that applies to one ticket type only.
Laying out the venue
Start with a floorplan. Upload background puts your venue image behind the canvas so you can trace over it. Without one you get an empty canvas and the prompt Pick a tool and start drawing, or upload a floorplan.
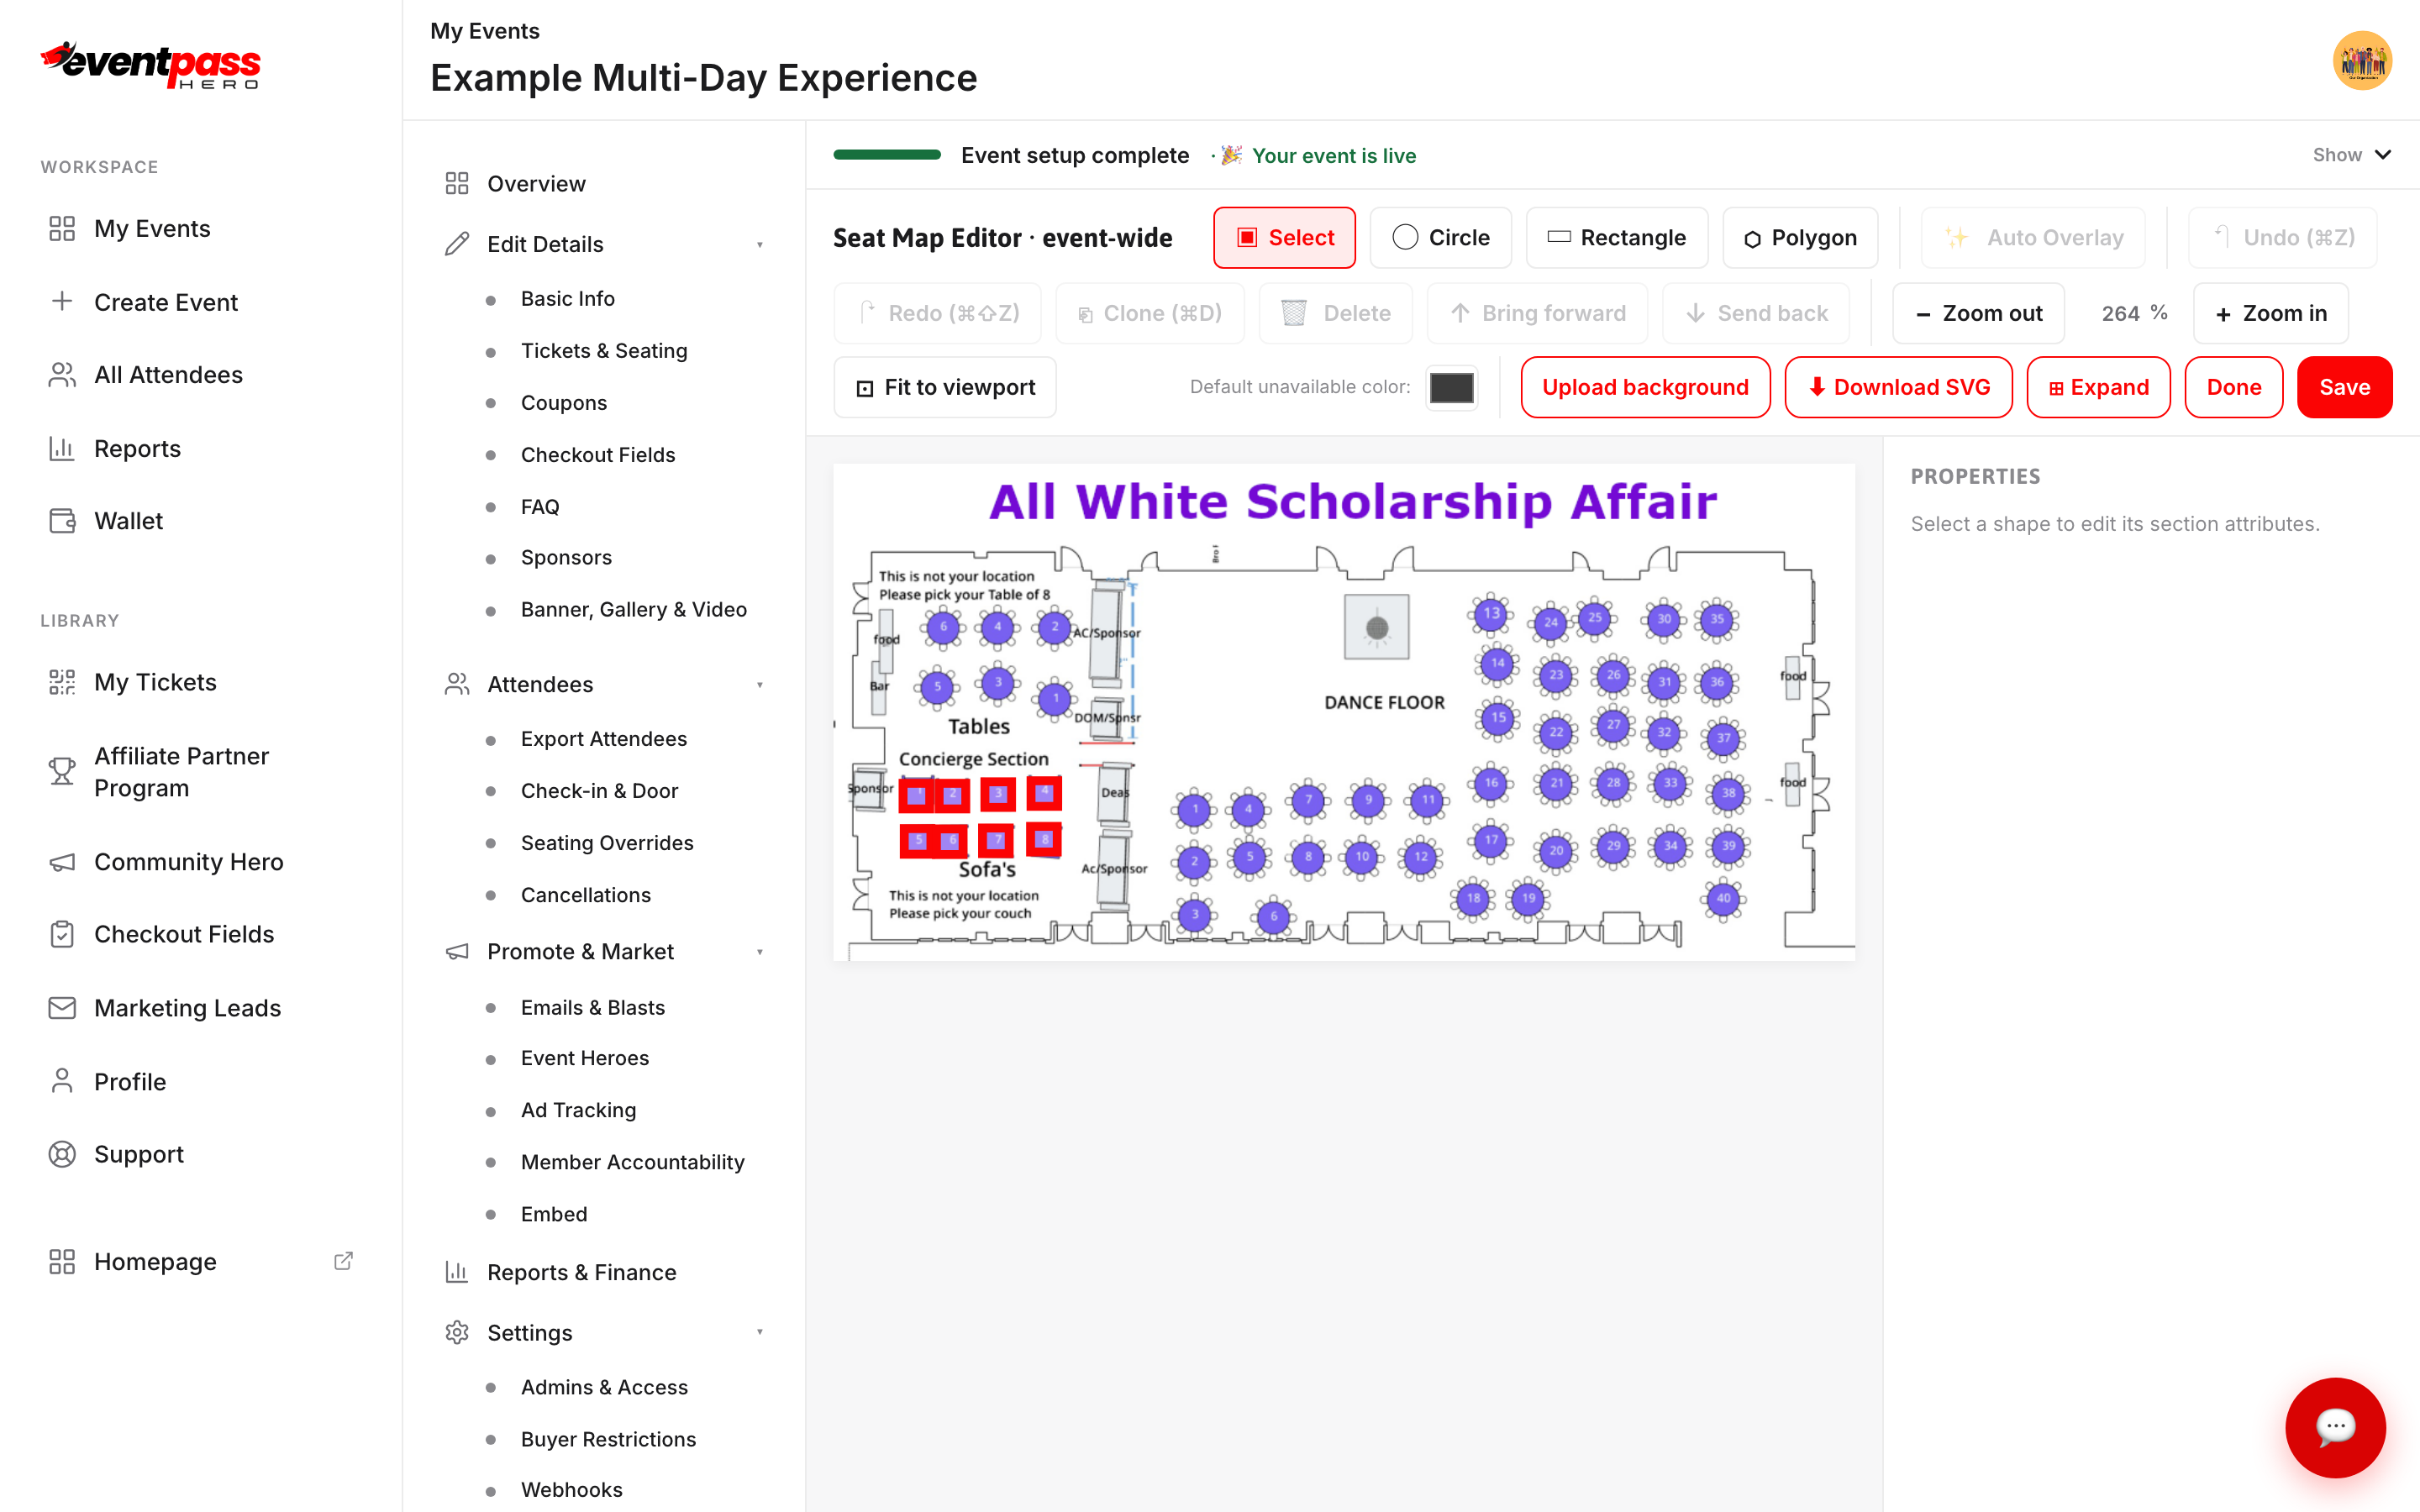
Four tools sit at the top left:
- Select — click a shape to pick it up, move it, or resize it by its handles.
- Circle — drag to draw. Best for round tables.
- Rectangle — drag to draw. Best for blocks, rows, and rectangular tables.
- Polygon — click each corner in turn for irregular shapes: curved balconies, wedge-shaped sections, boxes.
Everything else in the toolbar is housekeeping: Undo (⌘Z) and Redo (⌘⇧Z), Clone (⌘D) to copy the selected shape, Delete, Bring forward and Send back for overlapping shapes, and zoom controls including Fit to viewport.
Auto Overlay can detect sections from your floorplan automatically, but only as a starting point — it works only on a new map with just a background, so use it before you draw anything.
Telling a shape which seats it holds
Select a shape and the Properties panel fills with Section attributes. This is the part that matters: a shape with no seats attached is just a drawing.
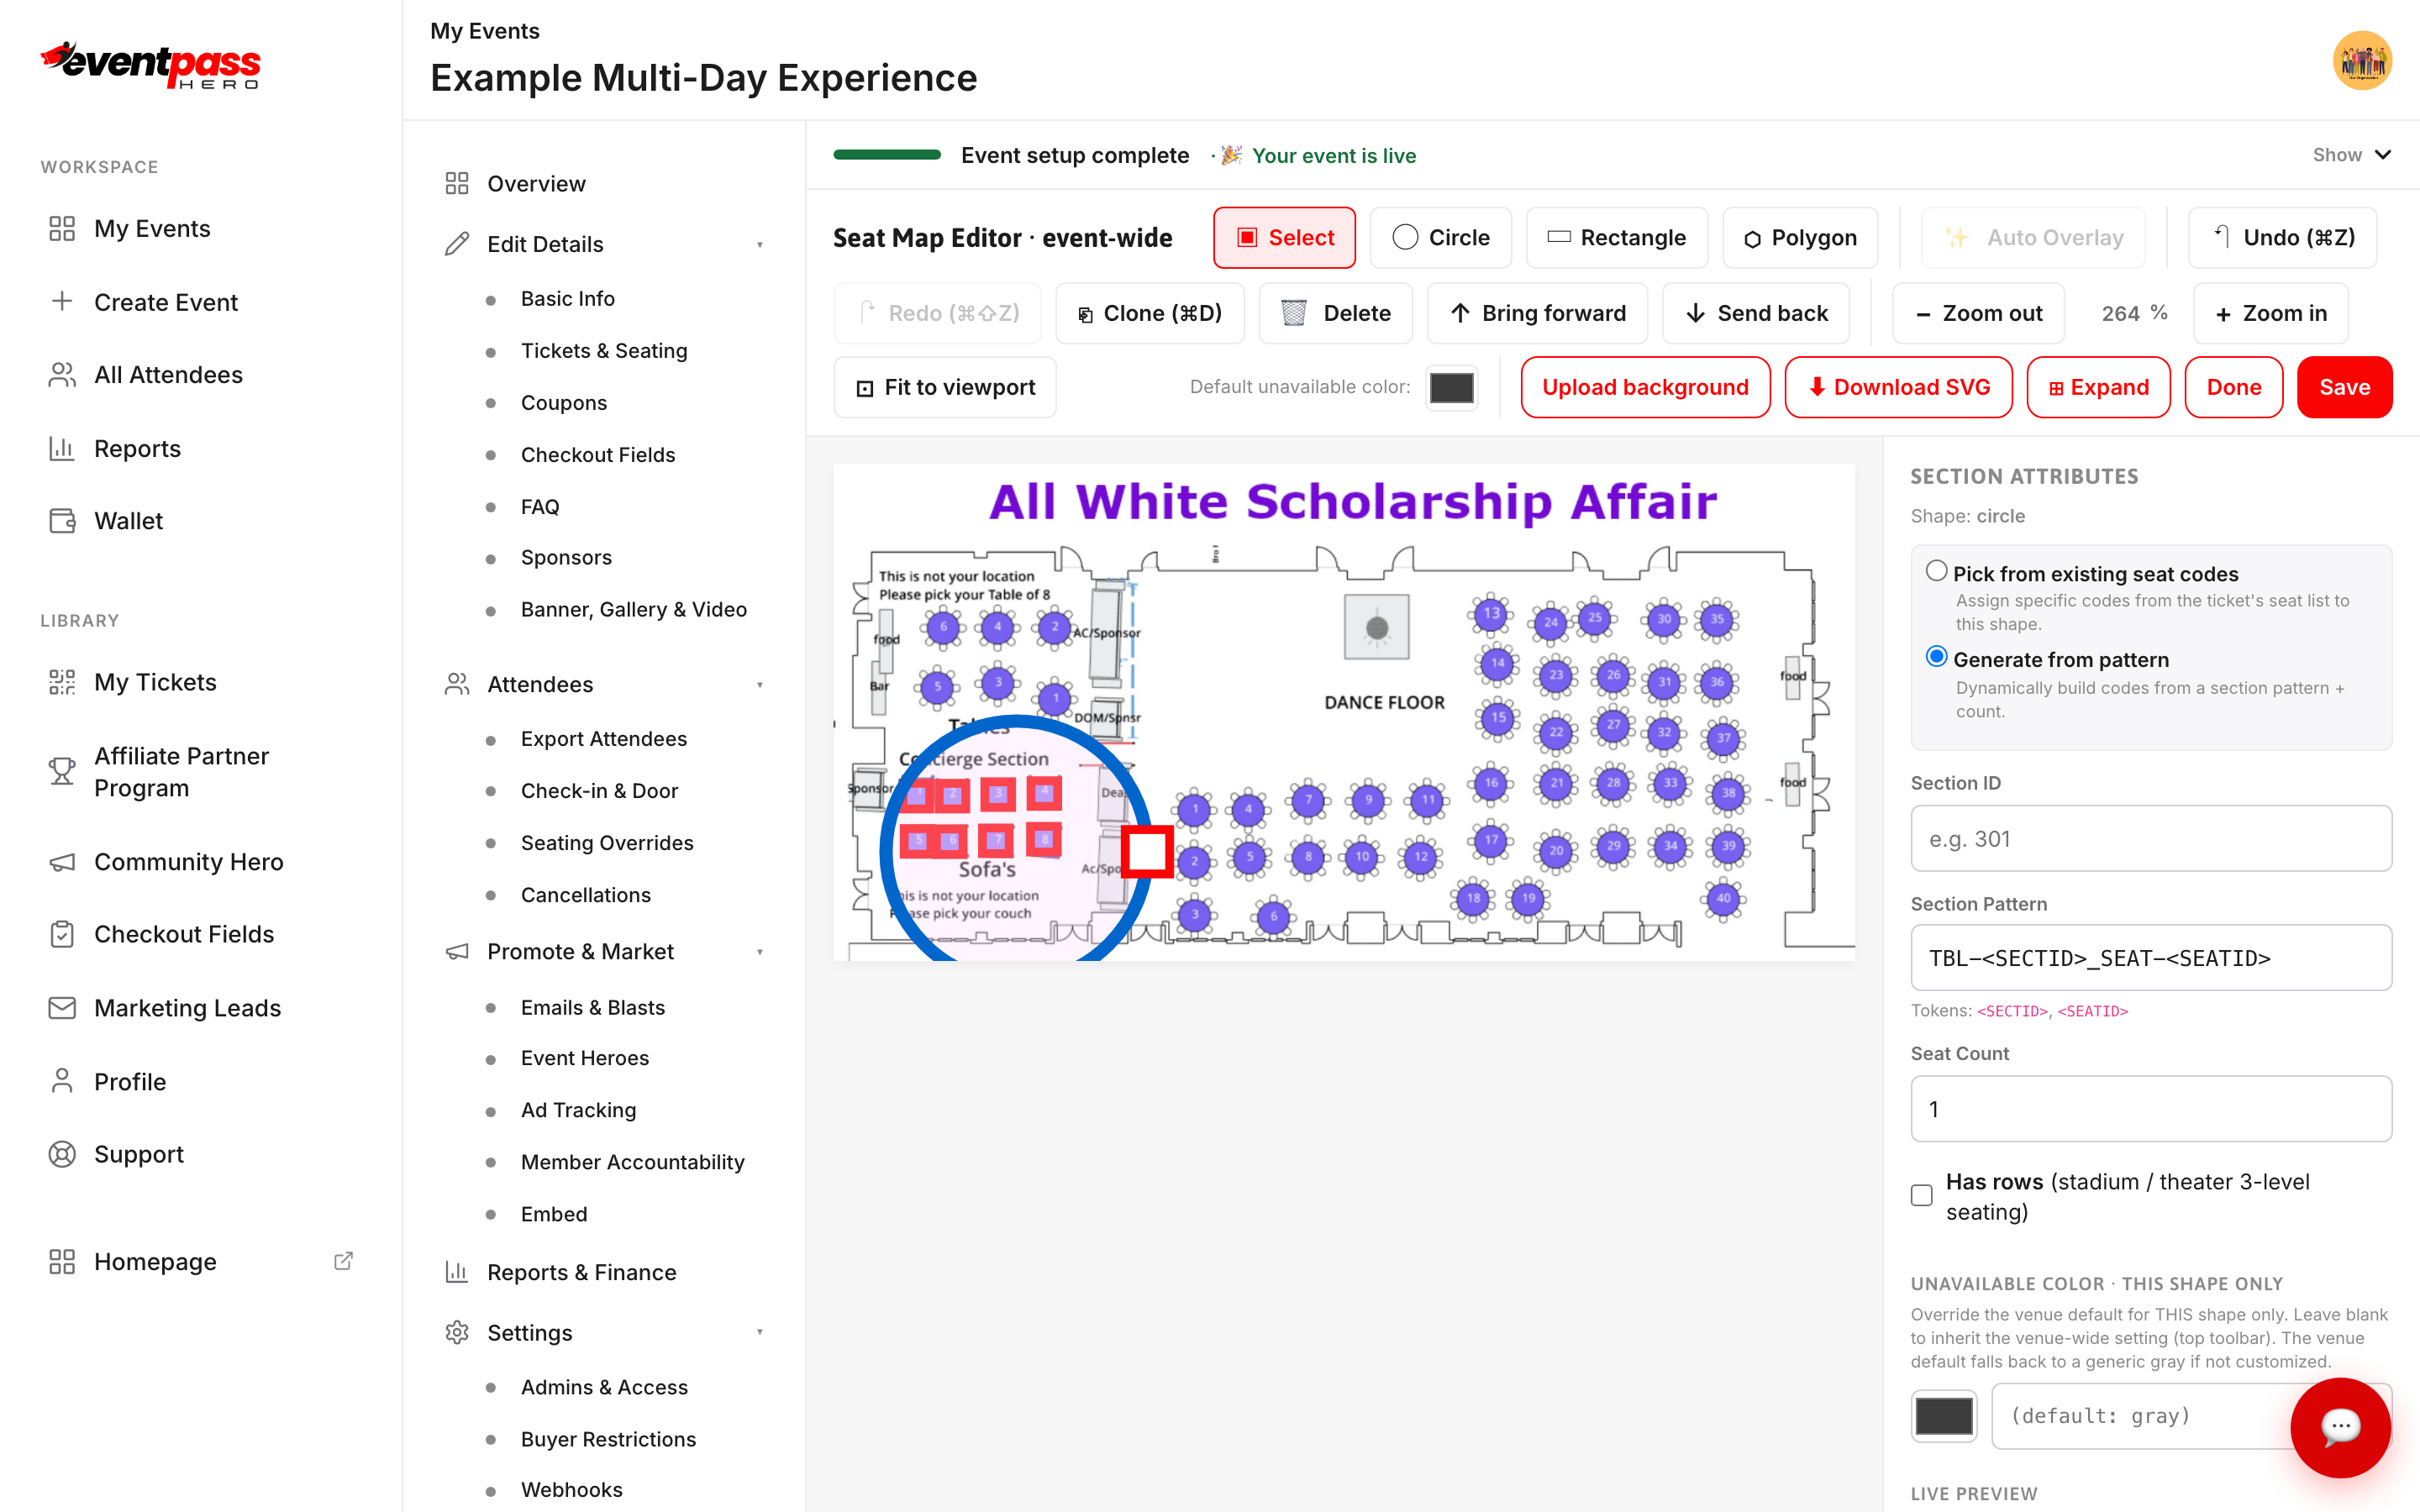
You have two ways to do it.
Pick from existing seat codes assigns specific codes from the ticket's seat list to this shape. Type in the filter box to narrow a long list, click the codes you want, and Clear all starts over. Use this when your seats already exist. As the panel notes, the cart honors these codes verbatim — the pattern fields above are ignored when codes are picked.
Generate from pattern builds the codes for you from three fields:
- Section ID — the section's number or name, such as
301. - Section Pattern — the template, such as
TBL-<SECTID>_SEAT-<SEATID>. The tokens available are<SECTID>and<SEATID>, plus<ROWID>when rows are on. - Seat Count — how many seats.
Tick Has rows (stadium / theater 3-level seating) and you get a Row Count as well; Seat Count then means seats per row. That's the three-level layout — section, row, seat.
If your venue labels rows with letters instead of numbers, also tick Alphabetic rows (A–ZZ instead of 1, 2, 3…) — rows are then lettered A, B, C… (continuing to AA, AB and so on after Z), and a hint under Row Count shows the range you'll get, like "Rows A–F". The generated codes read SEC-301_ROW-A_SEAT-1 and buyers see "Row A · Seat 1" at checkout and on their tickets.
Either way, Live preview at the bottom of the panel shows the actual codes that will be produced. Check it before you move on. It's much cheaper to spot a wrong pattern here than after tickets are on sale.
Colours
Default unavailable color in the toolbar sets the fill used for sold-out and blocked sections across the whole map. Any single shape can override it under Unavailable color · this shape only; leave that blank and the shape inherits the venue-wide setting.
Saving
Click Save. You'll see Map saved. when it's stored.
Each save writes a new version rather than overwriting the last one, so a previous map stays reachable in your media library. That makes experimenting safe — but it also means saving repeatedly leaves a trail of versions, so save when you've finished a pass rather than after every shape.
Done leaves the editor. ⬇ Download SVG saves a copy of the map to your computer.
Troubleshooting
- I uploaded a background and it vanished on reload — you'll have seen Background uploaded inline; click Save to persist. The image isn't stored until you click Save.
- Auto Overlay is greyed out — it only runs on a new map that has a background and no shapes yet. Clear your shapes to use it.
- Buyers can't click my sections — a shape with no seat codes isn't clickable. Select each shape and confirm Live preview shows codes.
- My codes don't match the ticket — the cart matches on the exact code. Compare what Live preview shows against the seat list on the ticket type; a different separator or a typo in the pattern breaks the match.
- The seat code list says "Showing 200 of …" — the picker caps its display. Type in the filter to reach the rest.
- I want to hold seats back, not remove them — block them instead of deleting them from the map.
Last updated 2026-09-07 · All FAQs & video tutorials