

Set Up Interactive Seating
Selling assigned seats or tables? Interactive seating lets buyers pick exactly where they'll sit, with every seat tracked automatically — no spreadsheets, no double-booking. The setup lives on your event's Tickets & Seating screen: enable Event Seating, add a seat map, and connect the map to your ticket types with seat codes.
Step-by-step
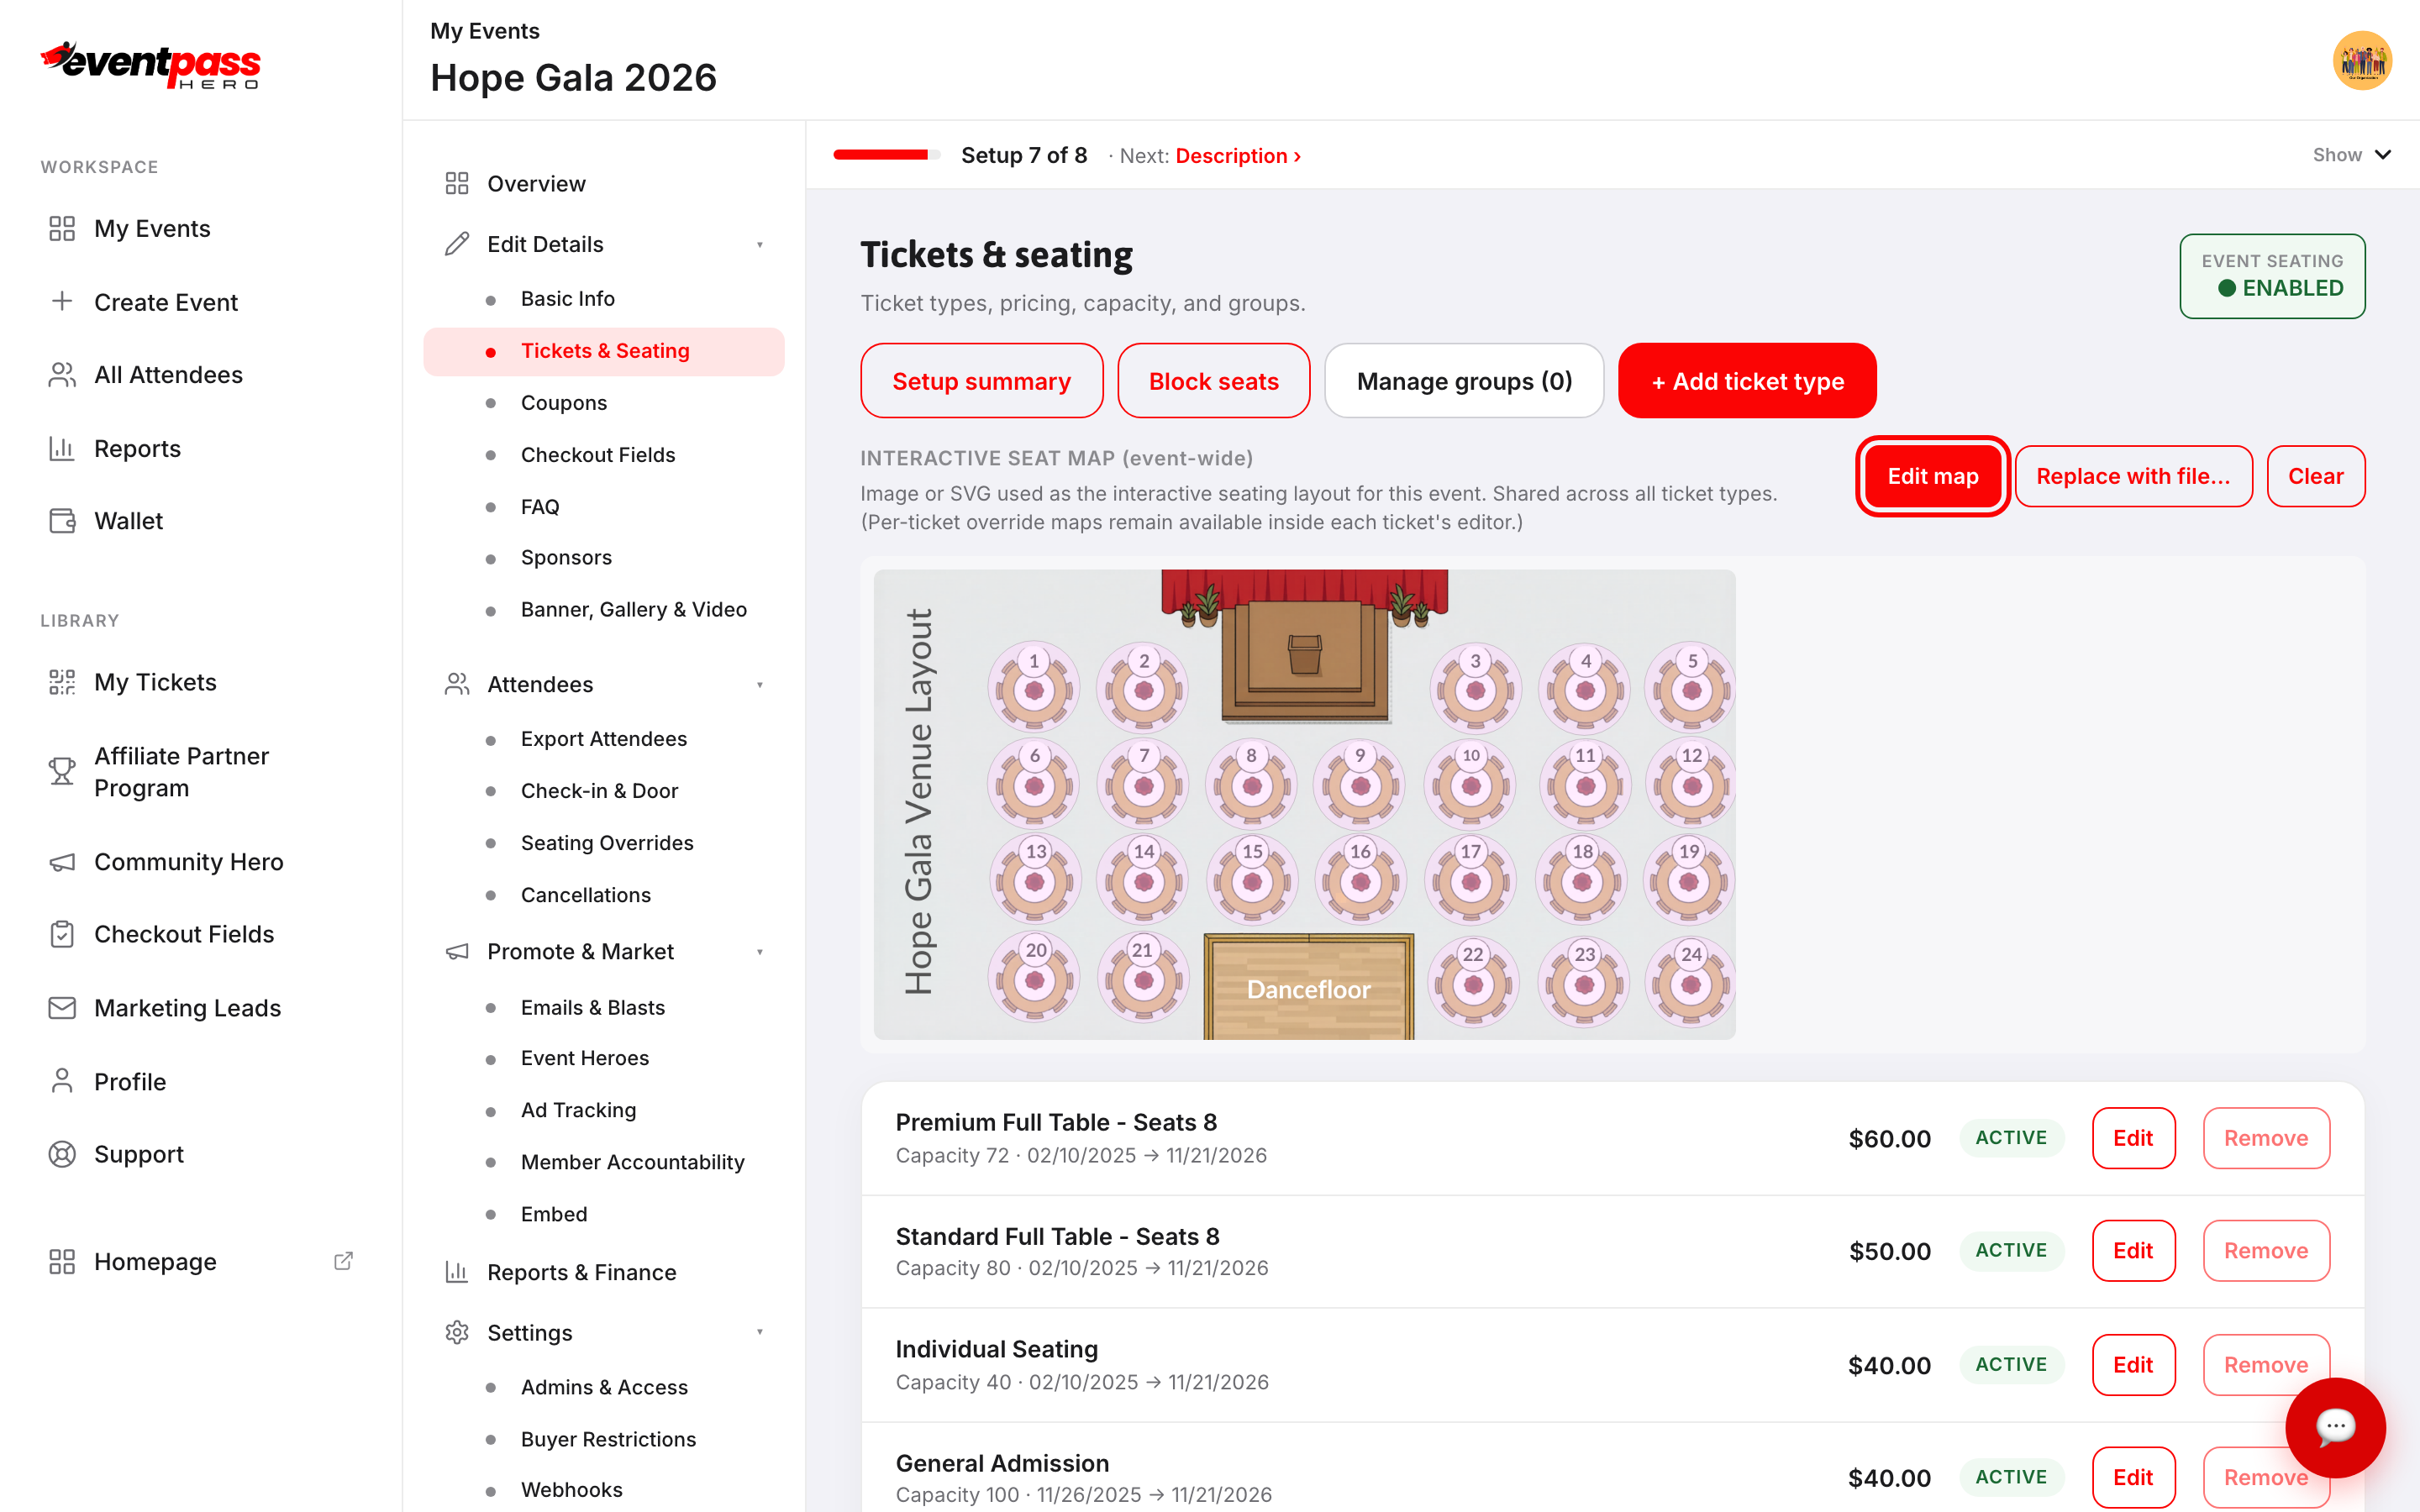
- 1. Open your event and click Tickets & Seating. Switch Event Seating to ENABLED.
- 2. Under Interactive Seat Map, add your event-wide map: Upload a file (an image or interactive SVG of your venue) or build one from scratch. The same map is shared across all ticket types, with per-ticket override maps available inside each ticket's editor.
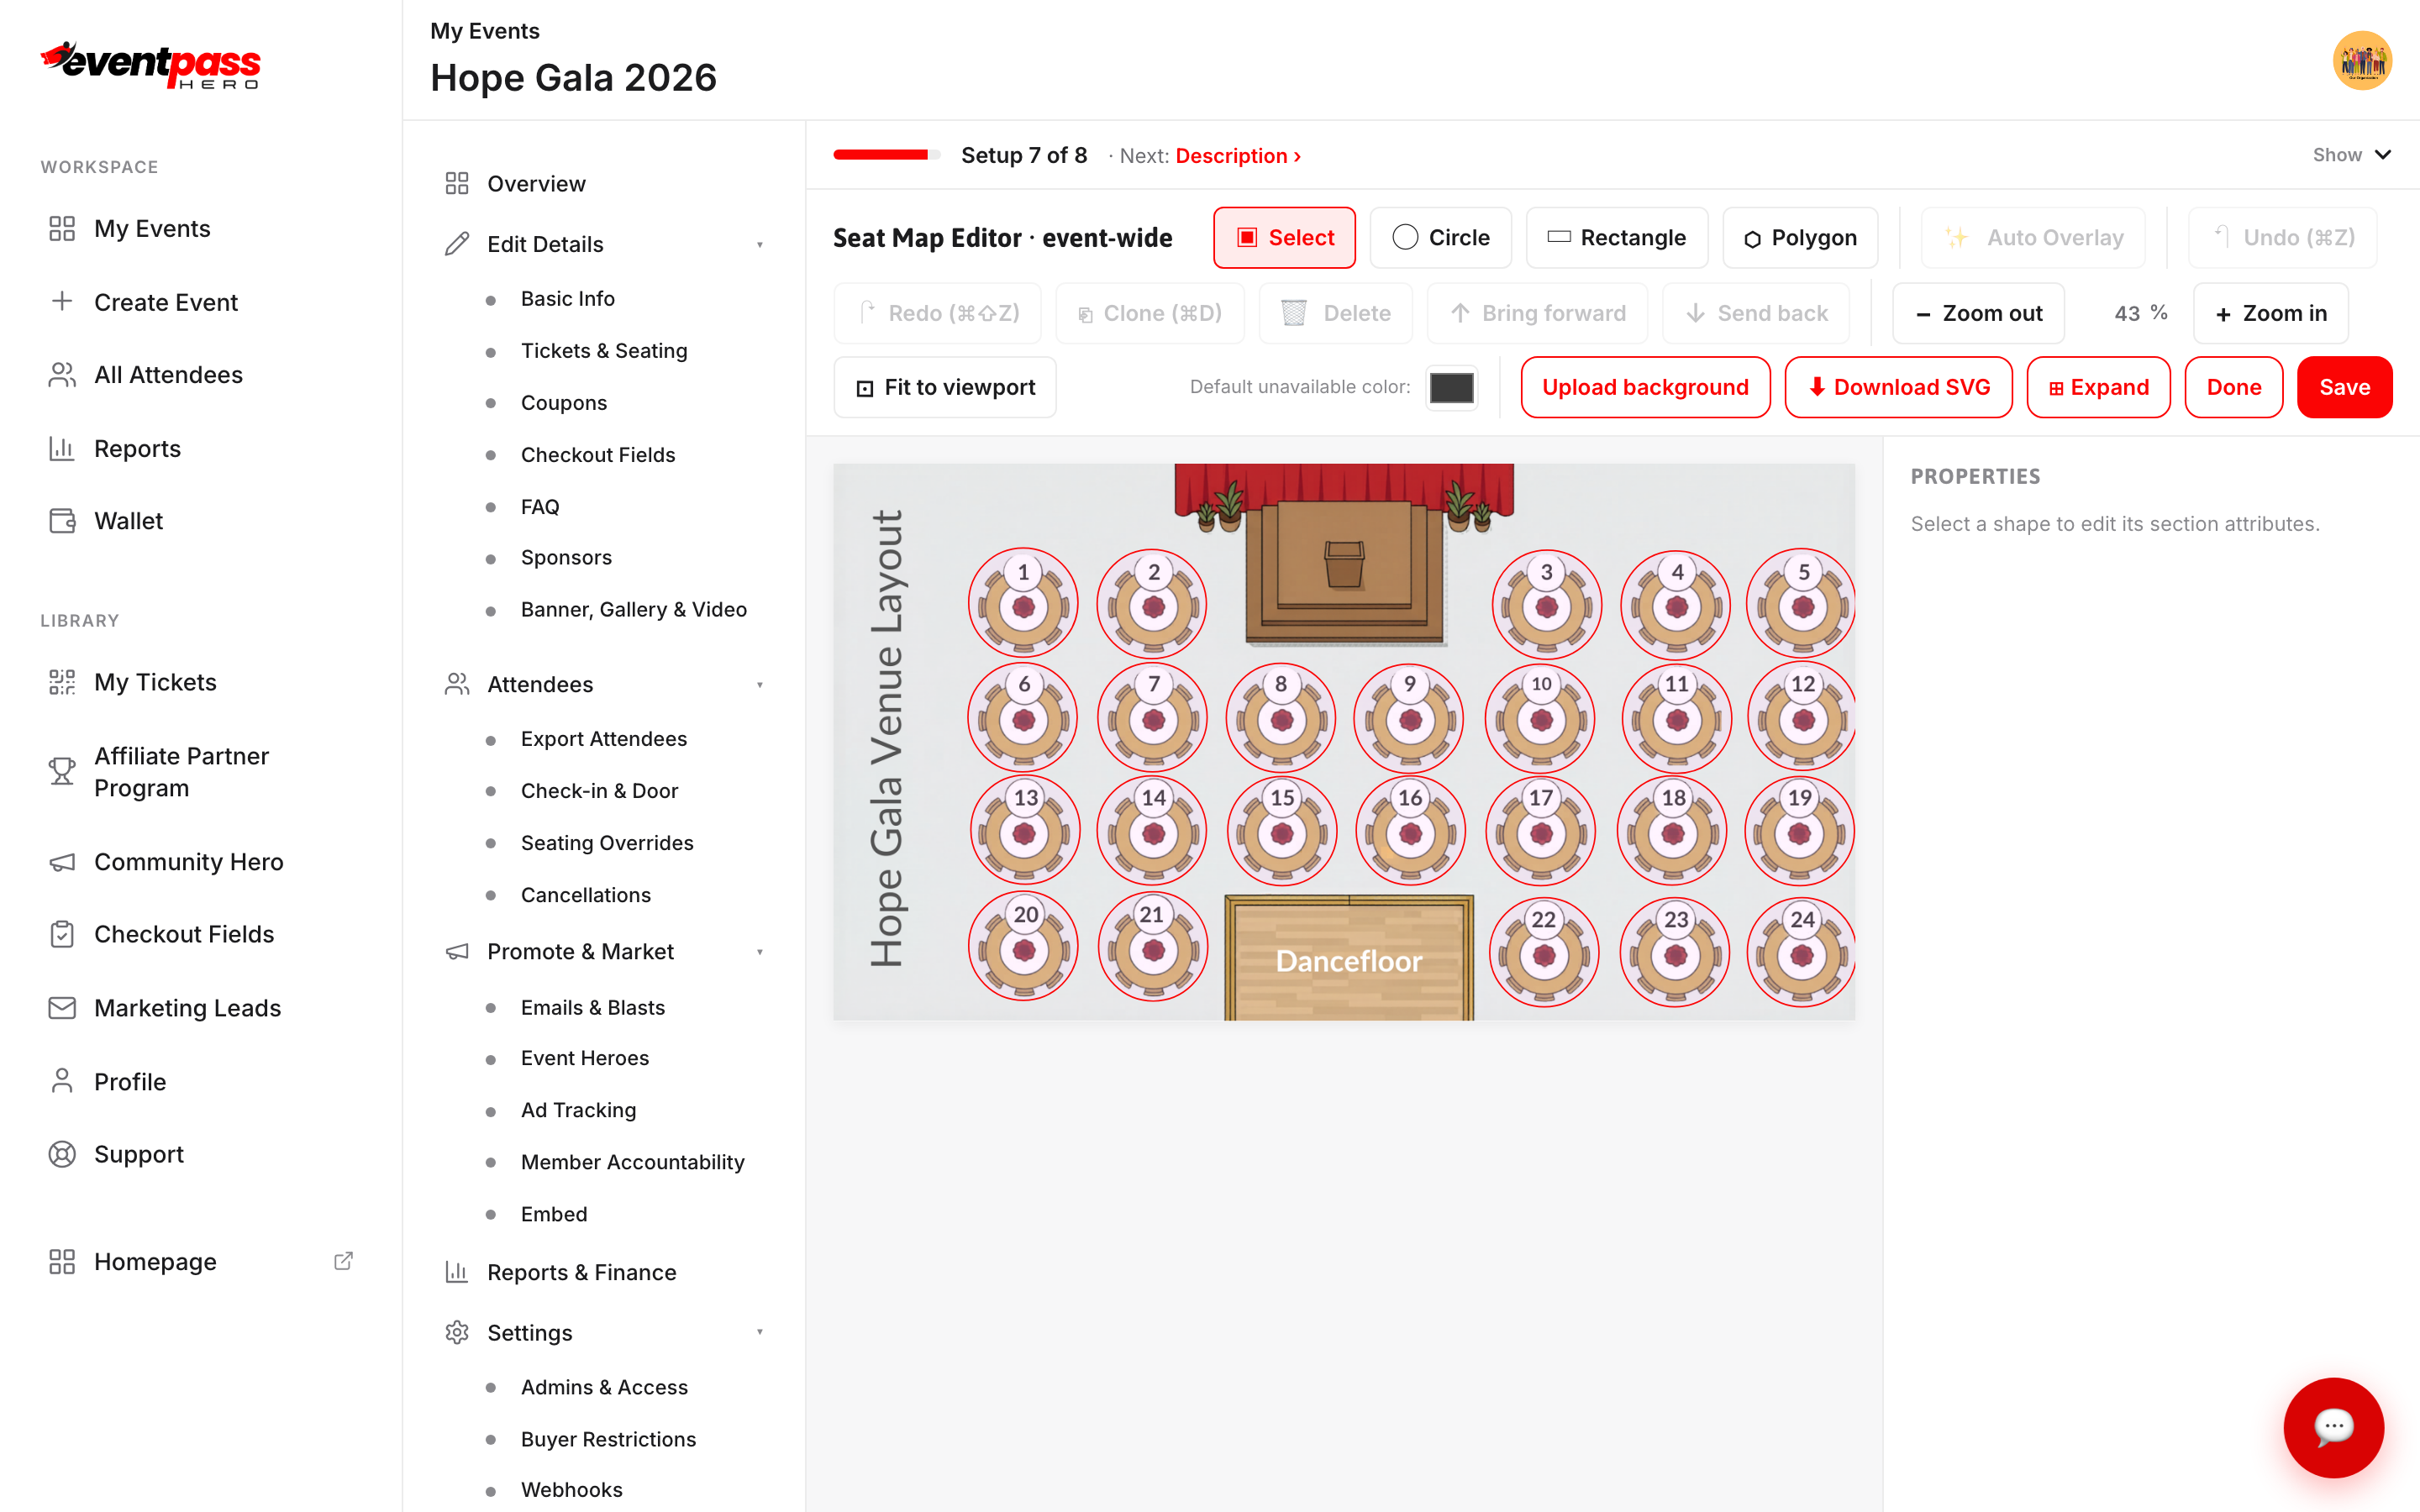
- 3. Click Edit map to open the Seat Map Editor. Draw sections with the Circle, Rectangle, and Polygon tools over your venue background, or try Auto Overlay to detect sections automatically. You can upload a background image, zoom, undo/redo, clone shapes, and Save when the layout matches your room.
- 4. Now connect tickets to seats. Edit a ticket type, turn on Assign seat codes to this ticket, and choose how seats are assigned:
- Attendees choose — buyers pick their exact seats from the map at checkout. - Attendees pick a section only — buyers tap a section on the map and the system automatically gives them the best available seats there (side-by-side in one row whenever possible). Perfect for stadiums and large venues where scrolling hundreds of individual seats is a chore. Buyers see exactly which seats they got before they pay. - Auto-assigned — the system assigns the next available seat at checkout; buyers make no seat choice at all.
- 5. Enter the ticket's Seat codes (comma-separated, like
TABLE-1_SEAT-1, TABLE-1_SEAT-2) — or click ✨ Seating wizard to bulk-generate codes for whole tables, rows, and sections in seconds.
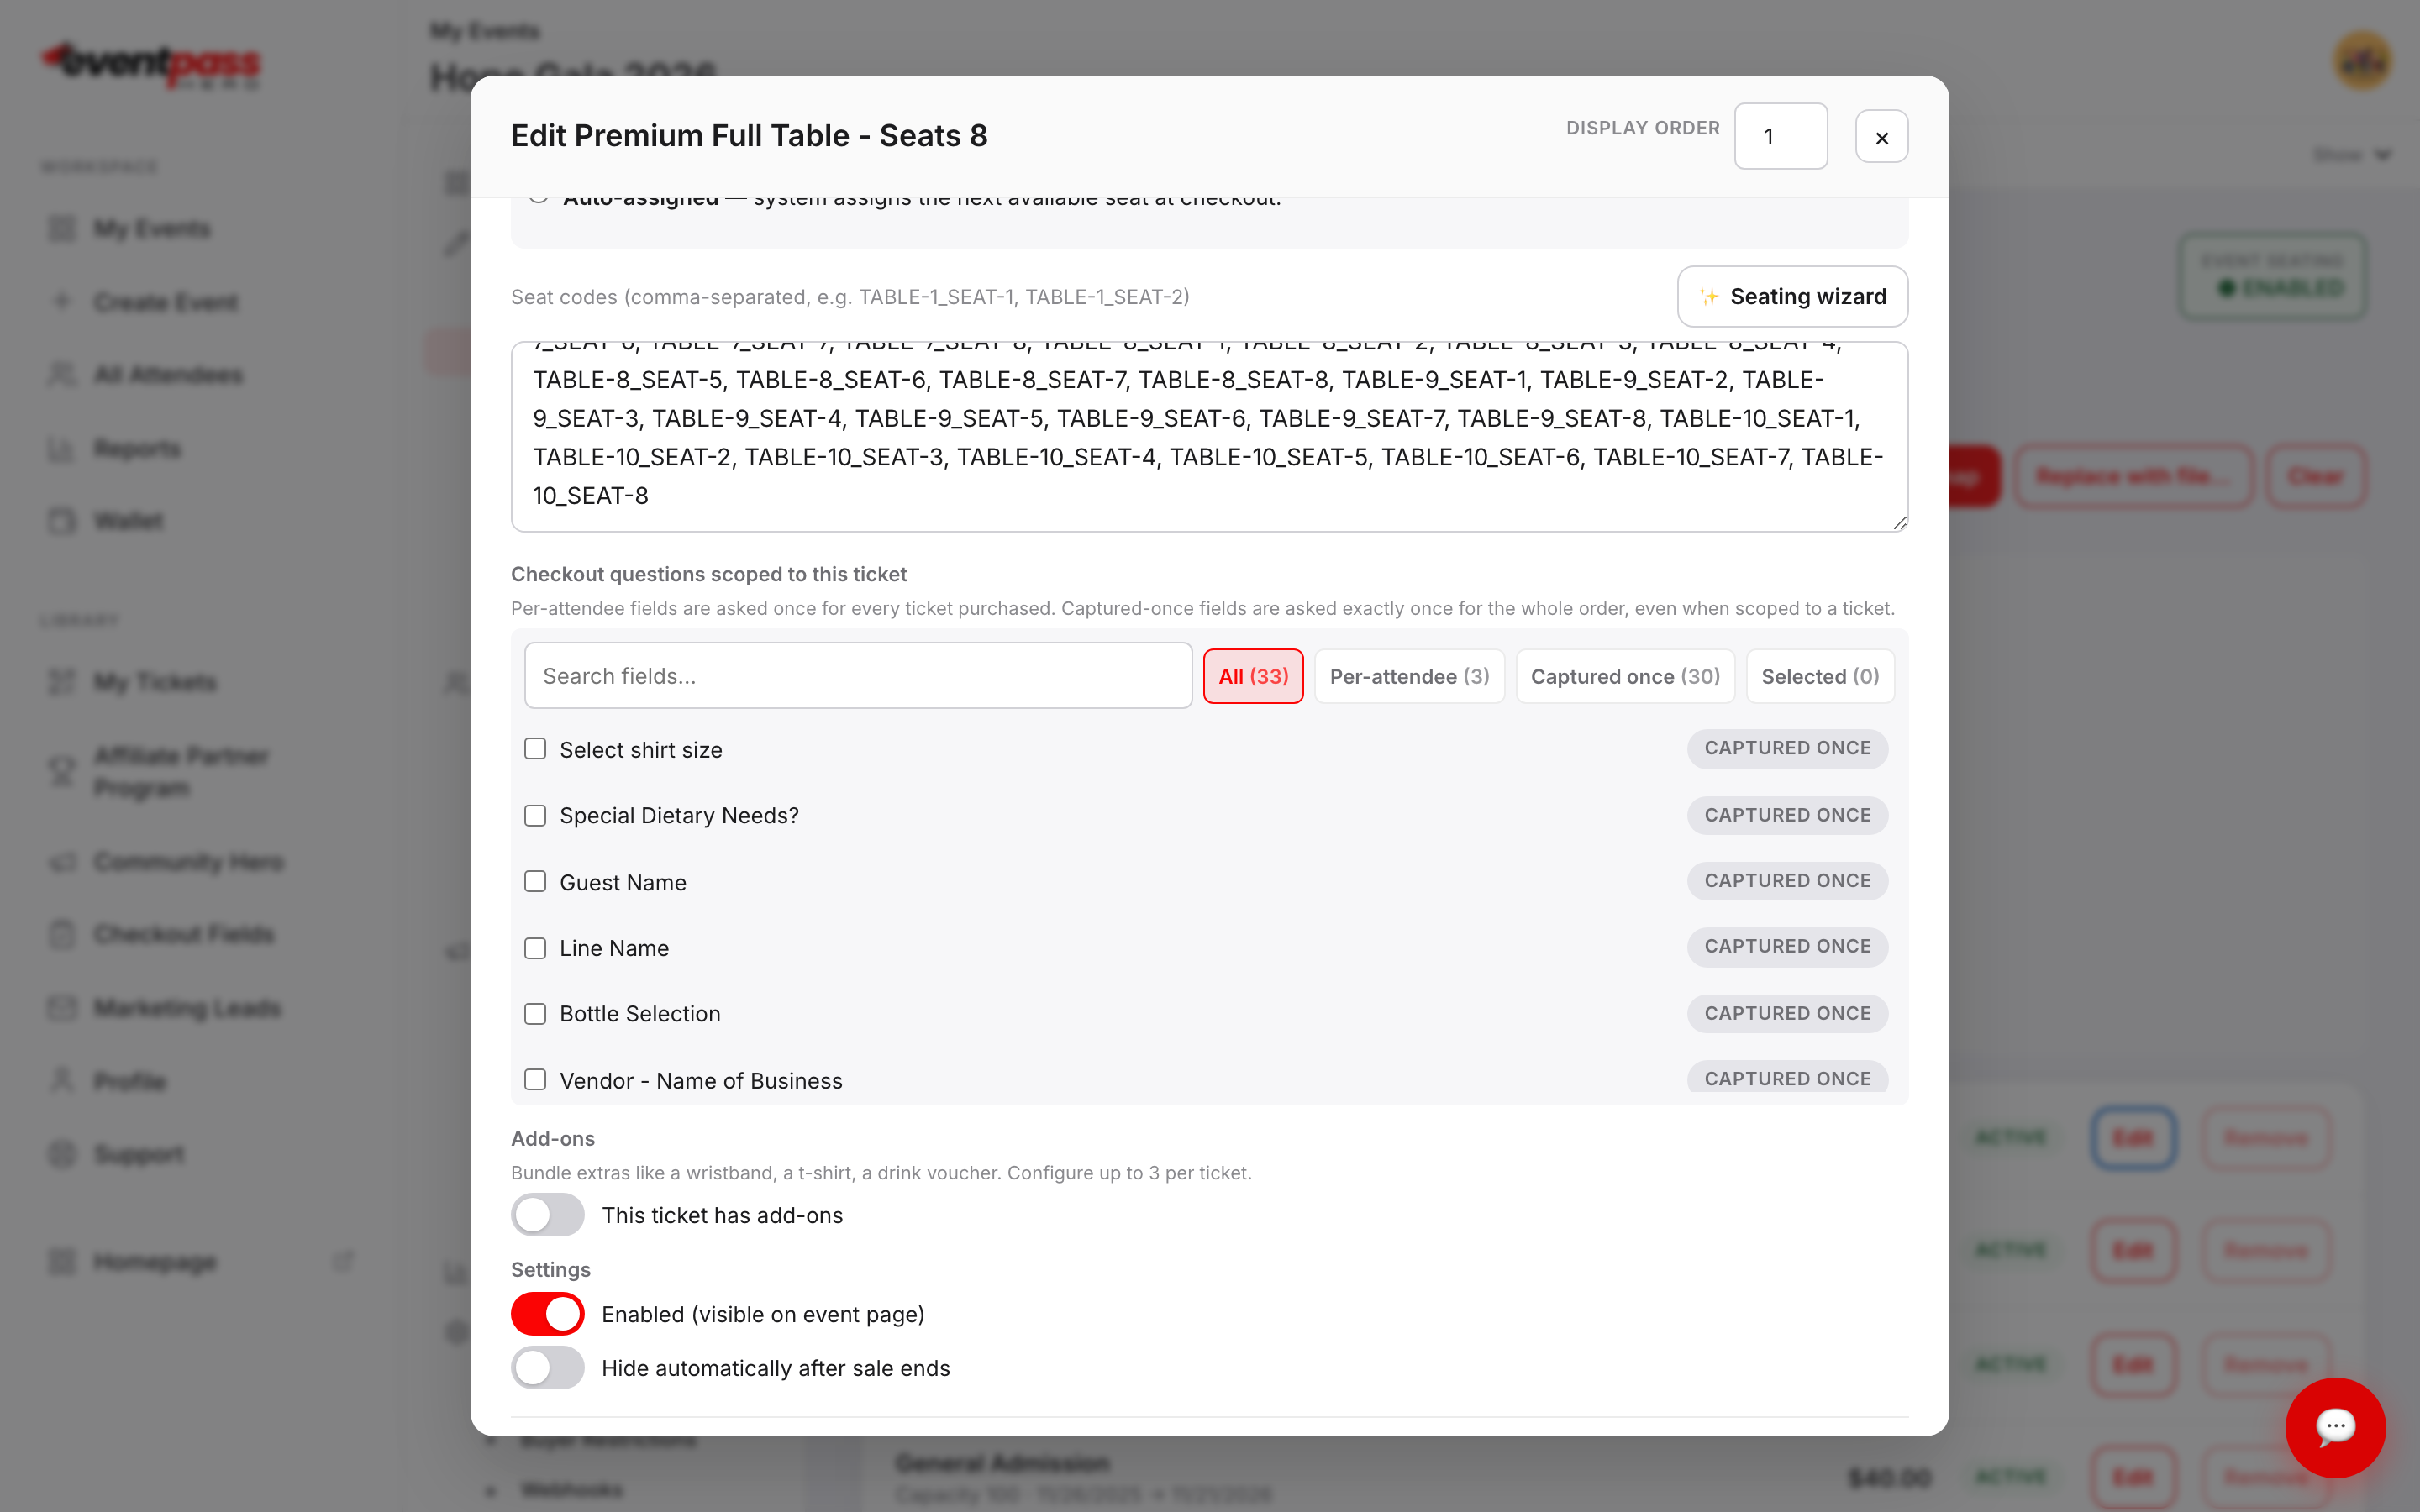
- 6. Click Save changes. Repeat for each reserved-seating ticket type.
Selling whole tables
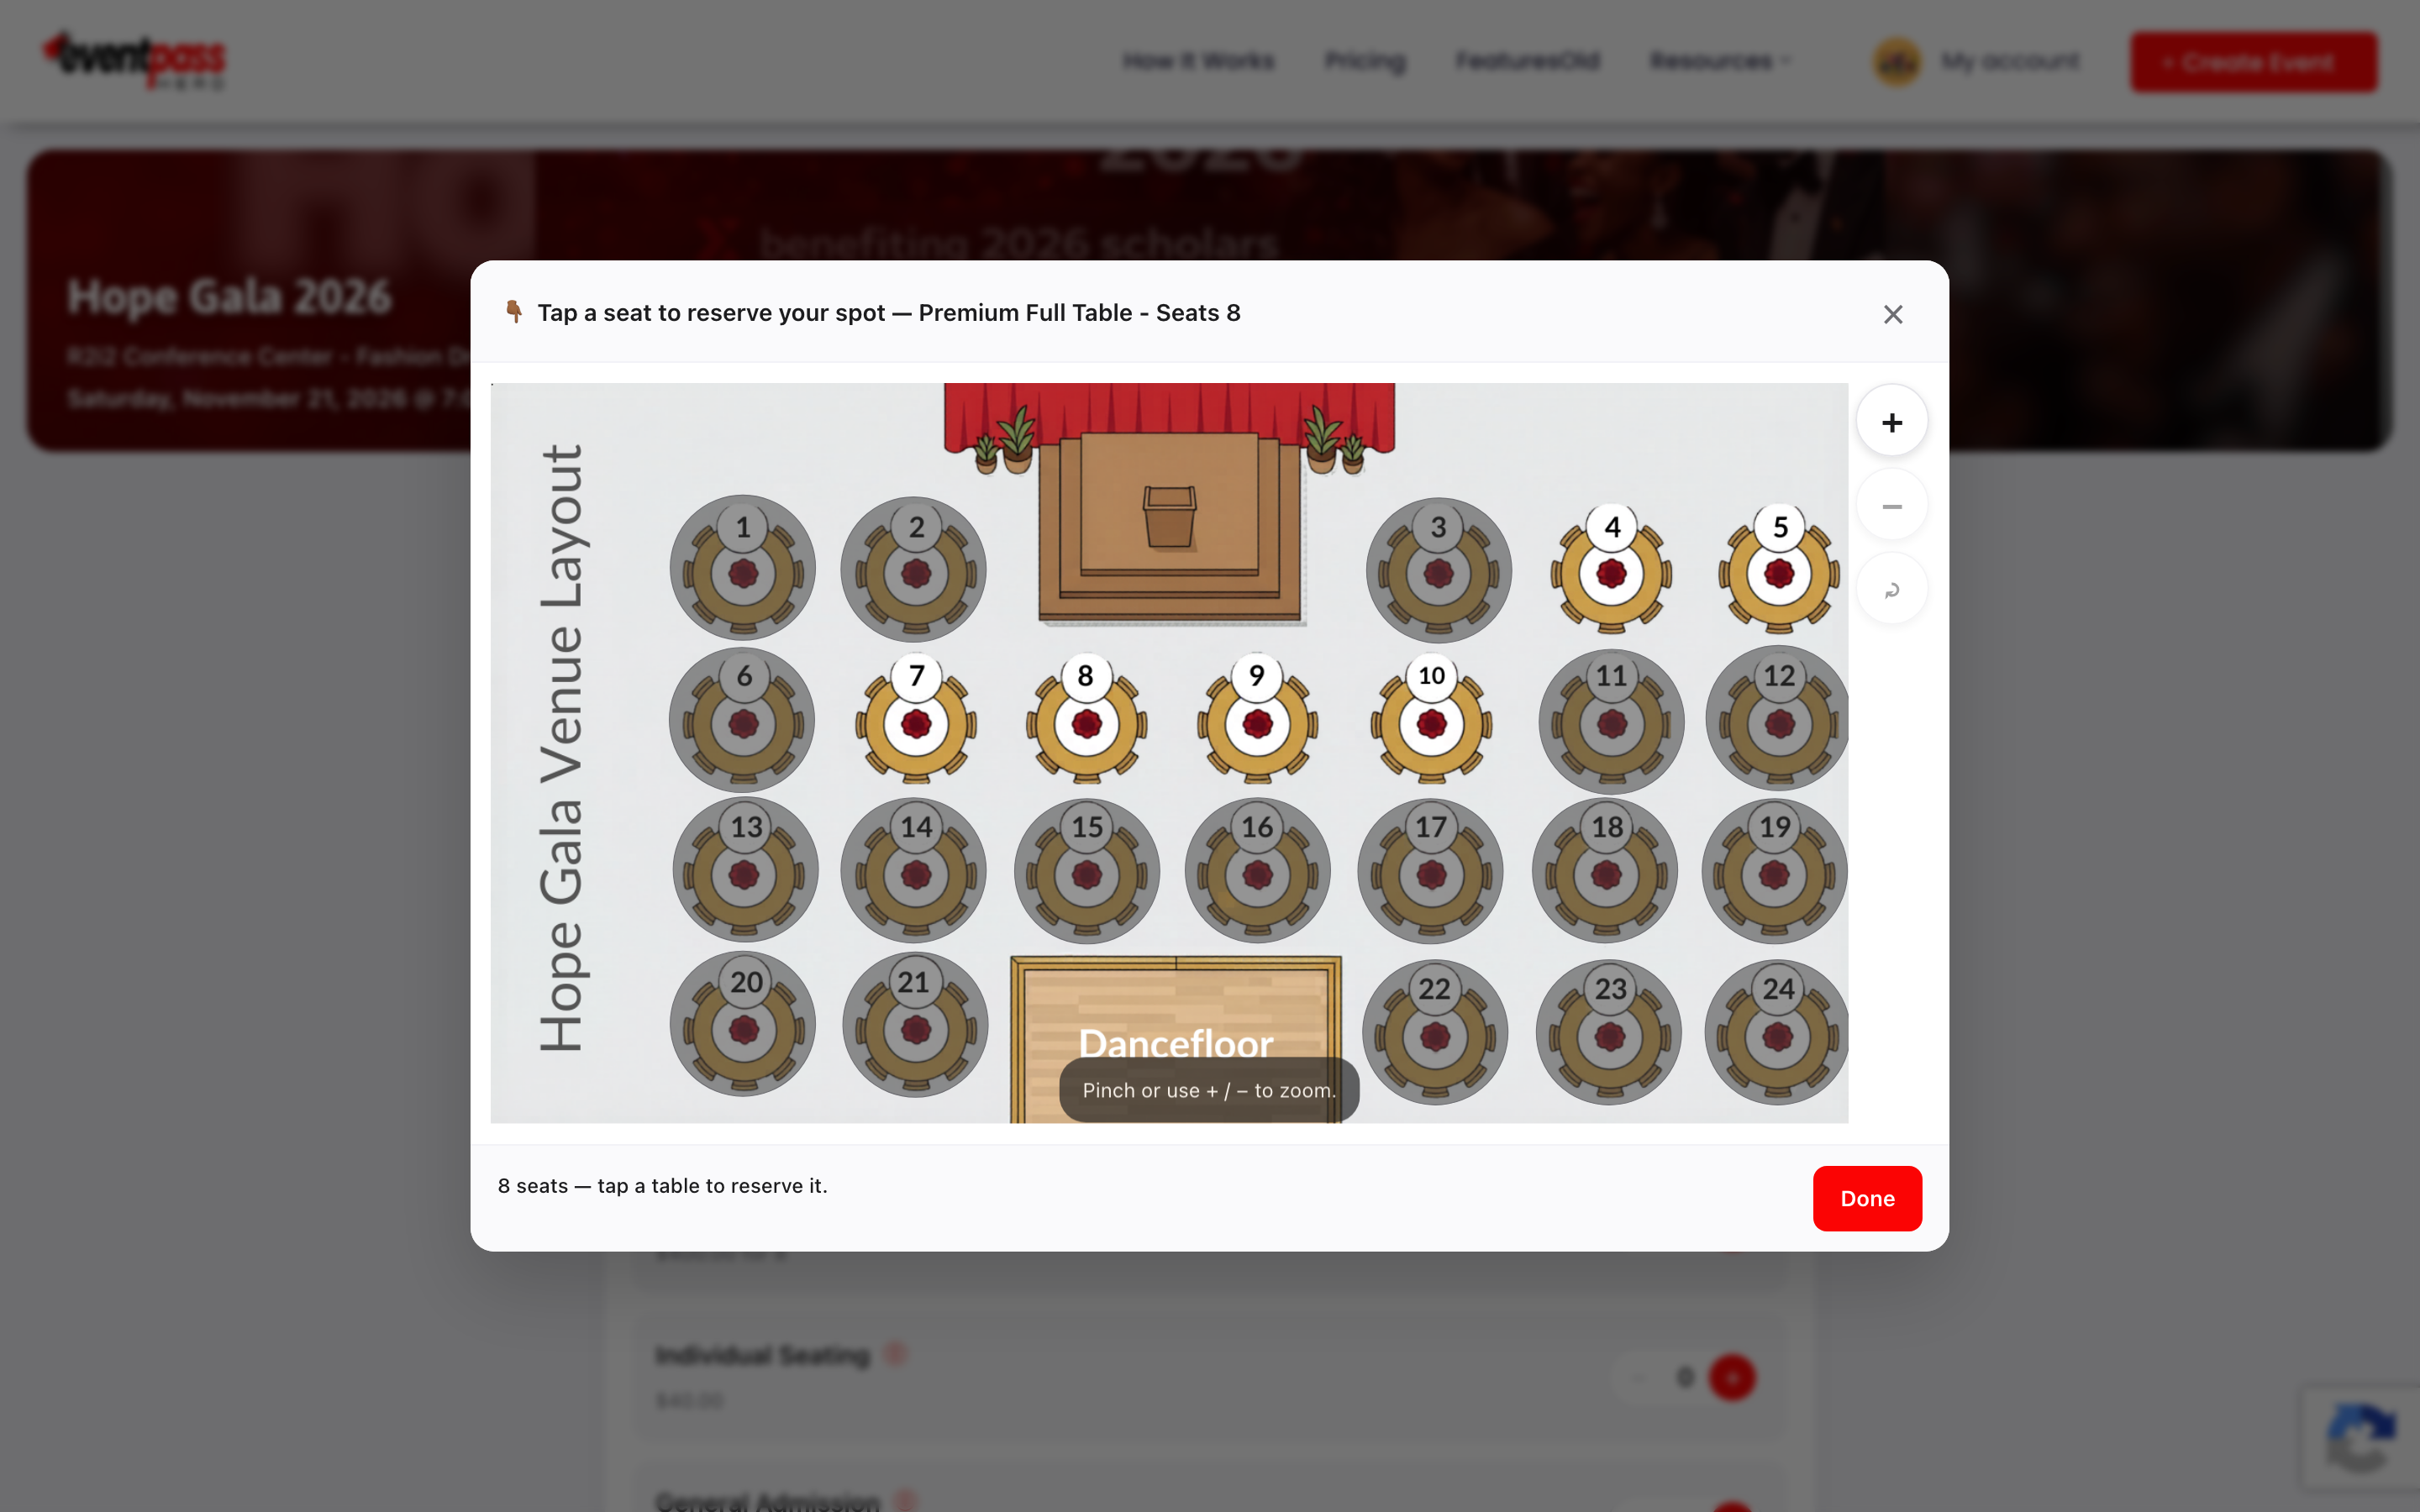
For a table of 8 sold as one purchase, turn on Yes, this ticket is sold as a bundle in the ticket editor and give it the table's seat codes. Buyers pick a starting table on the map, the bundle stays together, and each seat still gets its own QR-coded ticket.
What buyers see
At checkout, buyers with a reserved-seating ticket tap View Venue Map and pick their table or seat right on your map. Sold seats are unavailable — capacity stays in sync automatically.
For section-only tickets, tapping a section shows a small card with how many seats are left and exactly which seats the buyer would get (for example, "Row C, Seats 12–14"), with one Sit in this section button. If the seats can't all be side-by-side, buyers are told before they confirm.
Troubleshooting
- The map doesn't appear at checkout — confirm Event Seating is ENABLED, the event has a saved map, and the ticket type has Assign seat codes to this ticket turned on with seat codes entered.
- Seat-list count doesn't match capacity — the Setup summary flags this (for example "Seat-list count (48) ≠ capacity (40)"). Adjust the ticket's capacity or its seat-code list so they agree.
- You need to hold seats back — use Block seats on the Tickets & Seating screen to make specific seats unavailable for sale.
Last updated 2026-09-07 · All FAQs & video tutorials