
Customize Your Checkout and Confirmation Messages
Your event page sells the event. These four settings handle everything after that — the words on the button, what buyers read while they're paying, what lands in their inbox, and who they contact if something goes wrong. They all live in Edit Details → Basic Info.
Checkout button label
Under Buyer experience, Checkout button label changes the wording on your event's buy button. Pick from Tickets, Register, RSVP, Purchase, Reserve Spot, or Contribute.
It's a small change that sets expectations. A free workshop reads better as Register than Tickets, and a fundraiser reads better as Contribute.
Custom cart message
Tick Use a custom cart message and a rich-text editor appears, labelled Cart message. Whatever you write shows above the cart contents at checkout.
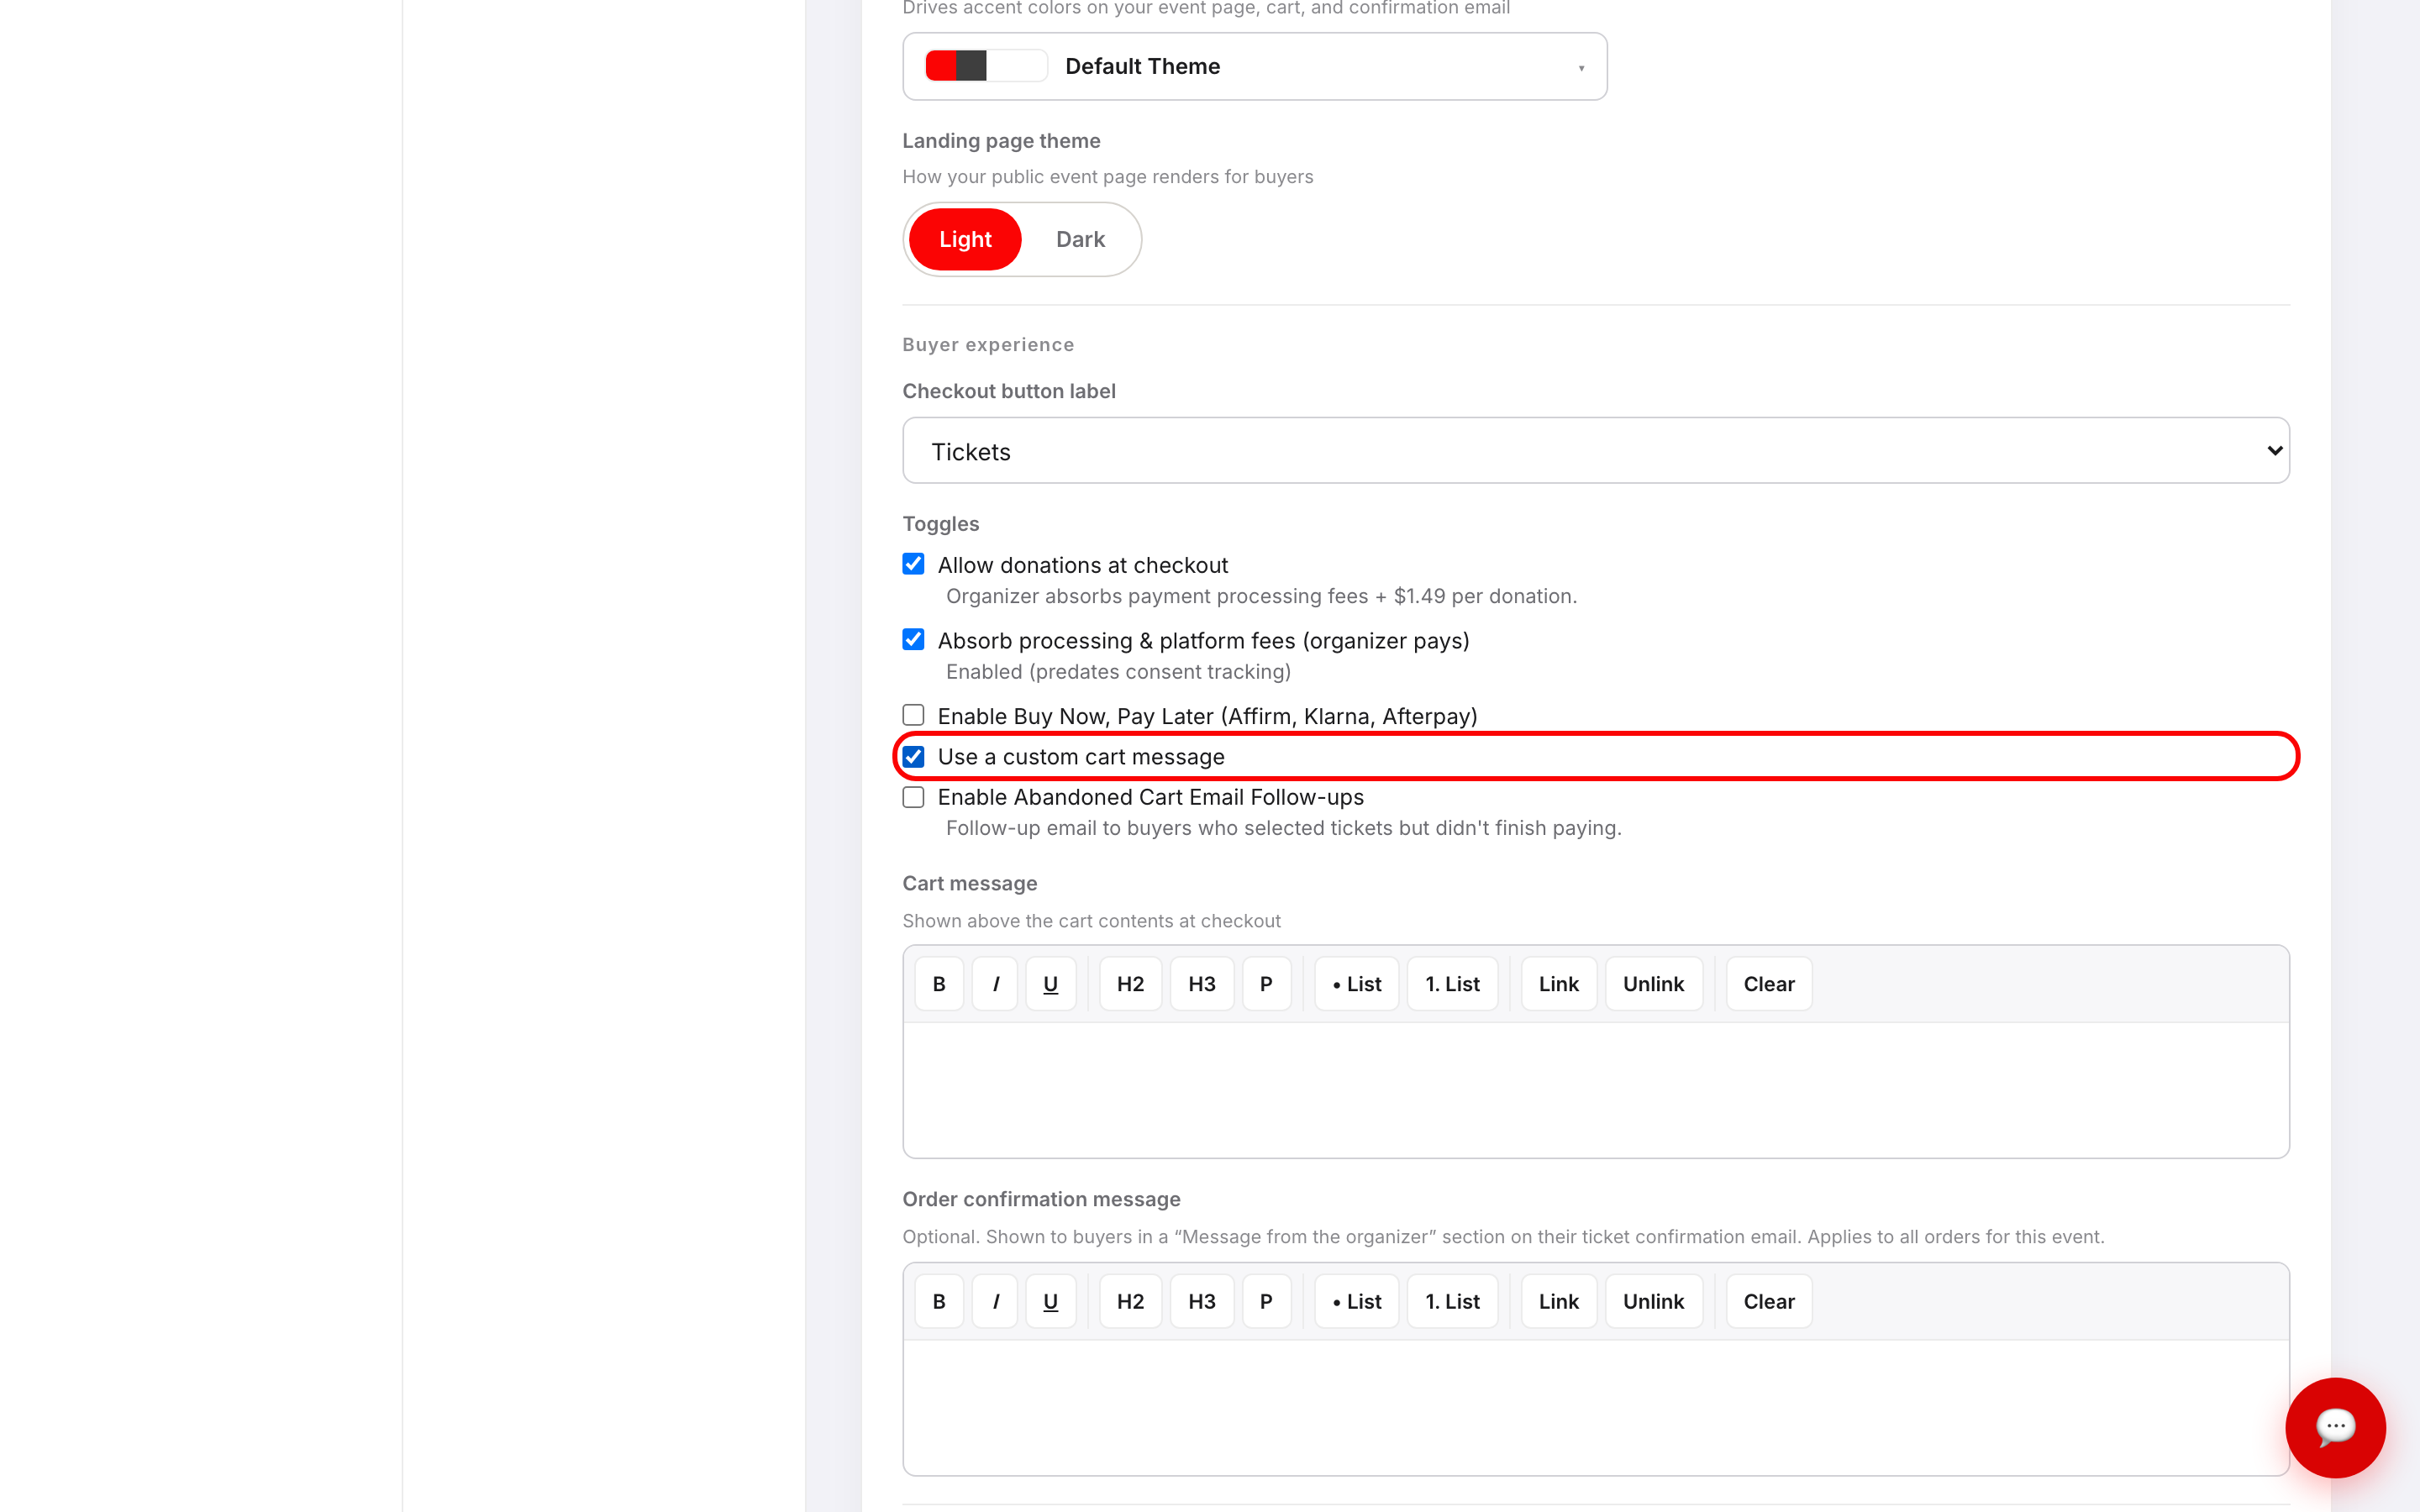
This is the place for anything a buyer needs to know before they pay: that tickets are non-refundable, that tables seat eight, that doors close at 8pm sharp. Keep it to a couple of lines — it sits between the buyer and the payment form.
Untick the box to stop showing it. Your text is kept, so you can switch it back on later.
Order confirmation message
Order confirmation message needs no toggle — write something and it appears, leave it blank and nothing is added. It renders as a Message from the organizer block on the ticket confirmation email, tinted with your event's theme colour, and it applies to every order for the event.
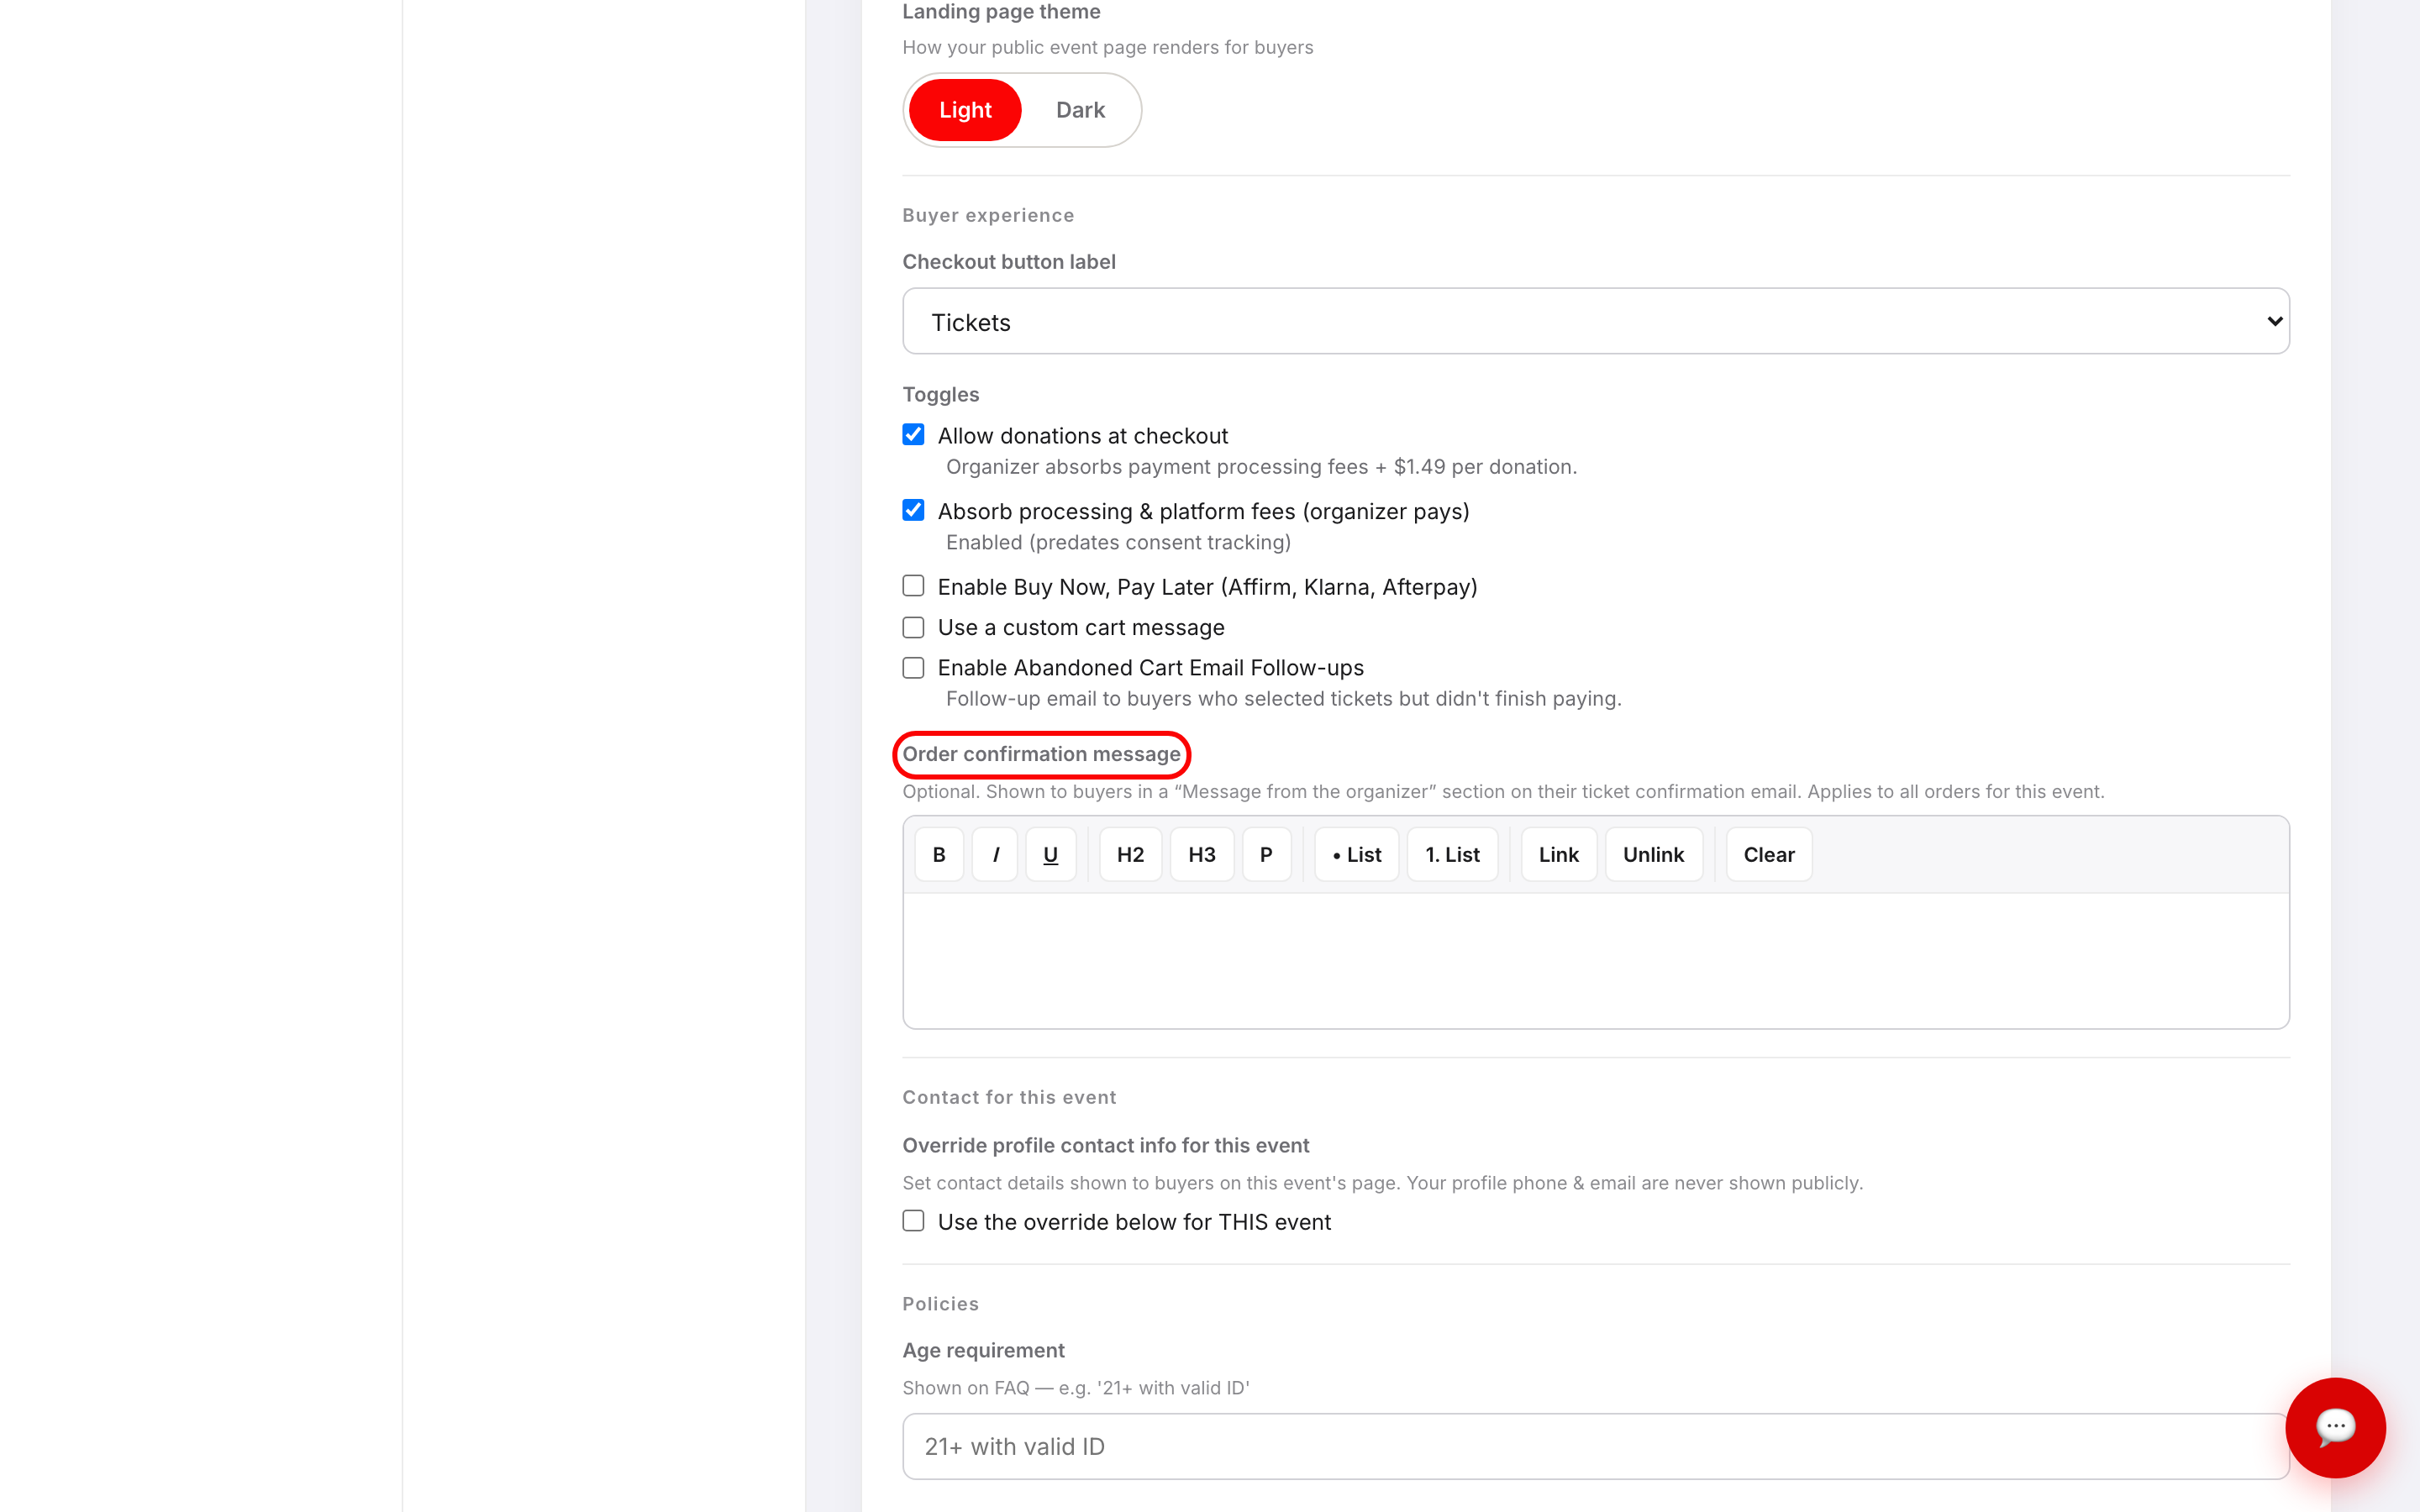
Use it for what happens next: parking instructions, the dress code, where to find will-call, a thank-you.
Stick to bold, italic, underline, bullet or numbered lists, and links. Headings are stripped when the message is saved, so a line you format as a heading comes back as plain text — make it bold instead. Images aren't supported here either.
Because it goes out with every confirmation, changing it only affects orders placed from that point on. Buyers who already have their email keep the old version.
Contact for this event
By default your event page shows the contact details from your organizer profile. Tick Use the override below for THIS event to replace them for this one event.
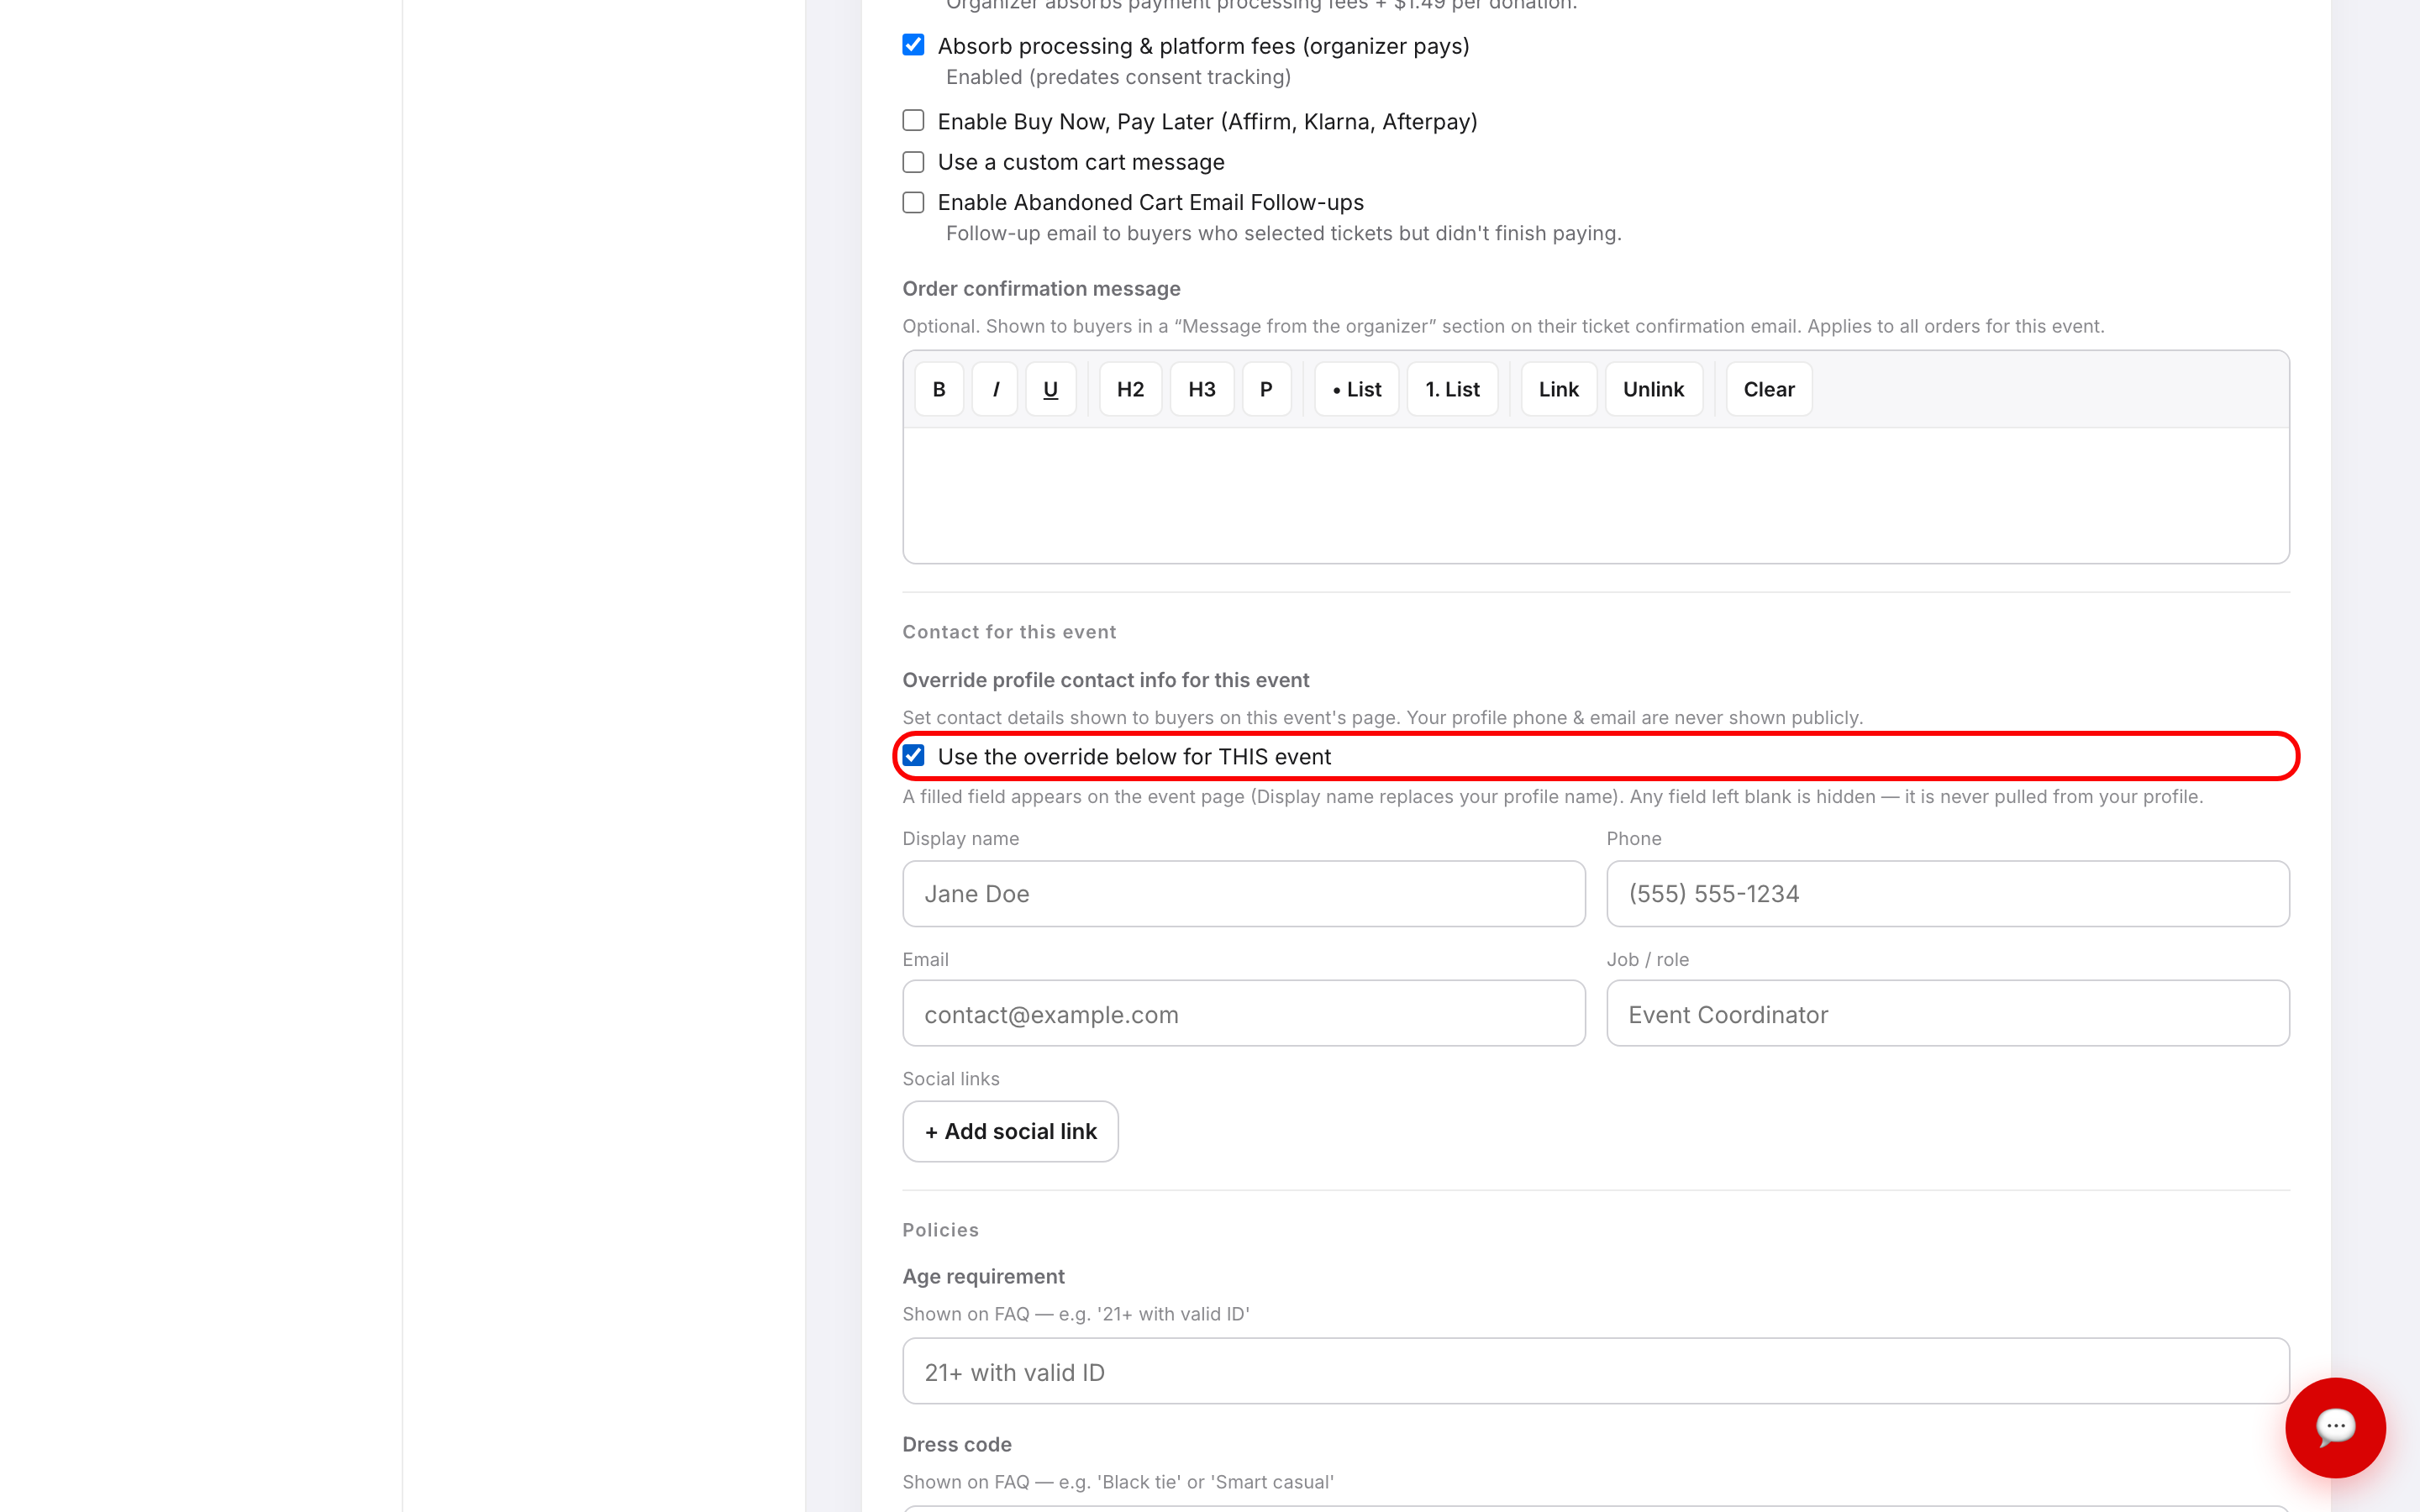
Four fields plus social links:
- Display name replaces your profile name on the event page.
- Phone, Email, and Job / role each appear only if you fill them in.
- + Add social link adds Facebook, Instagram, X, LinkedIn, YouTube, TikTok, or a website.
The rule is simple: a field you fill in appears, a field you leave blank is hidden. Blank fields are never quietly filled from your profile. That makes the override useful for handing an event to a coordinator without exposing your own number.
Your profile phone and email are never shown publicly on their own — the only contact details buyers see are the ones you deliberately put here.
Troubleshooting
- I saved but buyers still see the old message — all four settings save with Save changes at the bottom of Basic Info. If you edited a message and navigated away without saving, it's gone.
- My formatting disappeared — headings are removed from the order confirmation message on save. Use bold for emphasis instead.
- The cart message isn't showing — check the Use a custom cart message box is still ticked. Unticking hides the message without deleting it.
- My contact details vanished from the event page — you ticked the override but left the fields blank. Blank means hidden. Either fill them in or untick the override to fall back to your profile.
- I want to ask buyers a question, not tell them something — that's checkout fields, not a cart message.
Last updated 2026-08-15 · All FAQs & video tutorials