

Collect Custom Info at Checkout
Need to know every attendee's meal preference, or collect a single team name per order? Custom checkout fields let you ask buyers exactly what you need, in the format you want. Open your event and click Checkout Fields in the sidebar. Fields you create here are saved to your organizer profile automatically and can be reused across future events.
The two field types
Two kinds of custom fields exist, and choosing the right one matters:
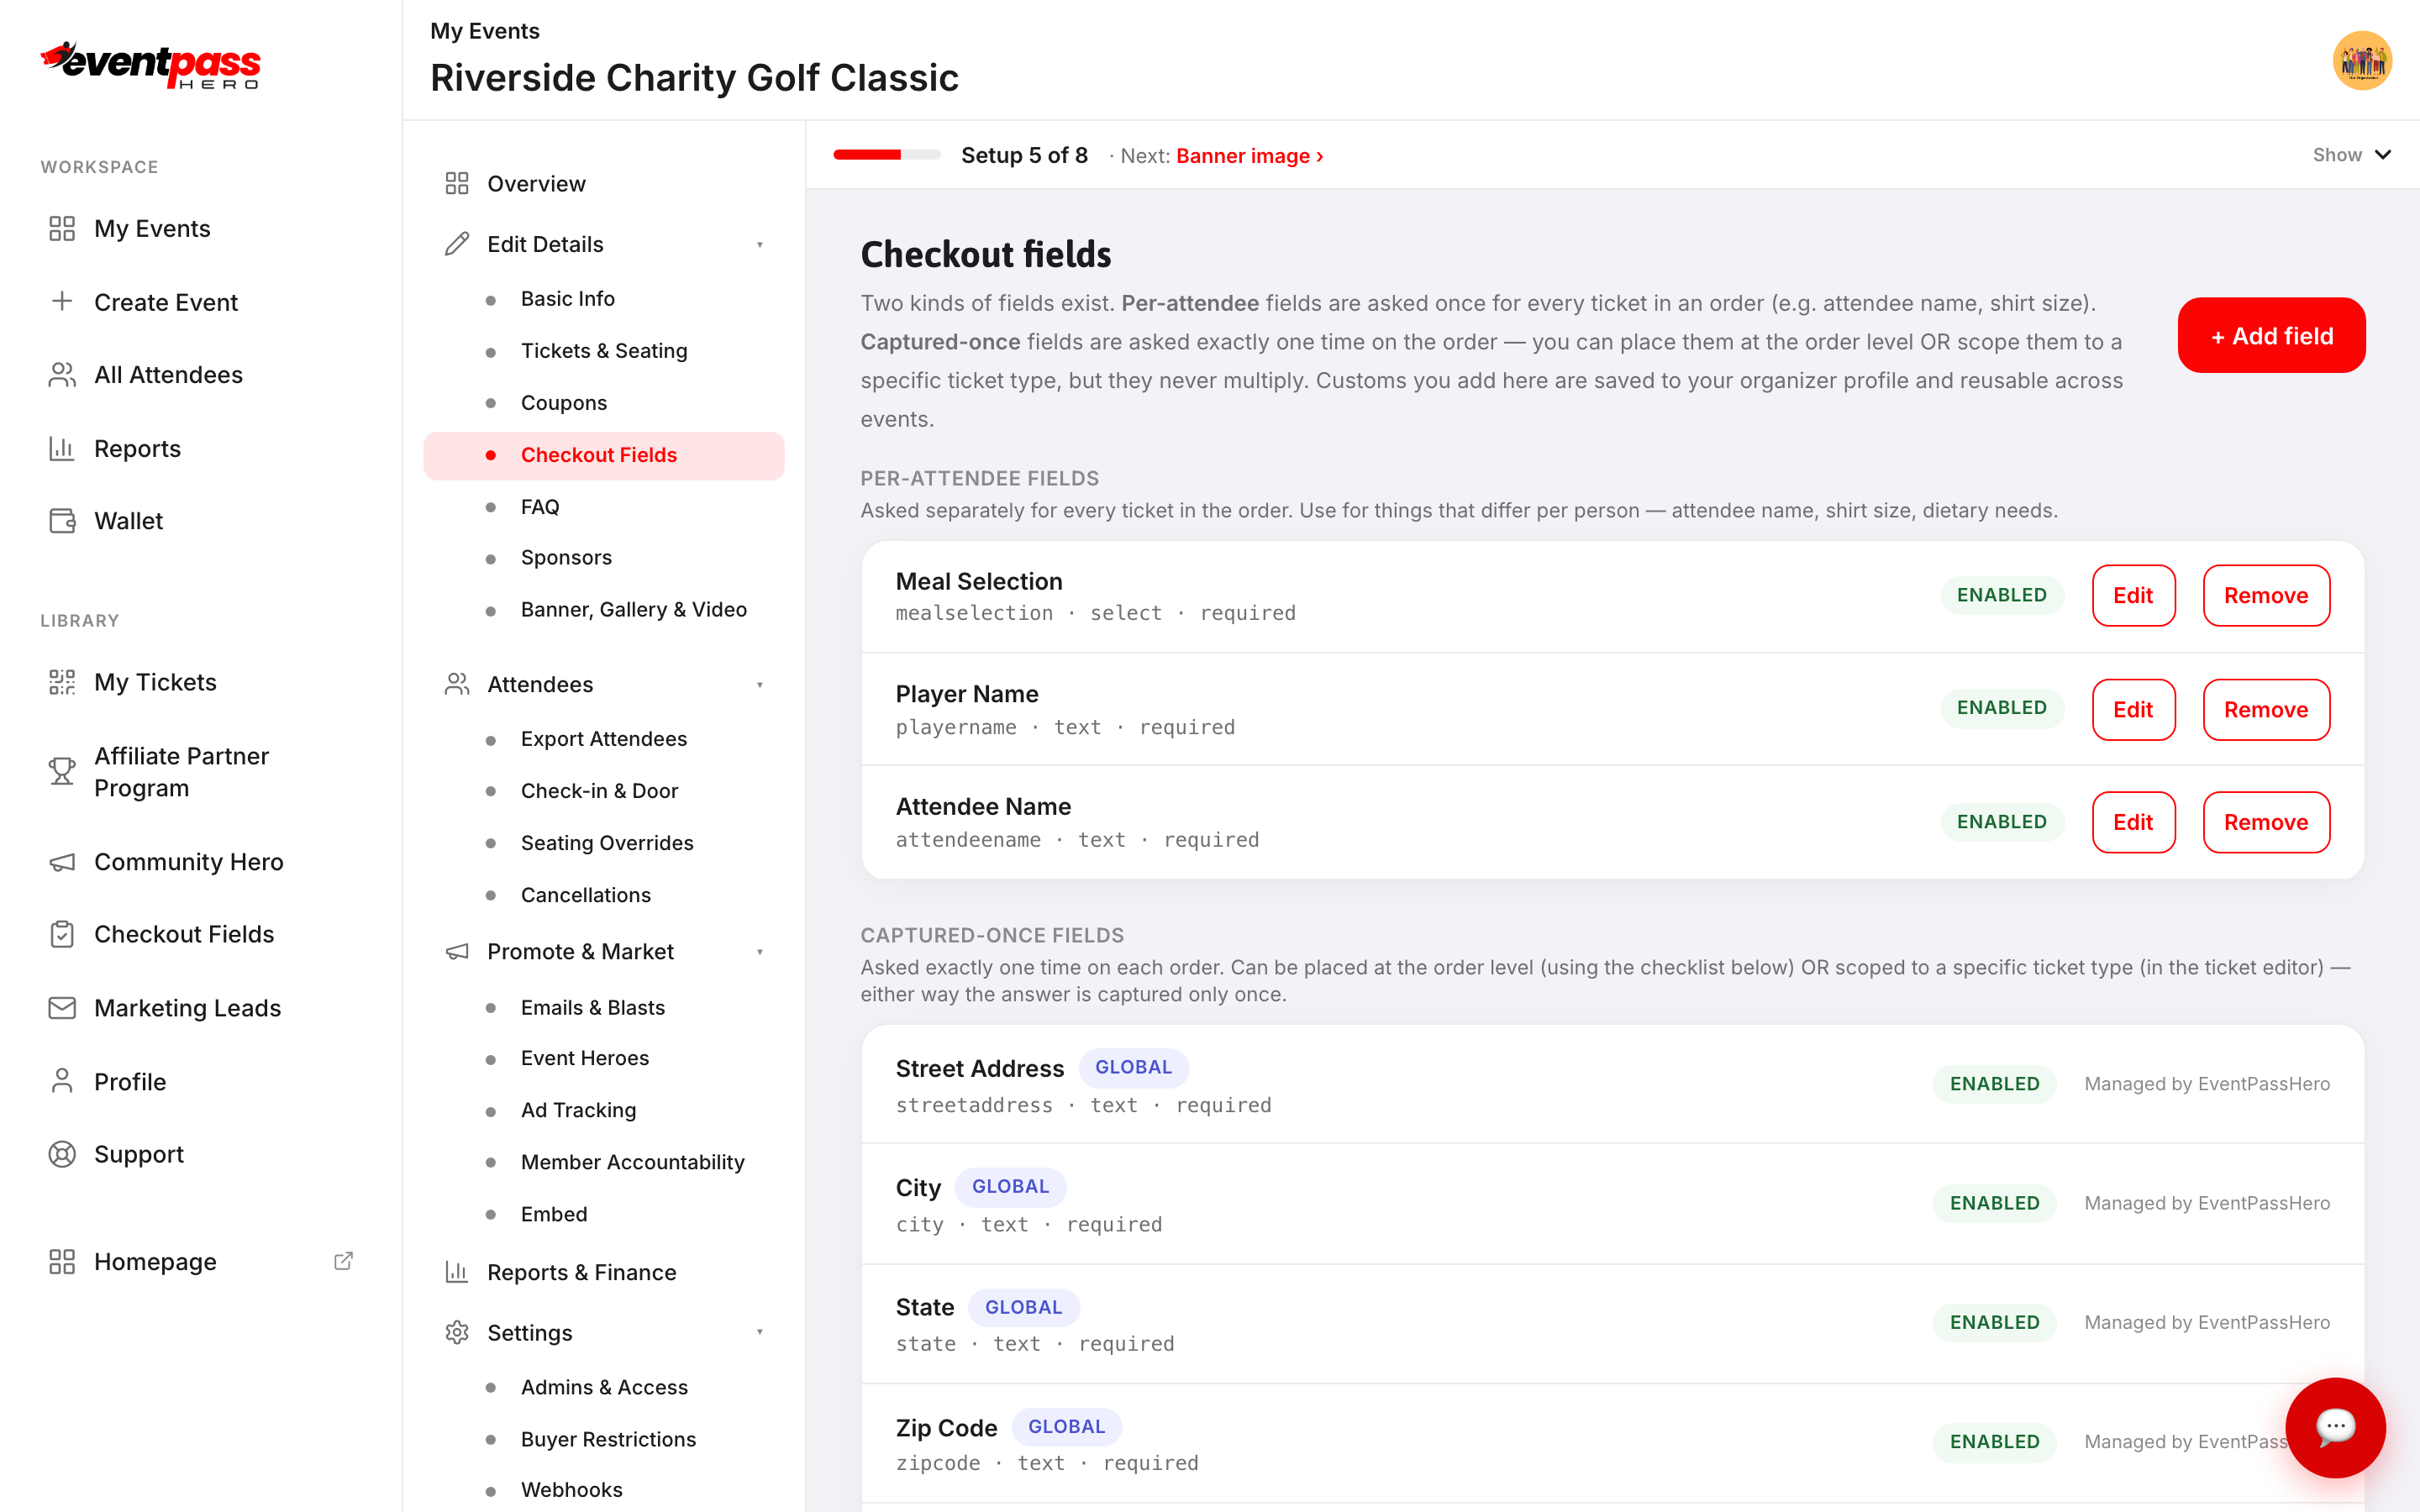
- Per-attendee fields — asked separately for every ticket in the order. Use these when the answer is different per person: attendee name, shirt size, dietary needs. If someone buys three tickets, they fill this field three times.
- Captured-once fields — asked exactly one time per order, regardless of ticket count. Use these when one answer covers the whole order: team name, company name, special group note. You can place a captured-once field at the order level or scope it to a specific ticket type — either way it appears only once.
Step-by-step
- 1. Open your event from My Events and click Checkout Fields under Edit Details in the sidebar.
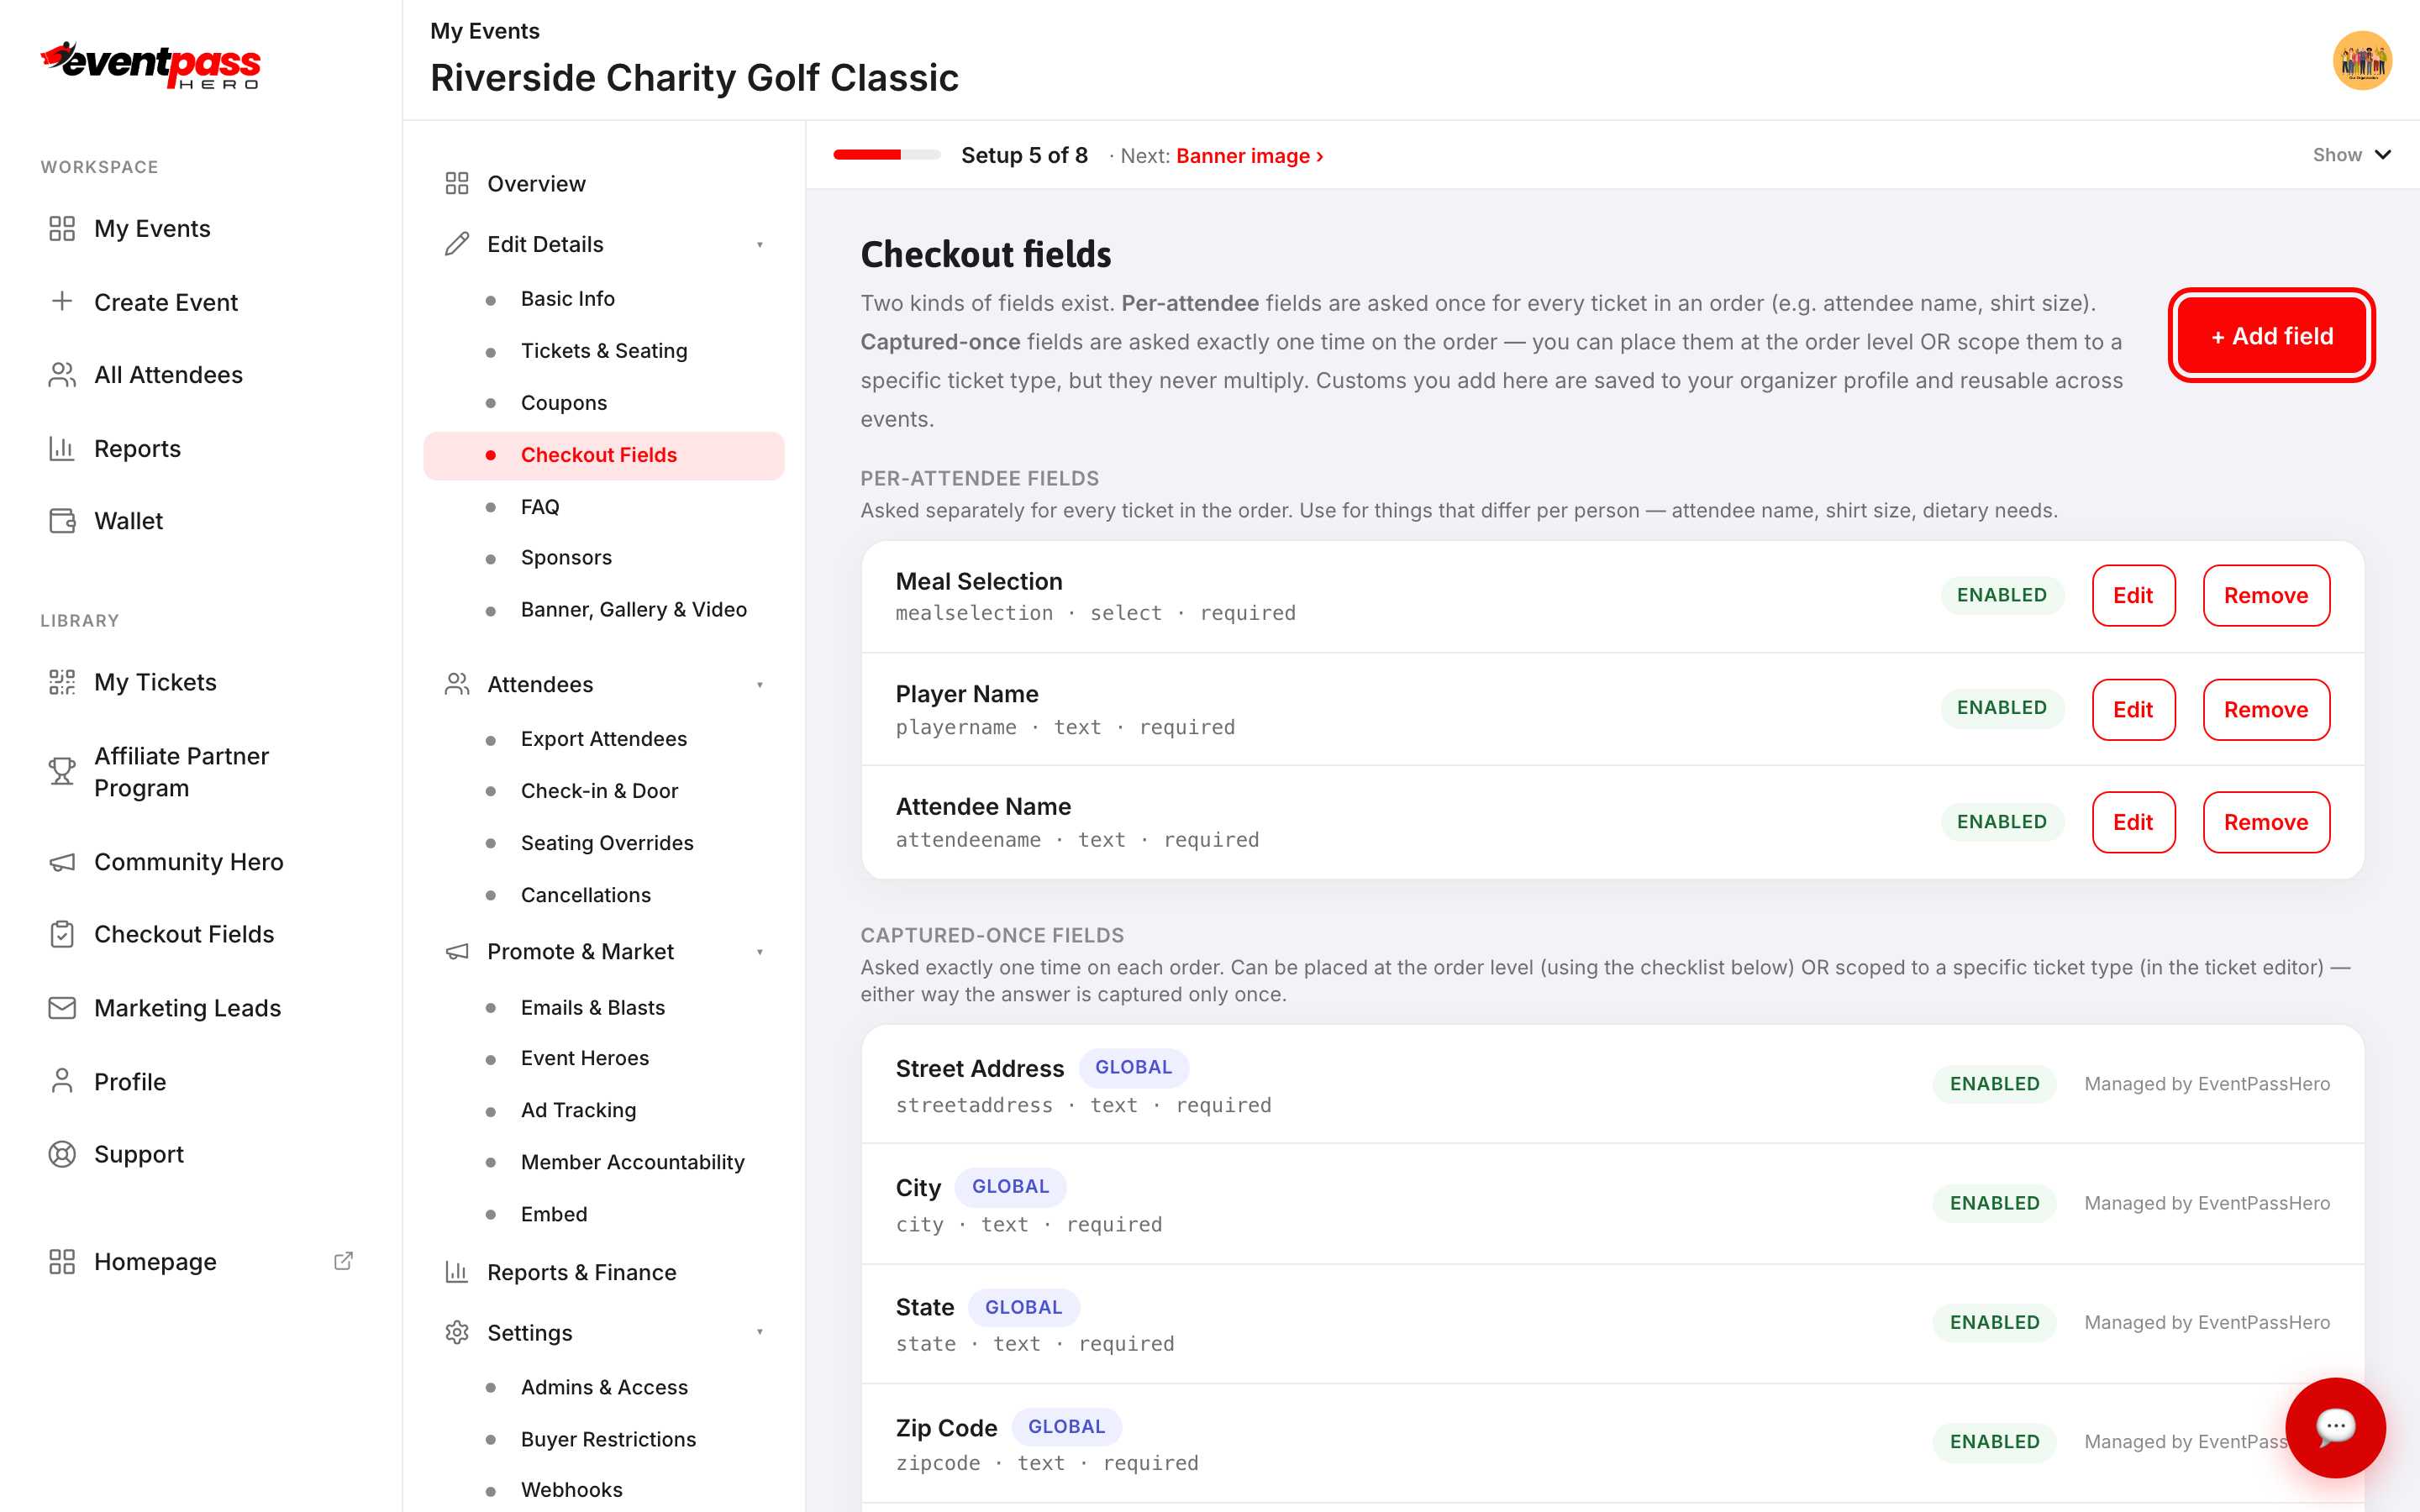
- 2. Click + Add field.
- 3. In the New checkout field dialog, fill in:
- Label — the question buyers see (e.g. "Meal Selection"). - Field type — Short text, Long text, Dropdown, or File upload. Choose Dropdown if you have fixed options like T-shirt sizes; enter the options comma-separated (e.g. S, M, L, XL). - Placeholder and Default value — optional hints shown inside the input. - How is this field captured? — pick Captured once or Per-attendee. - Settings — toggle Required, Enabled, Include in confirmation email, or Show on order summary as needed.
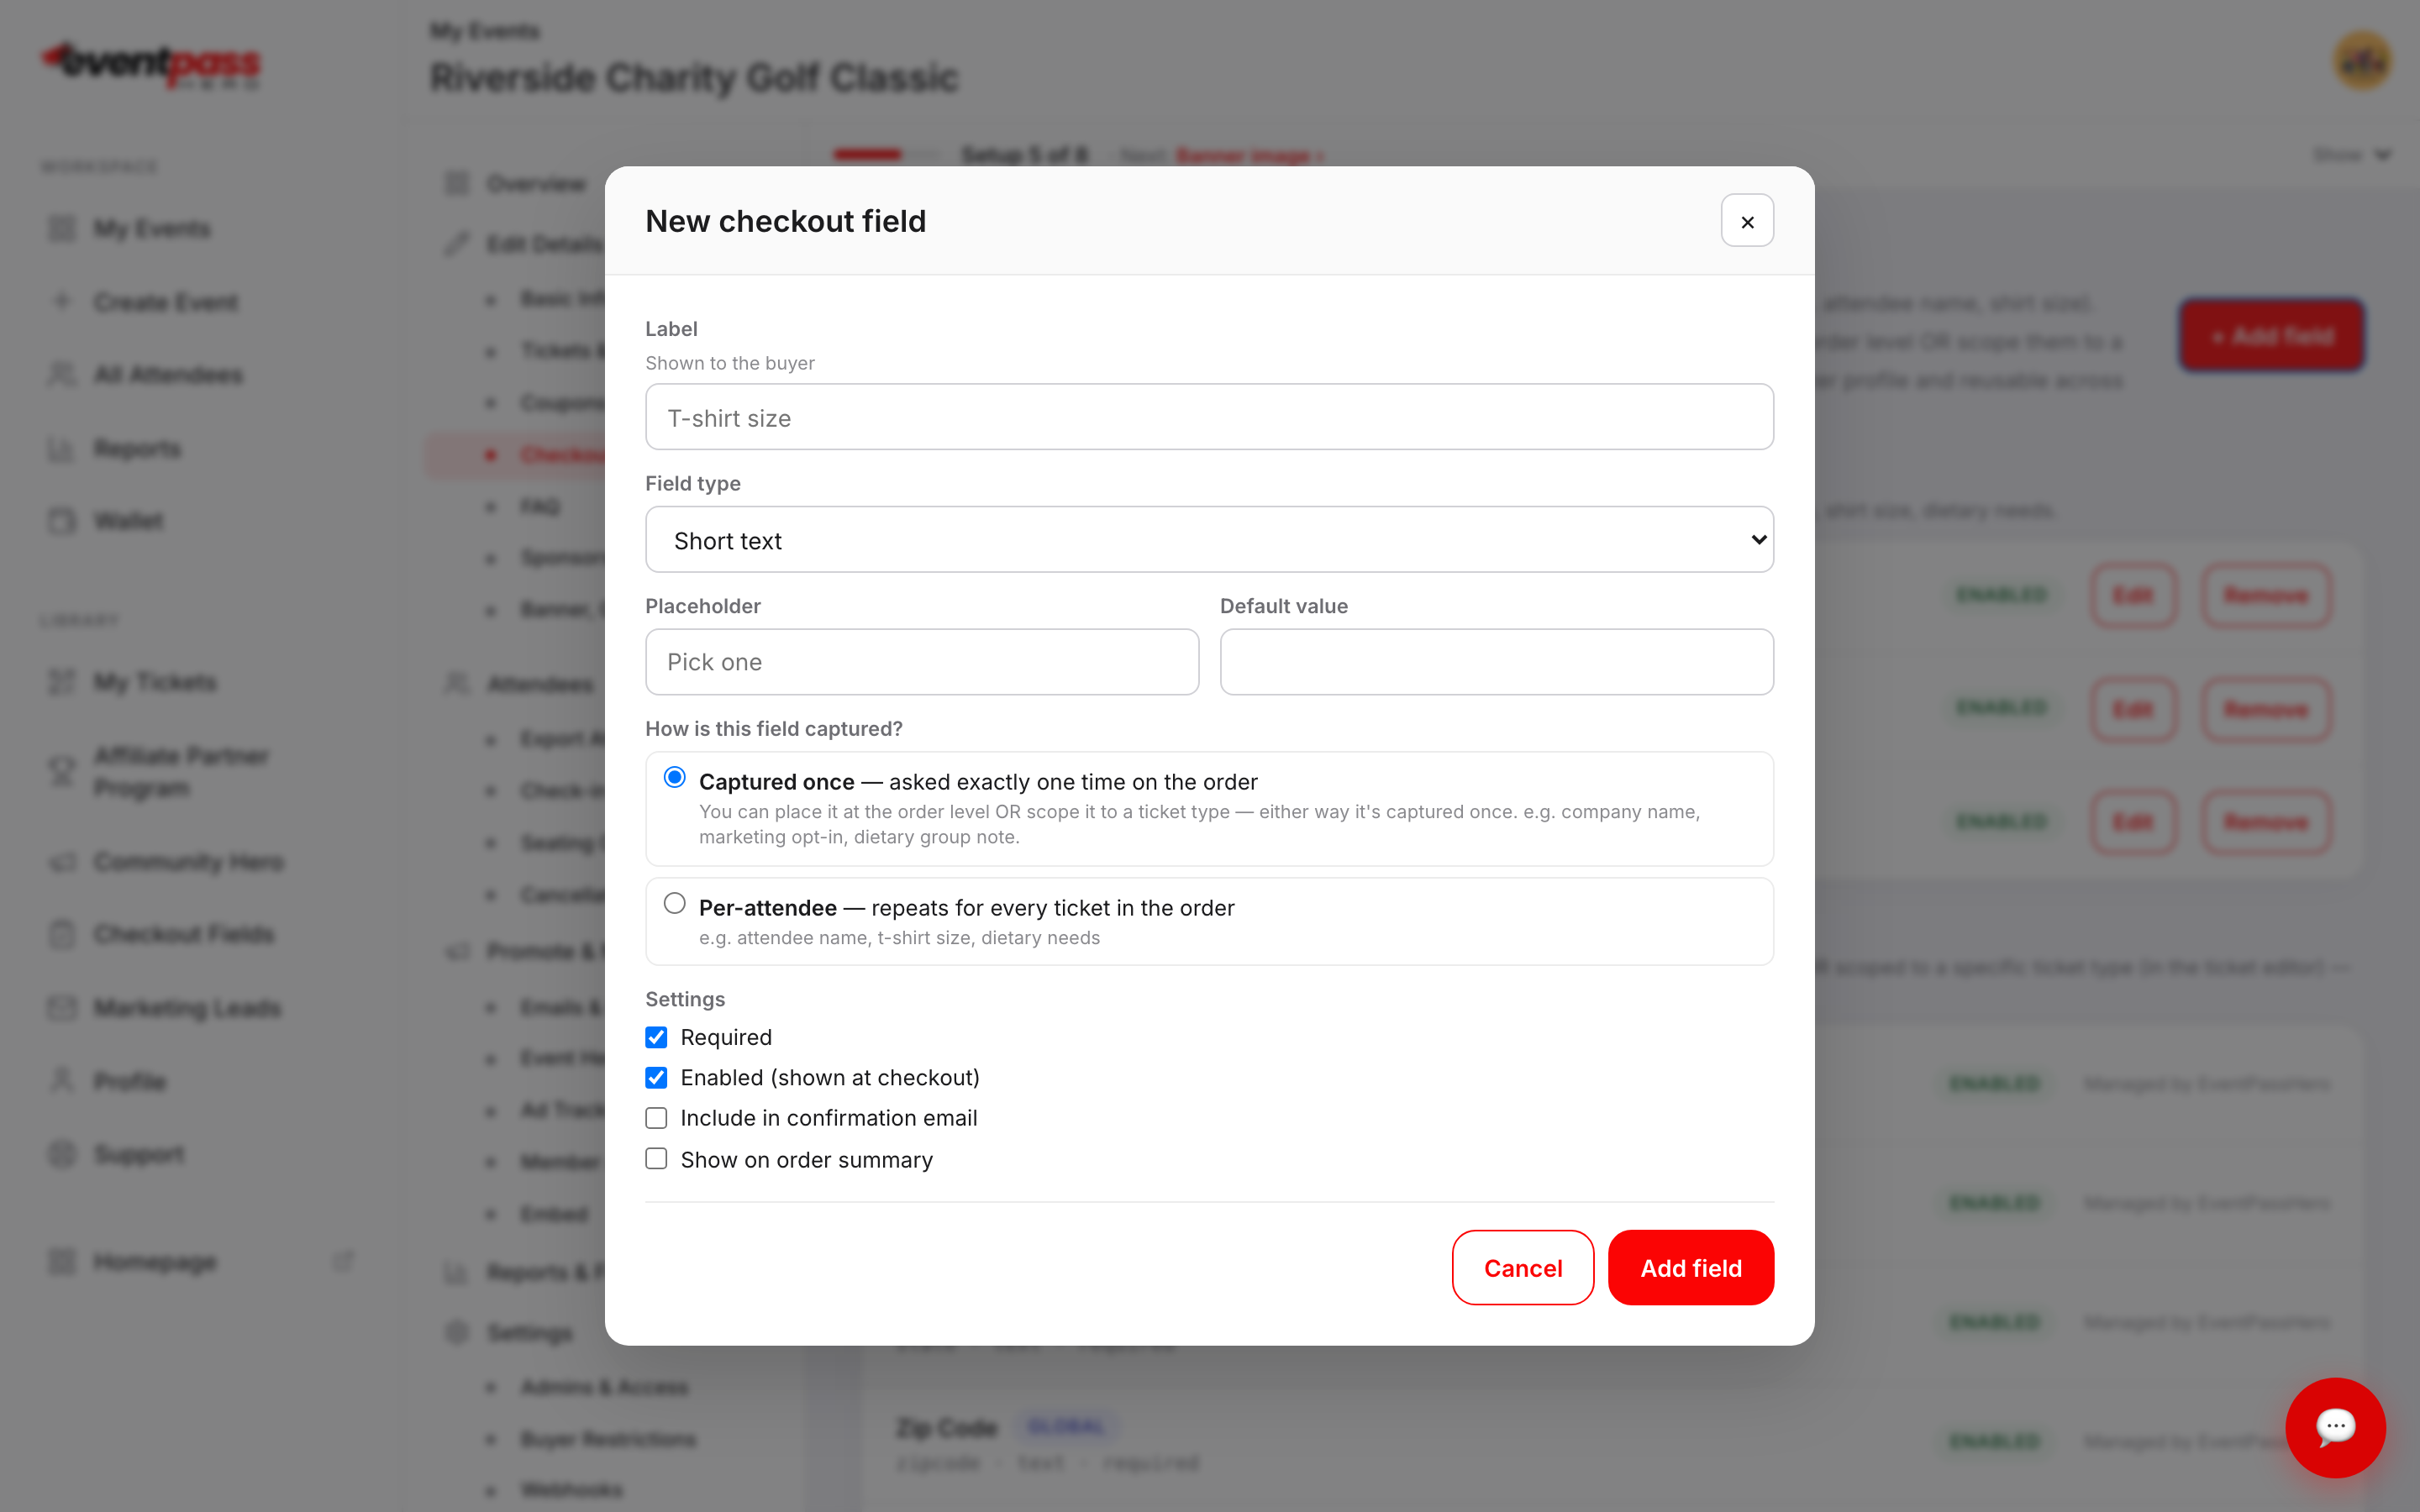
- 4. Click Add field. The field now appears in the appropriate section of the Checkout Fields screen.
Making captured-once fields appear at order checkout
Adding a captured-once field saves it to your library, but it doesn't automatically appear in the checkout flow. Scroll down to the Required at this event's order checkout panel, check the box next to any field you want buyers to see, then click Save.
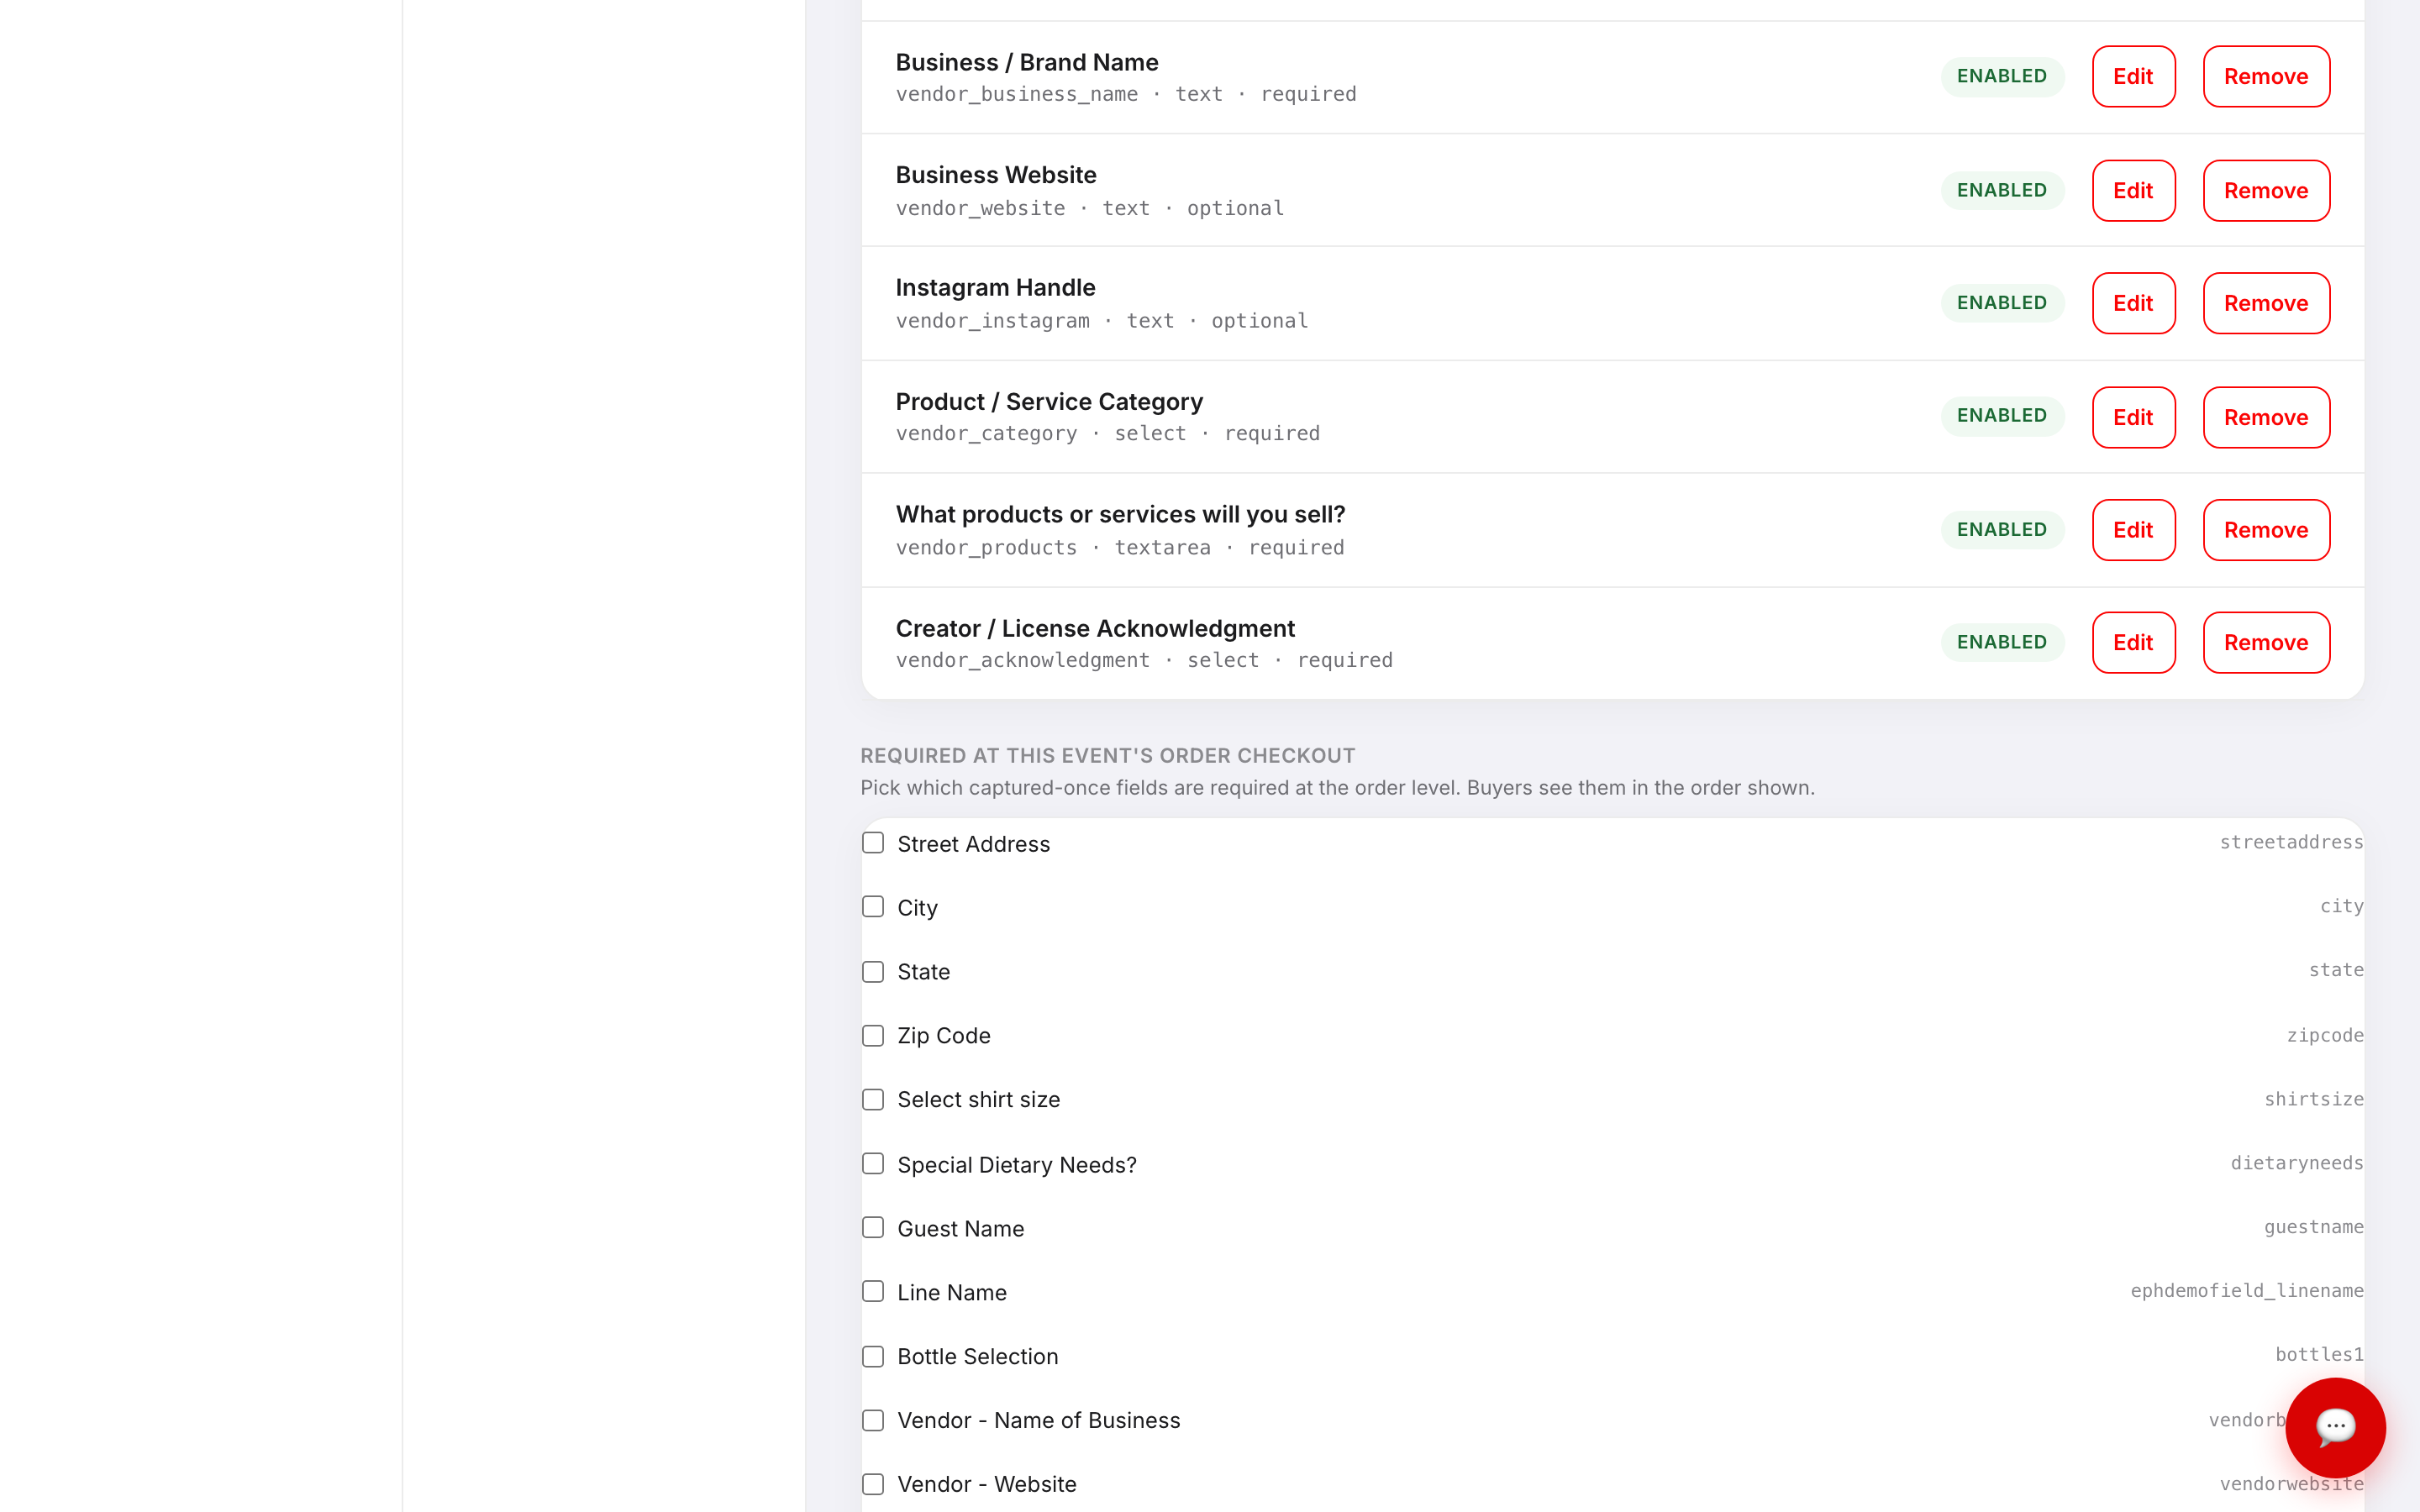
Alternatively, scope a captured-once field to a specific ticket type by editing the ticket in Tickets & Seating and attaching the field there.
Managing existing fields
Click Edit on any field you created to update its label, type, options, or settings. Click Remove to delete it — this removes it from all future events that use it. Fields labeled Managed by EventPassHero are platform-wide fields and cannot be removed, but you can disable them.
Troubleshooting
- A field appears for every ticket when I only want it once — check that the field's type is Captured once, not Per-attendee.
- My field isn't showing at checkout — confirm it's Enabled, and for captured-once fields, confirm it's checked under Required at this event's order checkout and that you clicked Save.
- I need the same fields on my next event — all fields you create are saved to your organizer profile automatically. On your next event's Checkout Fields screen, they appear in the library list ready to enable.
Last updated 2026-08-14 · All FAQs & video tutorials