

Meta Pixel and Google Tag Setup
If you're running Facebook ads, Instagram ads, or Google campaigns to promote your event, you need your tracking IDs on the event page so the platforms can count views, build audiences, and measure conversions. EventPassHero lets you add a Meta Pixel and a Google Tag — each scoped to your public event page only. Your organizer dashboard and the checkout flow are never tracked.
Before you start
- Meta Pixel ID — a 15- or 16-digit number. Find it in Meta Events Manager → select your pixel → Settings → Pixel ID.
- Google Tag ID — the format depends on the product: GA4 IDs start with
G-, Tag Manager withGT-, Google Ads withAW-, legacy Universal Analytics withUA-.
Step-by-step
- 1. Open your event and click Promote & Market → Ad Tracking in the left sidebar.
- 2. The Ad tracking screen loads with two sections: Meta Pixel (Facebook / Instagram) and Google Tag (Analytics / Ads).
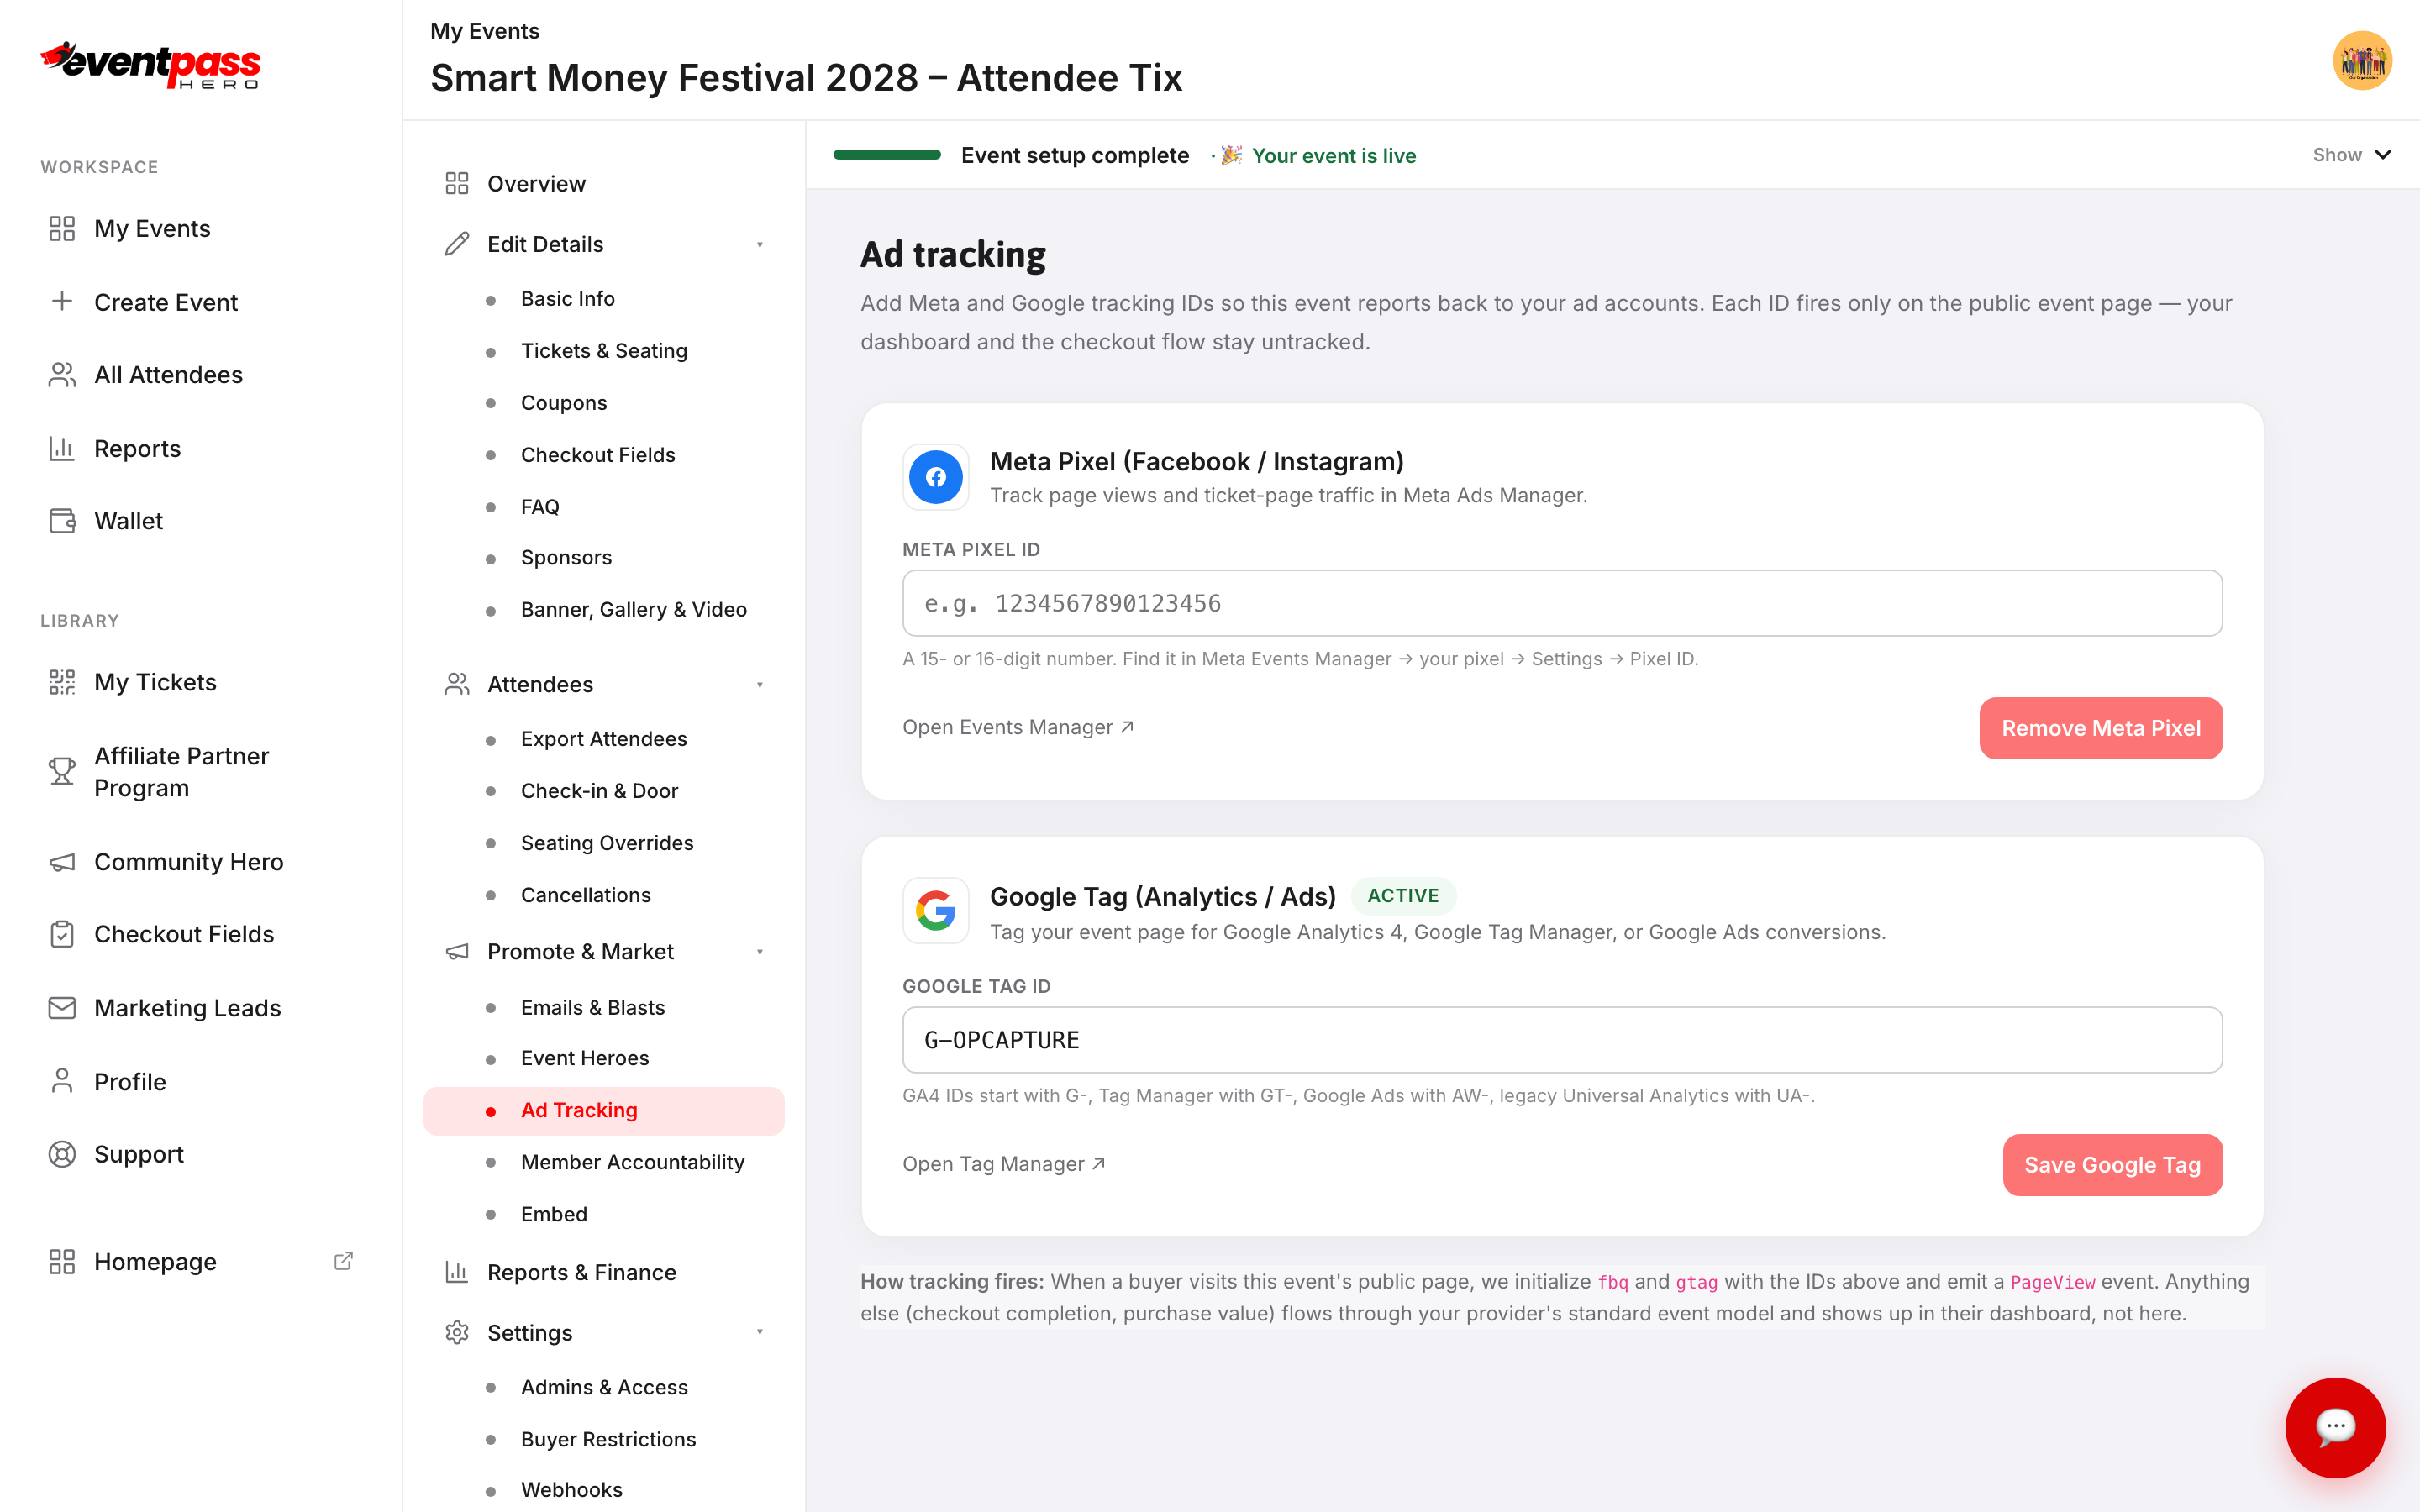
- 3. Under Meta Pixel, enter your Pixel ID in the META PIXEL ID field. Click Open Events Manager ↗ if you need to look it up.
- 4. Under Google Tag, enter your Tag ID in the GOOGLE TAG ID field. Click Open Tag Manager ↗ if you need to look it up.
- 5. Click Save Google Tag (or Save Meta Pixel). The screen confirms the ID is active.
What tracking fires
When a buyer visits your public event page, EventPassHero initializes fbq with your Pixel ID and gtag with your Tag ID, then fires a PageView event on each. Any further conversion events (purchase value, checkout completion) flow through your ad provider's own event model and appear in their dashboard — EventPassHero doesn't send those separately.
Troubleshooting
- The pixel isn't firing — confirm the ID you entered is correct, then open your event's public page in a browser that isn't already on your organizer account. Use the Meta Pixel Helper browser extension or Google Tag Assistant to verify the tag loads.
- You want to remove a pixel — click Remove Meta Pixel under the pixel section. The ID clears and tracking stops on the next page load.
- Multiple pixels on one event — EventPassHero supports one Meta Pixel ID and one Google Tag ID per event. If you need additional pixel IDs, contact support for assistance.
Last updated 2026-08-14 · All FAQs & video tutorials