

Restrict Who Can Buy Tickets
You can limit ticket sales to a specific list of buyers, cap how much each buyer can spend, or both. Open your event and go to Settings → Buyer Restrictions in the sidebar. Turn on restrictions, choose your mode, and save — the event page immediately shows a Buyer-Restricted Event notice and checkout enforces the rules.
Before you start
- Your event must exist (draft or published) — you can set restrictions before publishing.
- Restrictions apply to all ticket types on the event; you cannot scope them to a single ticket type.
Step-by-step
- 1. Open your event from My Events and click Buyer Restrictions under Settings in the left sidebar.
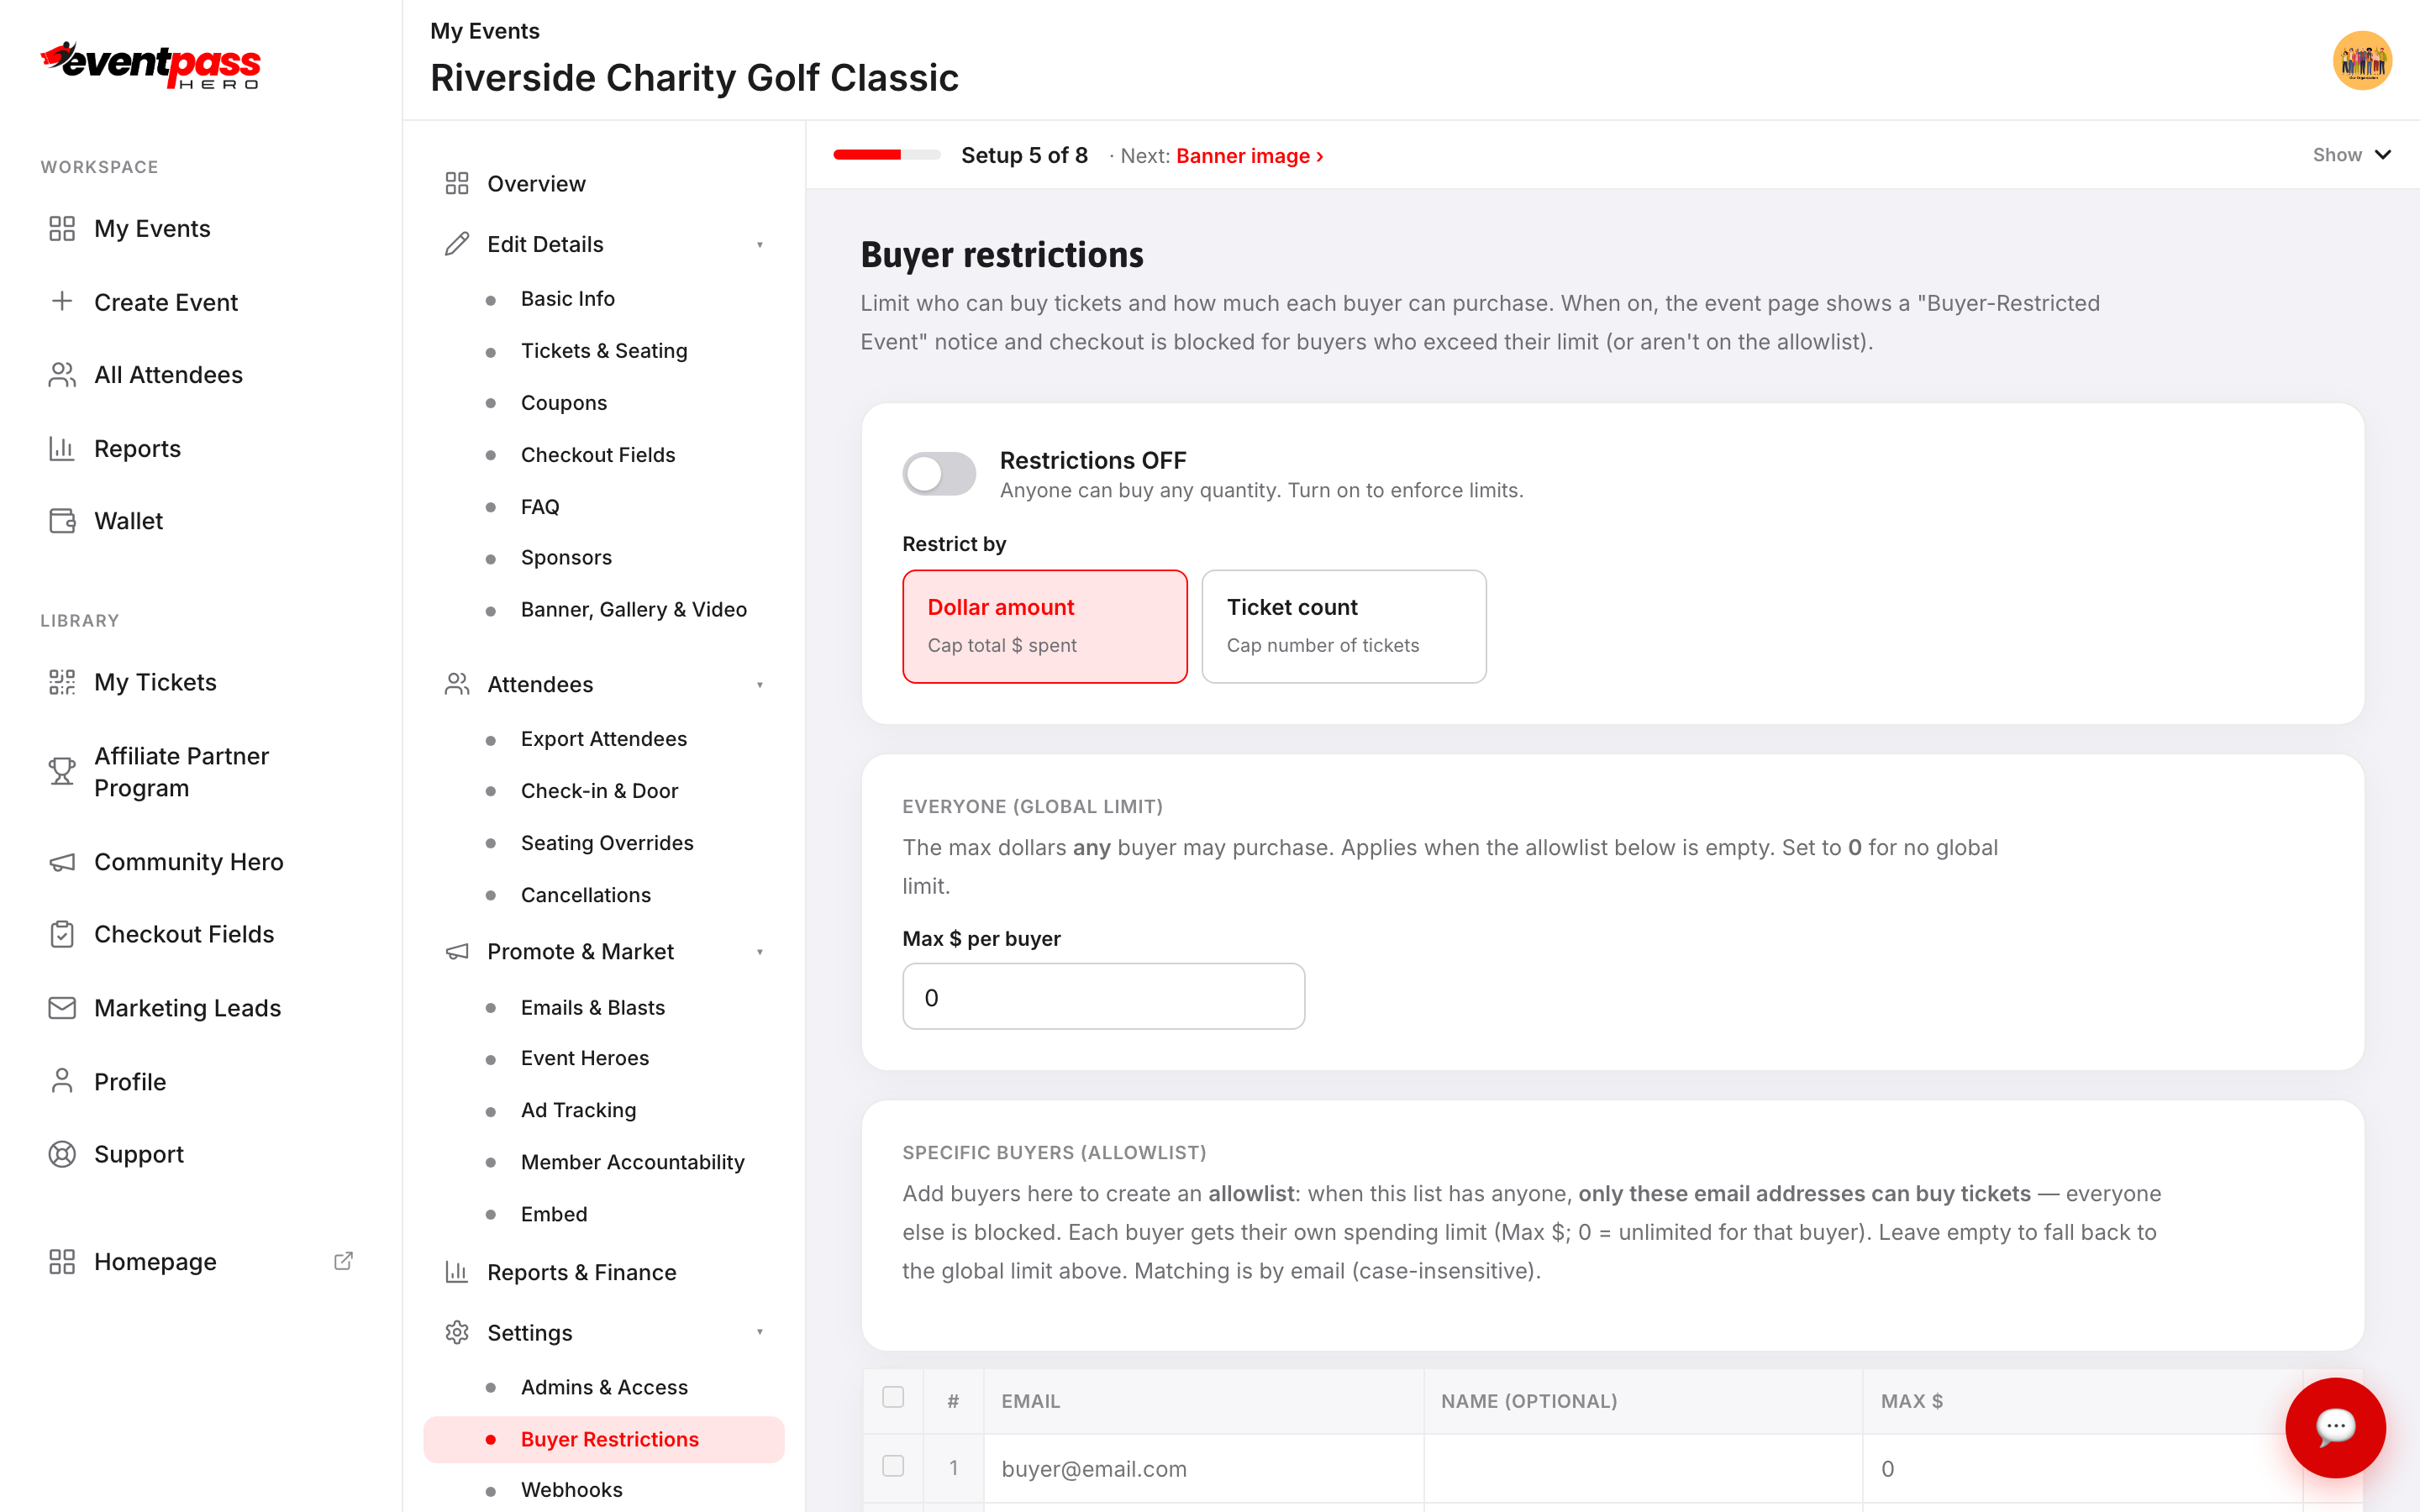
- 2. Click Restrictions OFF to enable restrictions. The toggle switches to Restrictions ON and the limit fields below become editable.
- 3. Choose how to restrict under Restrict by:
- Dollar amount — caps the total dollars each buyer can spend across all orders. - Ticket count — caps the total number of tickets each buyer can purchase.
- 4. Under Everyone (Global Limit), set the Max $ per buyer (or ticket count). Set to 0 for no global cap when you plan to use an allowlist instead.
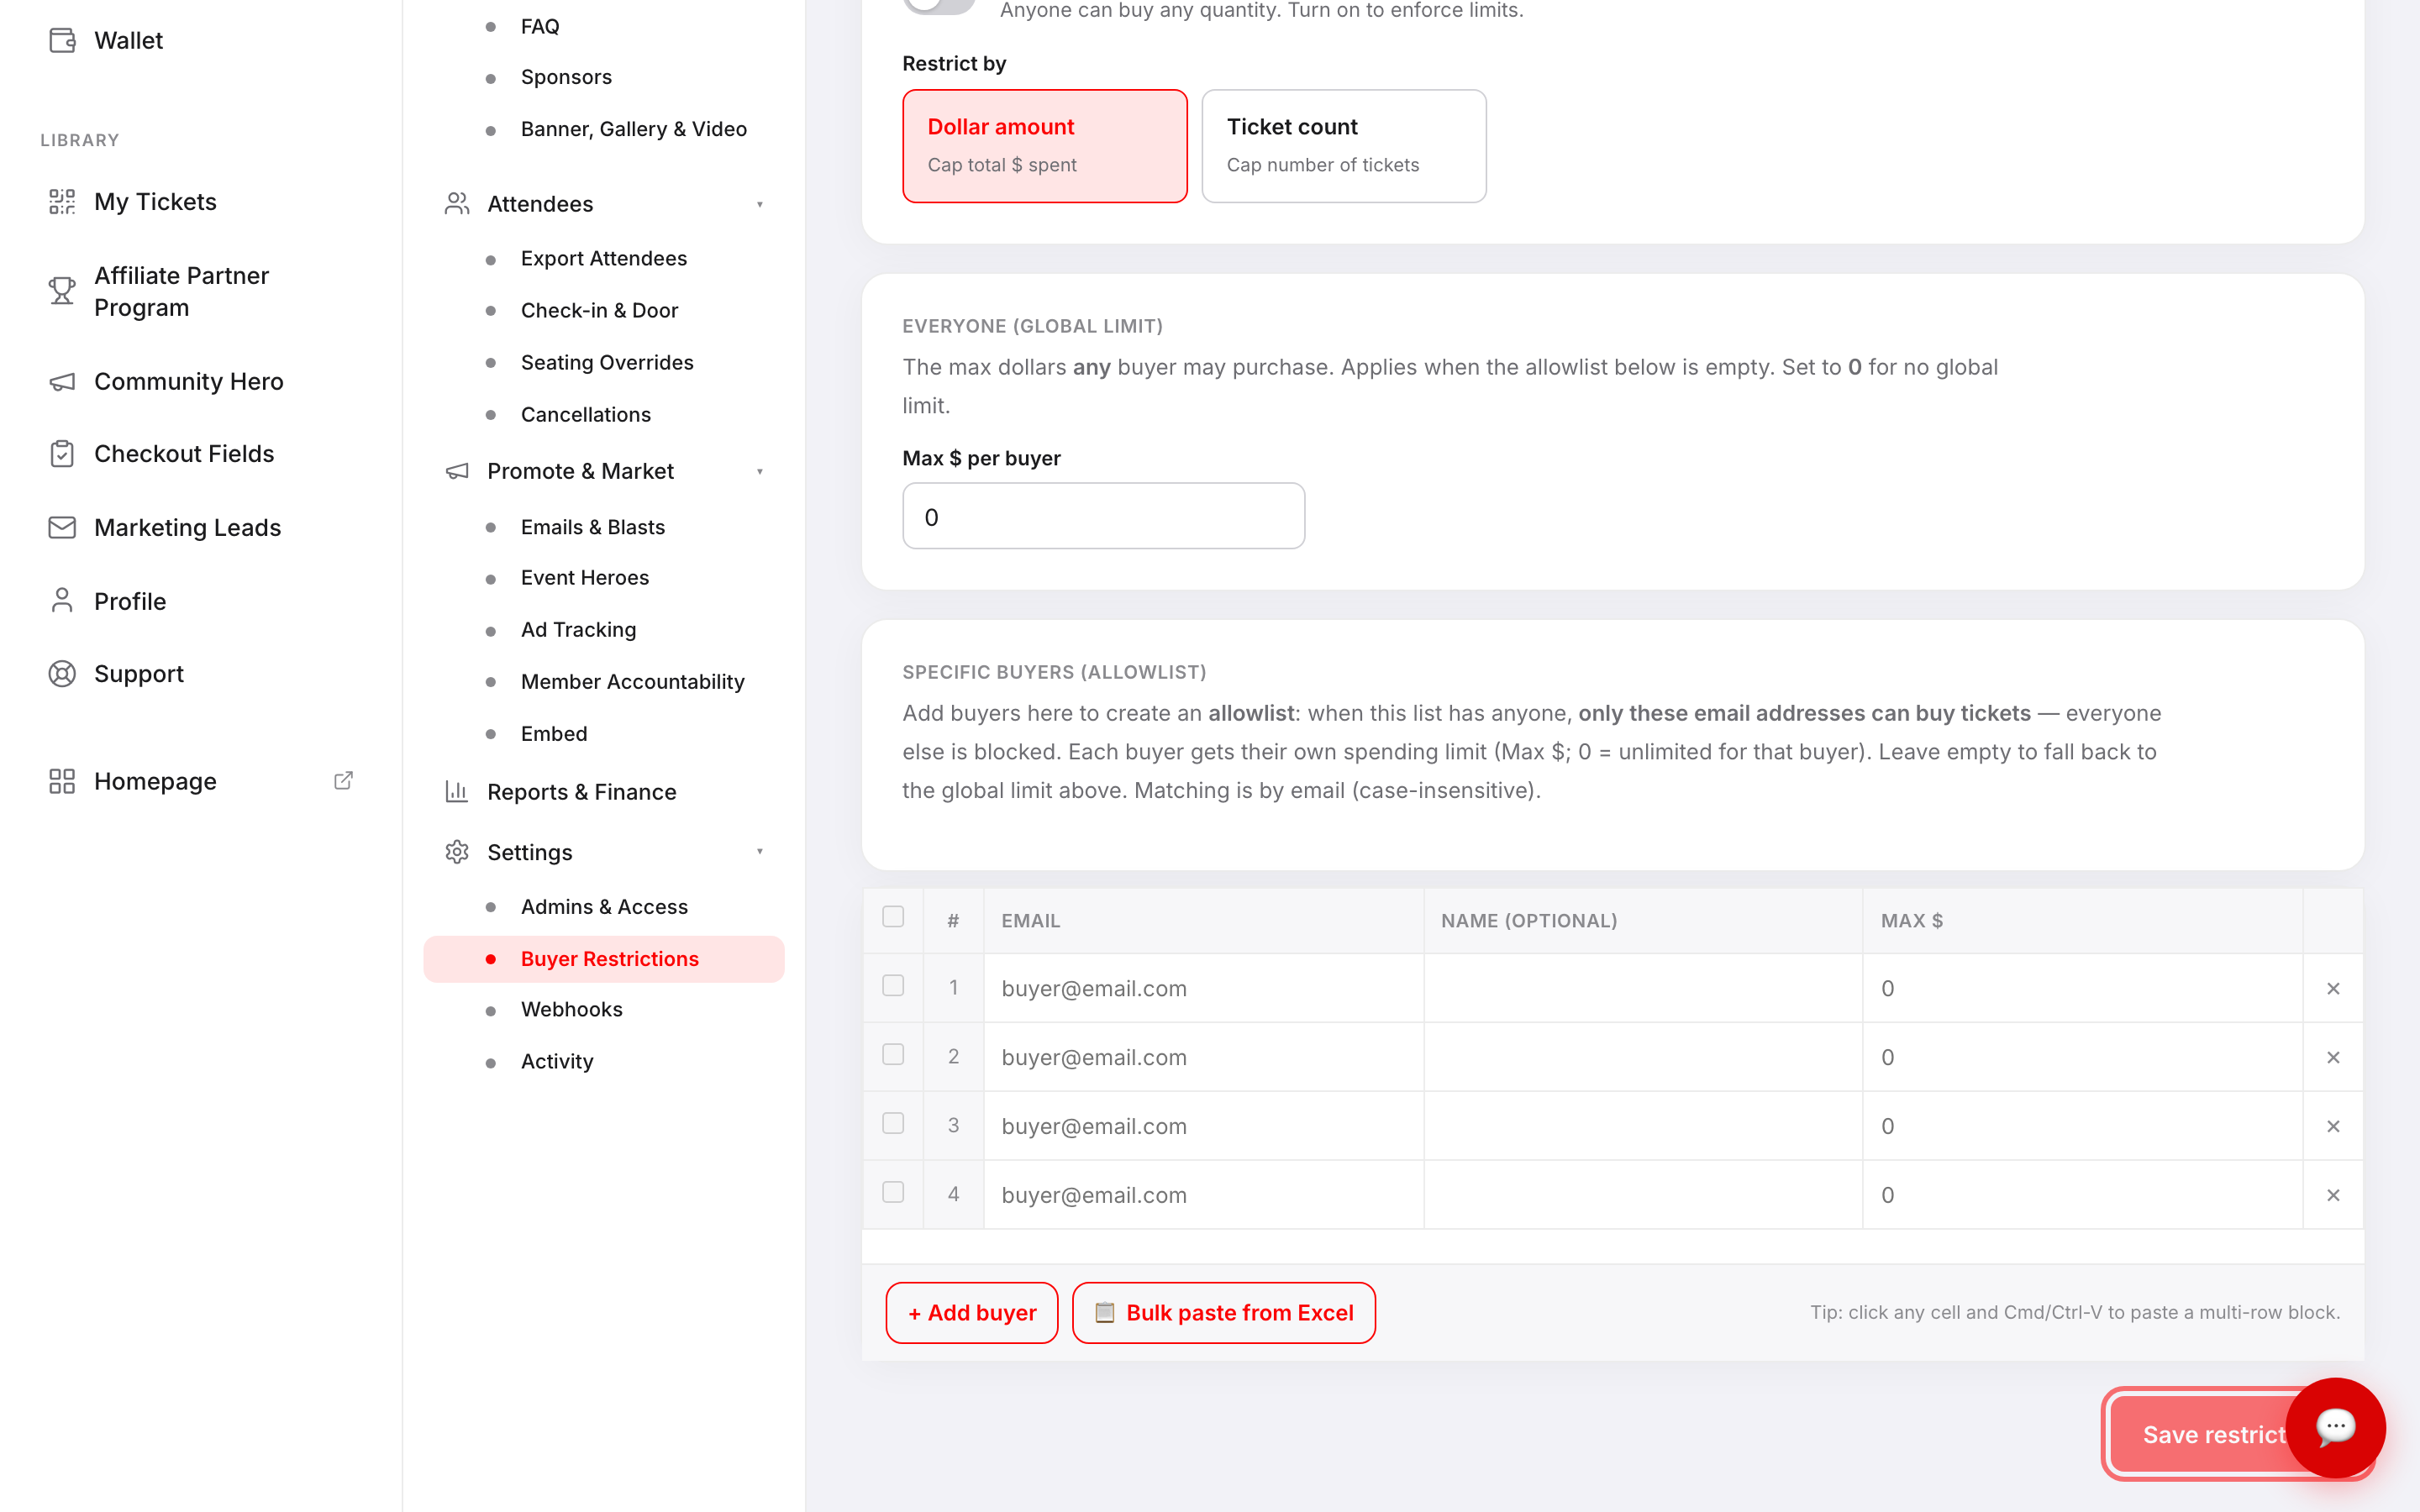
- 5. To build an allowlist — so only specific buyers can purchase at all — add email addresses under Specific Buyers (Allowlist). Click + Add buyer to add rows one at a time, or click Bulk paste from Excel and paste a column from a spreadsheet. Each row accepts an email, an optional name, and a per-buyer spending limit (Max $; set to 0 for unlimited for that buyer). When the allowlist has any entries, buyers not on the list are blocked from checkout entirely.
- 6. Click Save restrictions.
How restrictions appear to buyers
Once restrictions are on, the public event page shows a Buyer-Restricted Event banner. At checkout, buyers who have already hit their limit see a blocked message. Buyers not on the allowlist (when you have one) cannot proceed past the ticket selection screen.
Turning off restrictions
Open Buyer Restrictions, click Restrictions ON to toggle it back to Restrictions OFF, and click Save restrictions. All caps and allowlist entries are preserved in case you want to turn them back on later.
Troubleshooting
- A buyer says they can't check out but they're on my allowlist — confirm the email matches exactly (matching is case-insensitive but must be the same address they use to check out). Check that their cumulative spend hasn't already hit their Max $ limit.
- I want to lift the global cap for everyone but keep the allowlist — set Max $ per buyer to 0. With 0, there is no global dollar cap; only the per-buyer limits on the allowlist apply.
- Restrictions are on but the event page looks normal — give the page a hard refresh (Ctrl+Shift+R / Cmd+Shift+R). EventPassHero caches the public event page briefly.
Last updated 2026-08-14 · All FAQs & video tutorials