

Set Up Member Accountability
If your organization runs on its members — fraternities, sororities, alumni chapters, associations — your event hinges on every member doing their part. Member Accountability turns that into a system: set a per-member sales goal, load your roster, and every member gets a unique tracking link (their hero code). Sales through their link credit them automatically, and the live report shows exactly who's hit the goal and who's still working. No more wondering who's pulling their weight.
Step-by-step
- 1. Open your event and click Member Accountability under Promote & Market.
- 2. Under Setup, enter the Goal — the minimum dollar amount of ticket sales each member is responsible for.
- 3. Load your roster into the member list: three columns — Email, First Name, Last Name. Type rows in, or click 📋 Bulk paste from Excel and paste a whole block straight from your spreadsheet.
- 4. Click Save updates. Each member gets a hero code and personal tracking link automatically.
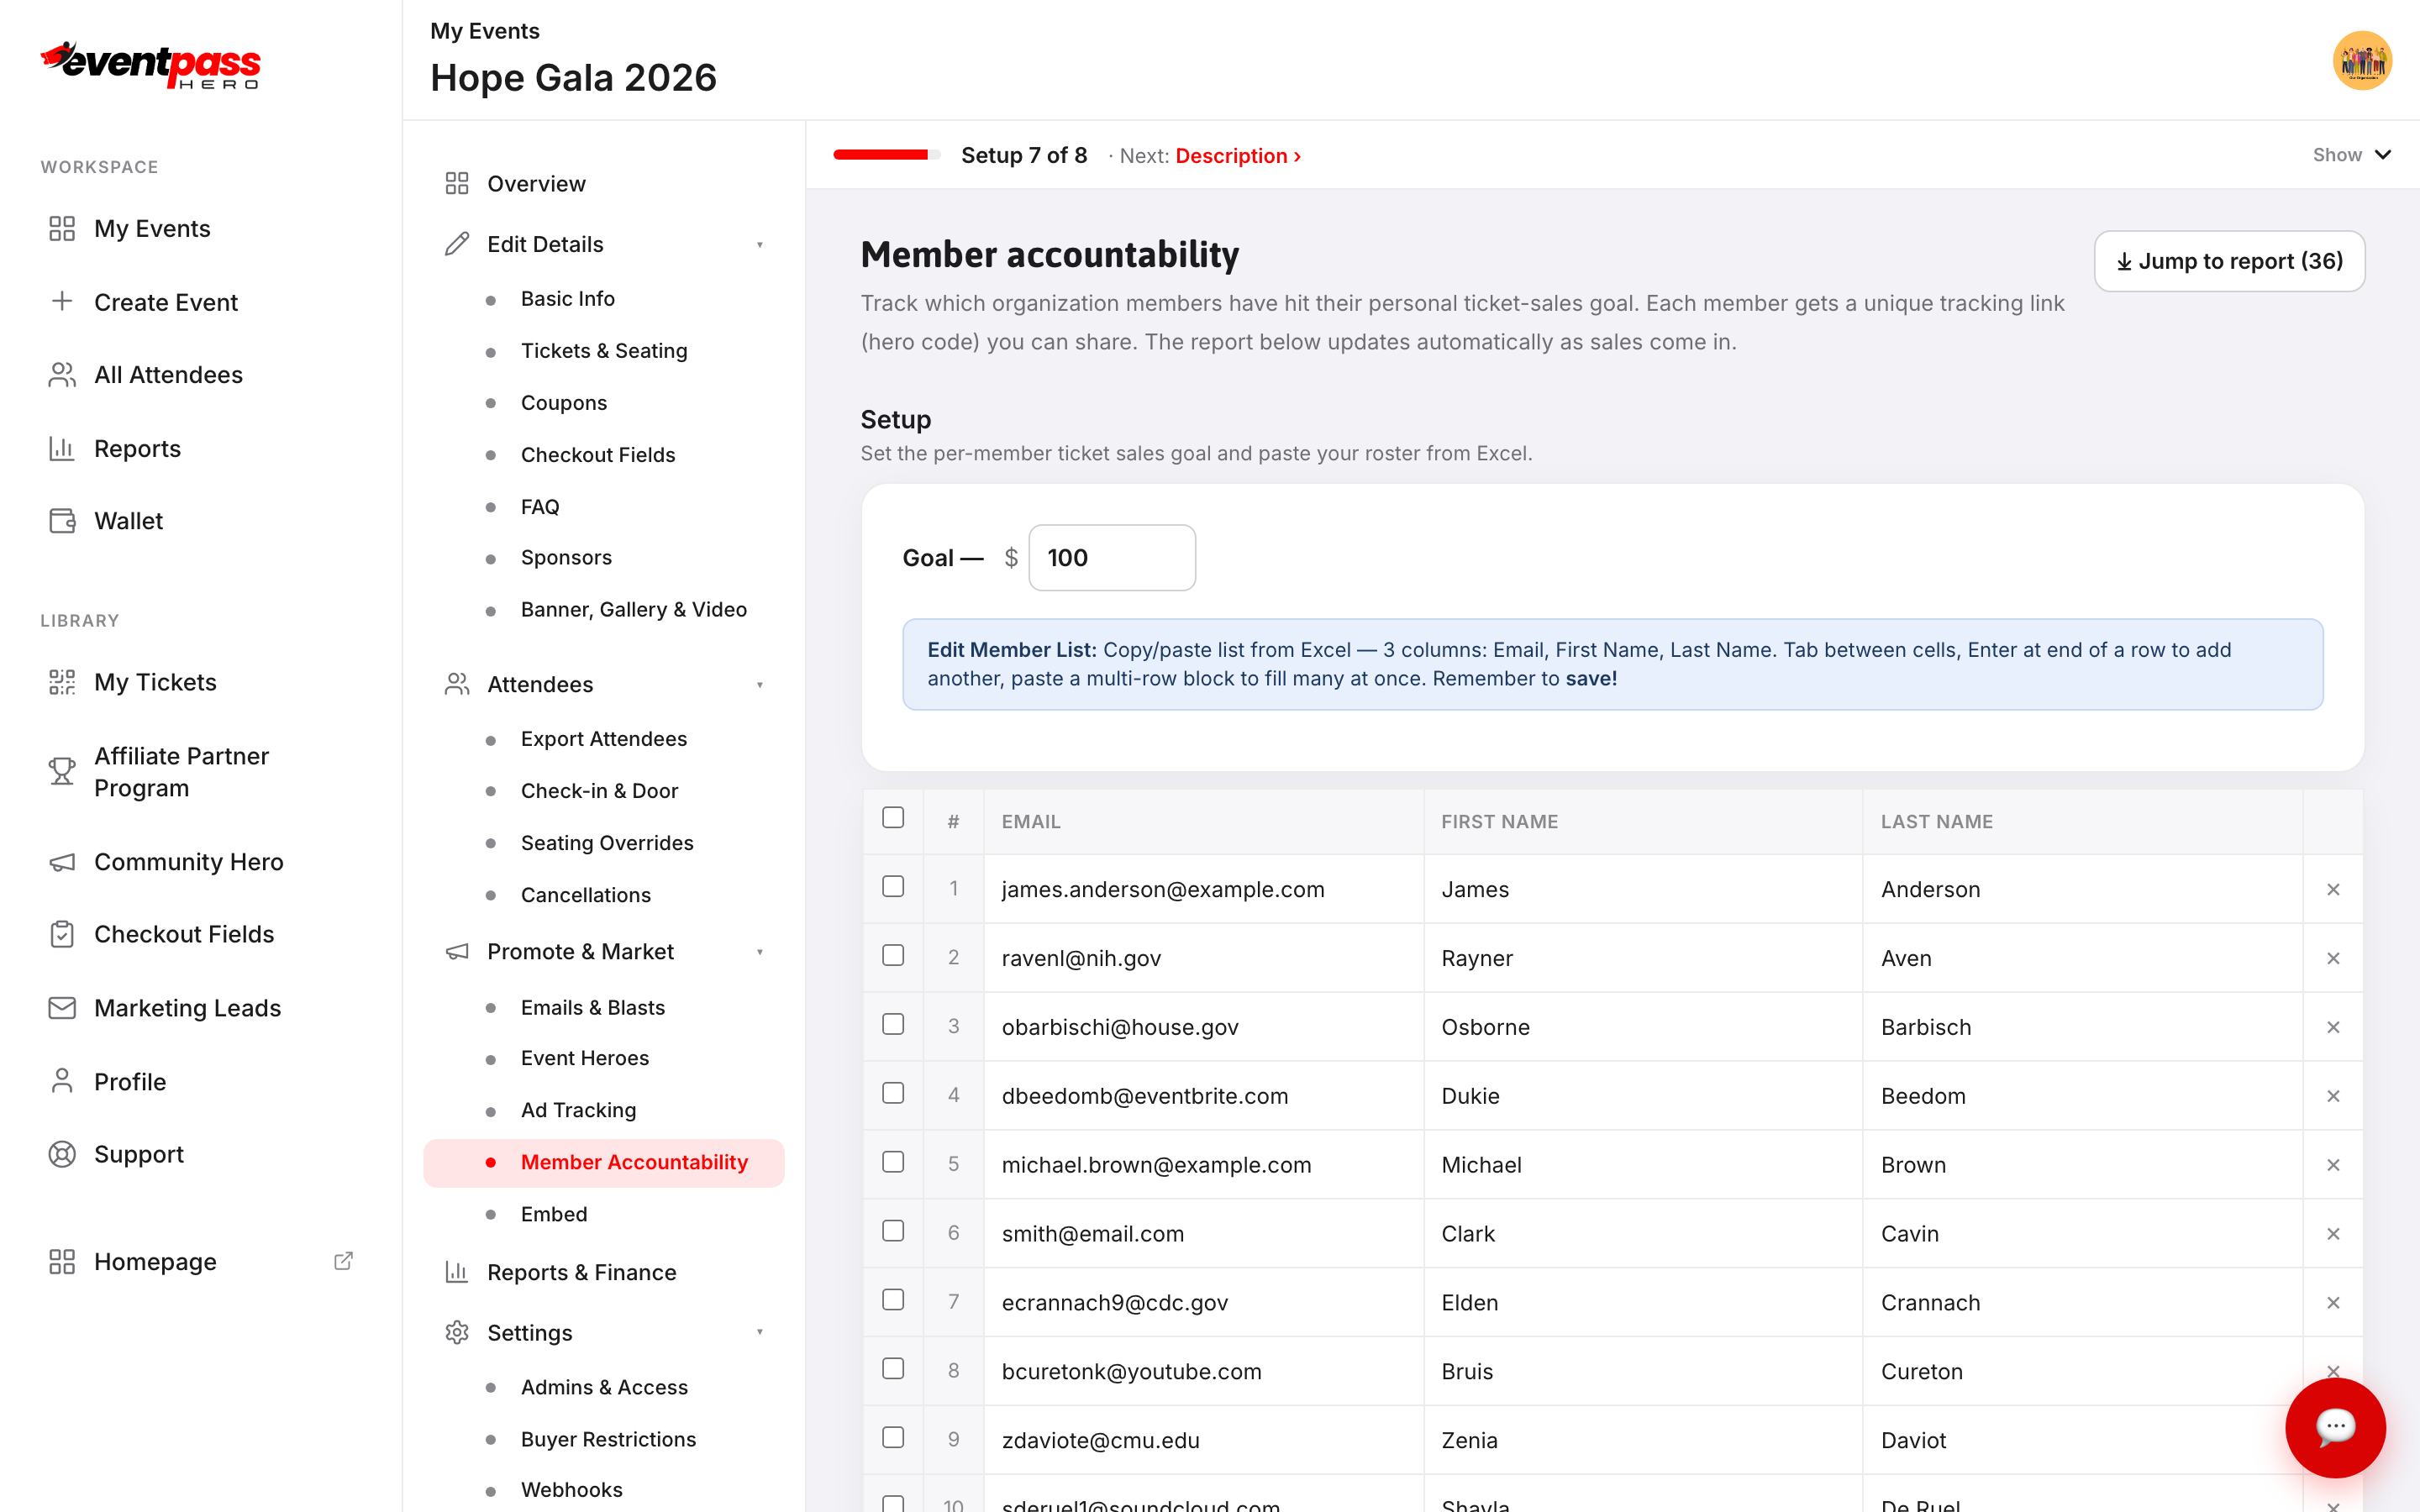
- 5. Click ⬇ Export members & tracking links to download every member's link — ready to distribute by email, group chat, or your newsletter.
The Member Accountability Report
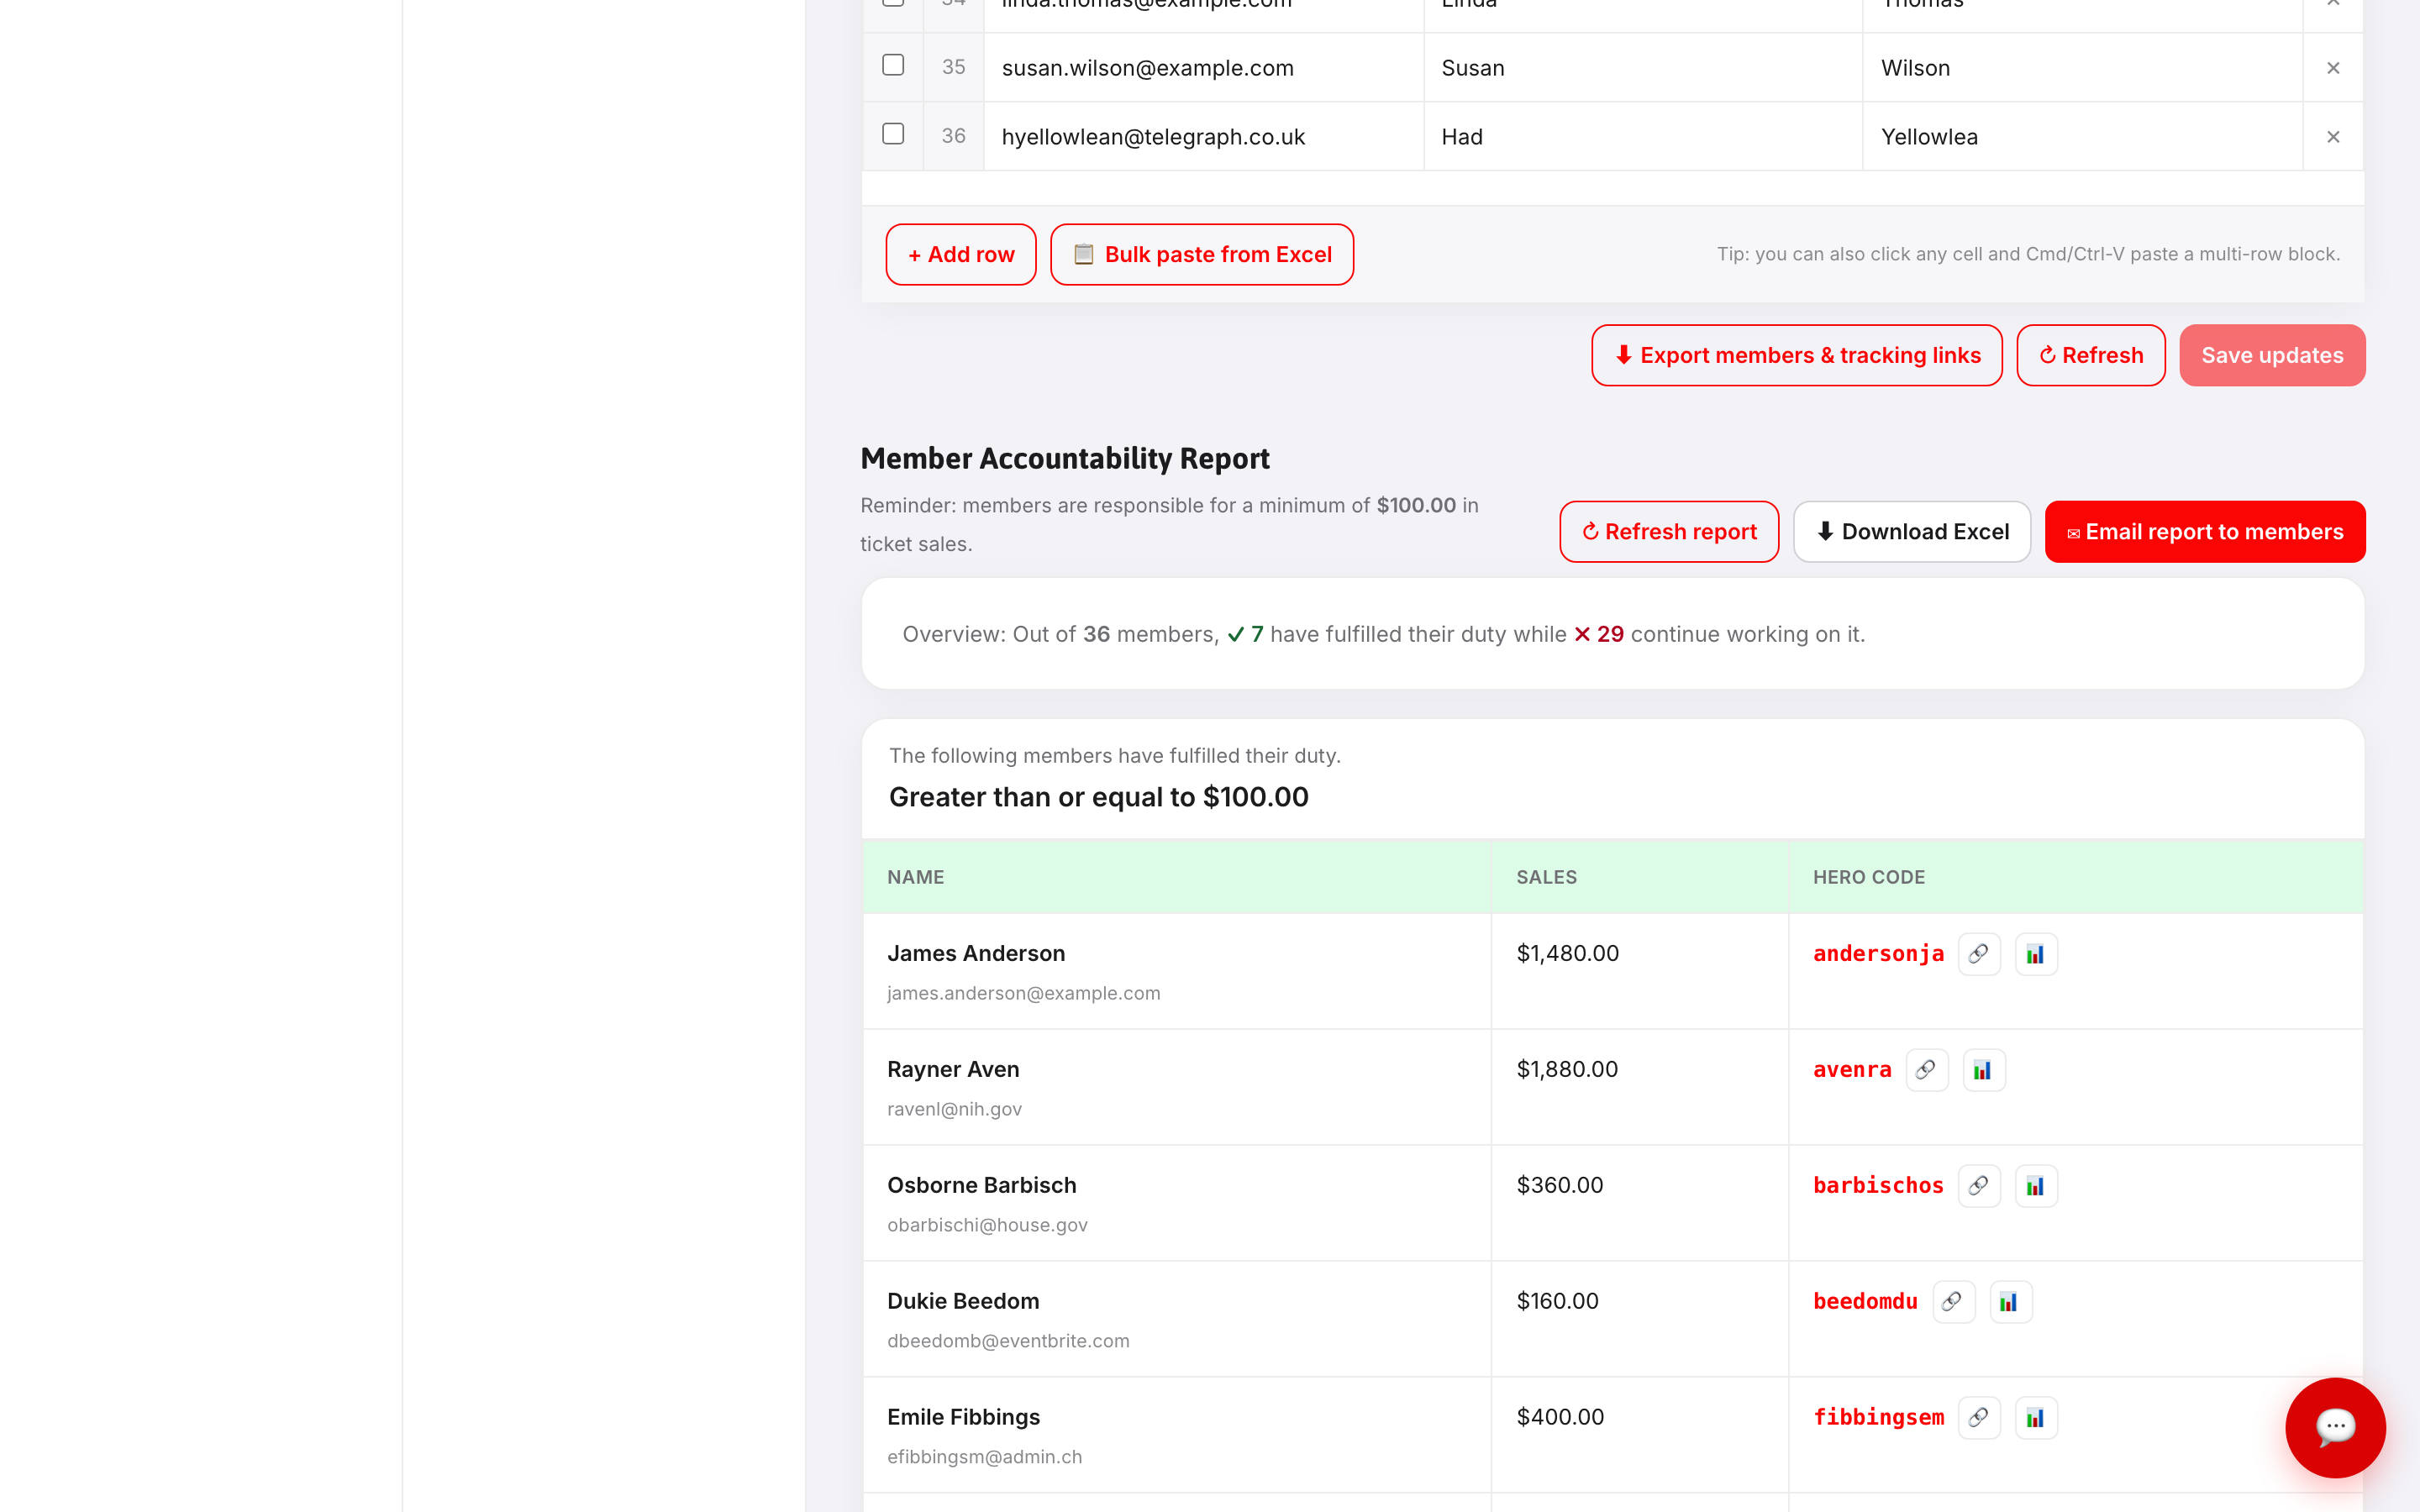
Below the setup, the report updates automatically as sales come in. The overview line says it plainly — "Out of 36 members, ✓ 7 have fulfilled their duty while ✗ 29 continue working on it" — with members who've hit the goal listed in the top group and everyone else below, each with their sales total and hero code.
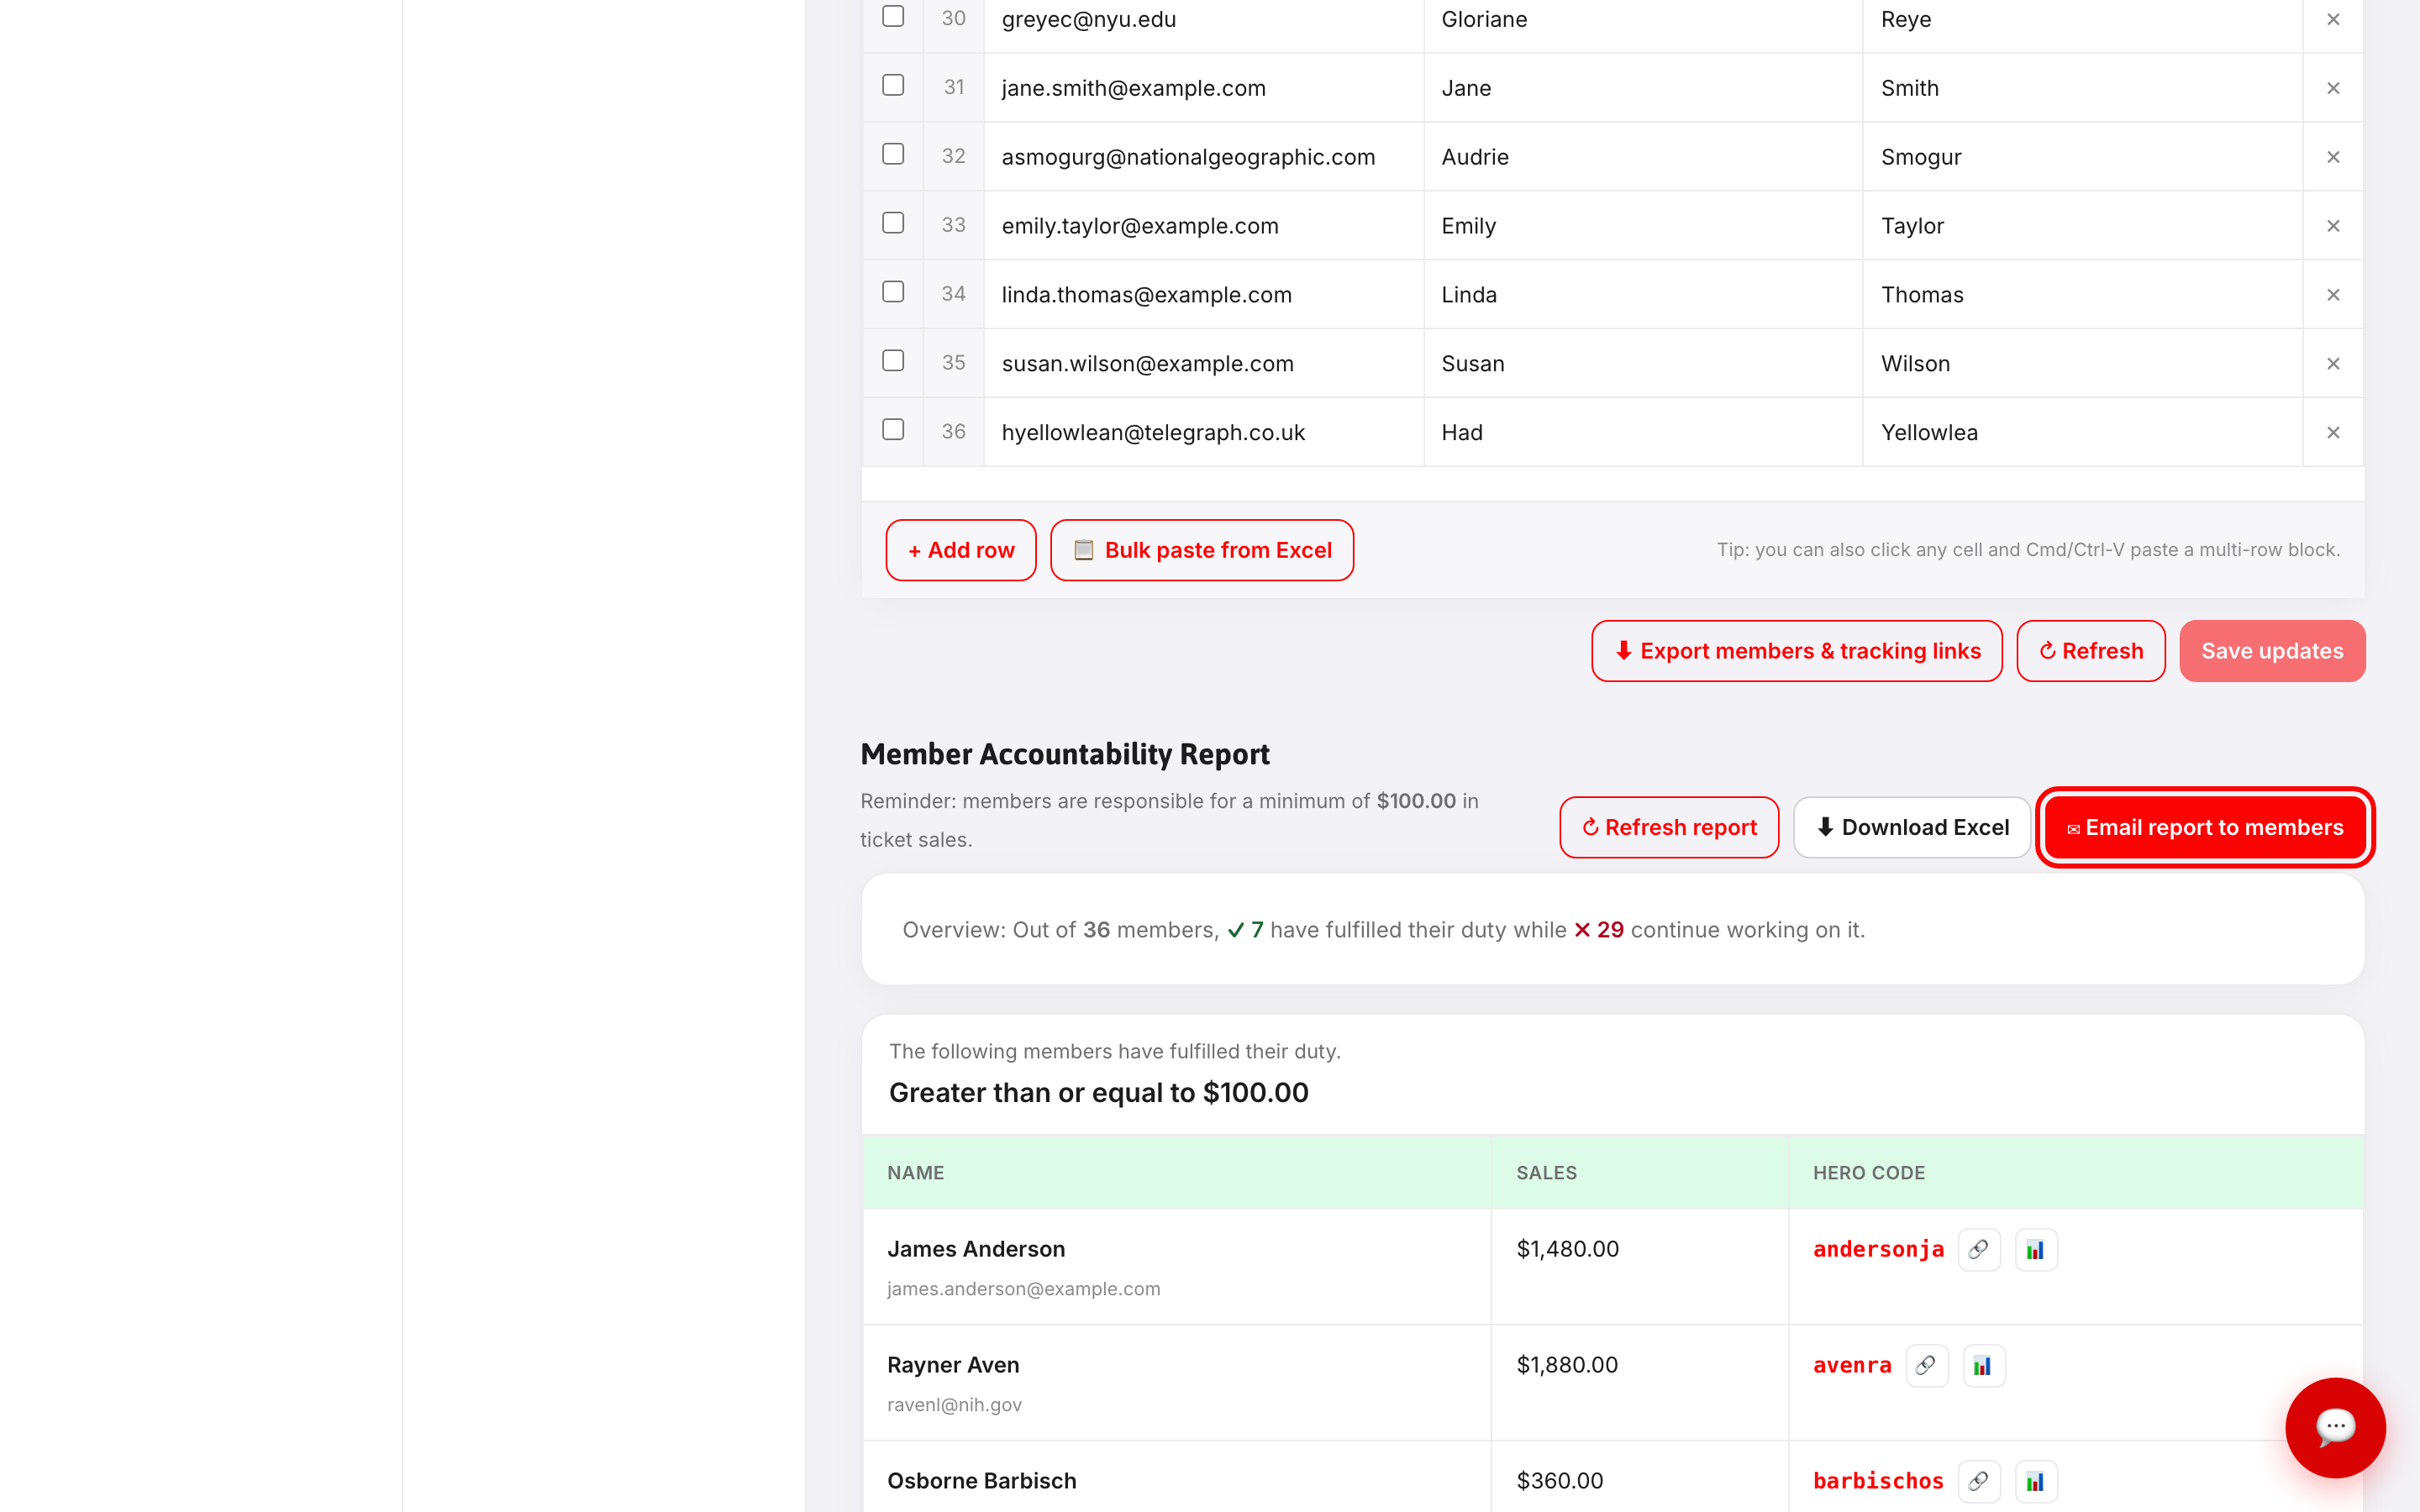
- ✉ Email report to members — send the current standings to your whole roster. Total transparency is the point: everyone sees who's carrying the load.
- ⬇ Download Excel — the same report as a spreadsheet for board meetings.
- Each member row links to their personal tracking link and their member dashboard.
How attribution works
A member shares their link; when a buyer arrives through it, the tracking sticks for 14 days and any completed order credits that member. The same totals feed the Event Heroes leaderboard, and members can watch their own numbers on their personal dashboard (see the member's guide below). Your roster also becomes an email audience — Organization Members — on the Emails & Blasts screen.
Troubleshooting
- A member's sale didn't credit them — the buyer must arrive through the member's link (or pick the member at checkout when the event asks "Referred by member"). Use Hero overrides on the Event Heroes screen to move credit between codes when needed.
- The roster paste looks scrambled — paste three columns in the order Email, First Name, Last Name, tabbed between cells with one row per line.
- A member left the organization — remove their row and Save updates; their code stops counting toward goals.
Last updated 2026-08-14 · All FAQs & video tutorials