

Embed Tickets on Your Website
You can add a Buy Tickets button to any website you control — your organization's site, a landing page, a newsletter archive — without sending people away to another tab. The embed puts the full ticket cart inside a lightbox that opens right on your page.
Step-by-step
- 1. Open your event and click Promote & Market in the left sidebar. Under that section, click Embed.
- 2. You'll see the Embed code screen. A live Preview button labeled Buy Ticket(s) shows how your button will look.
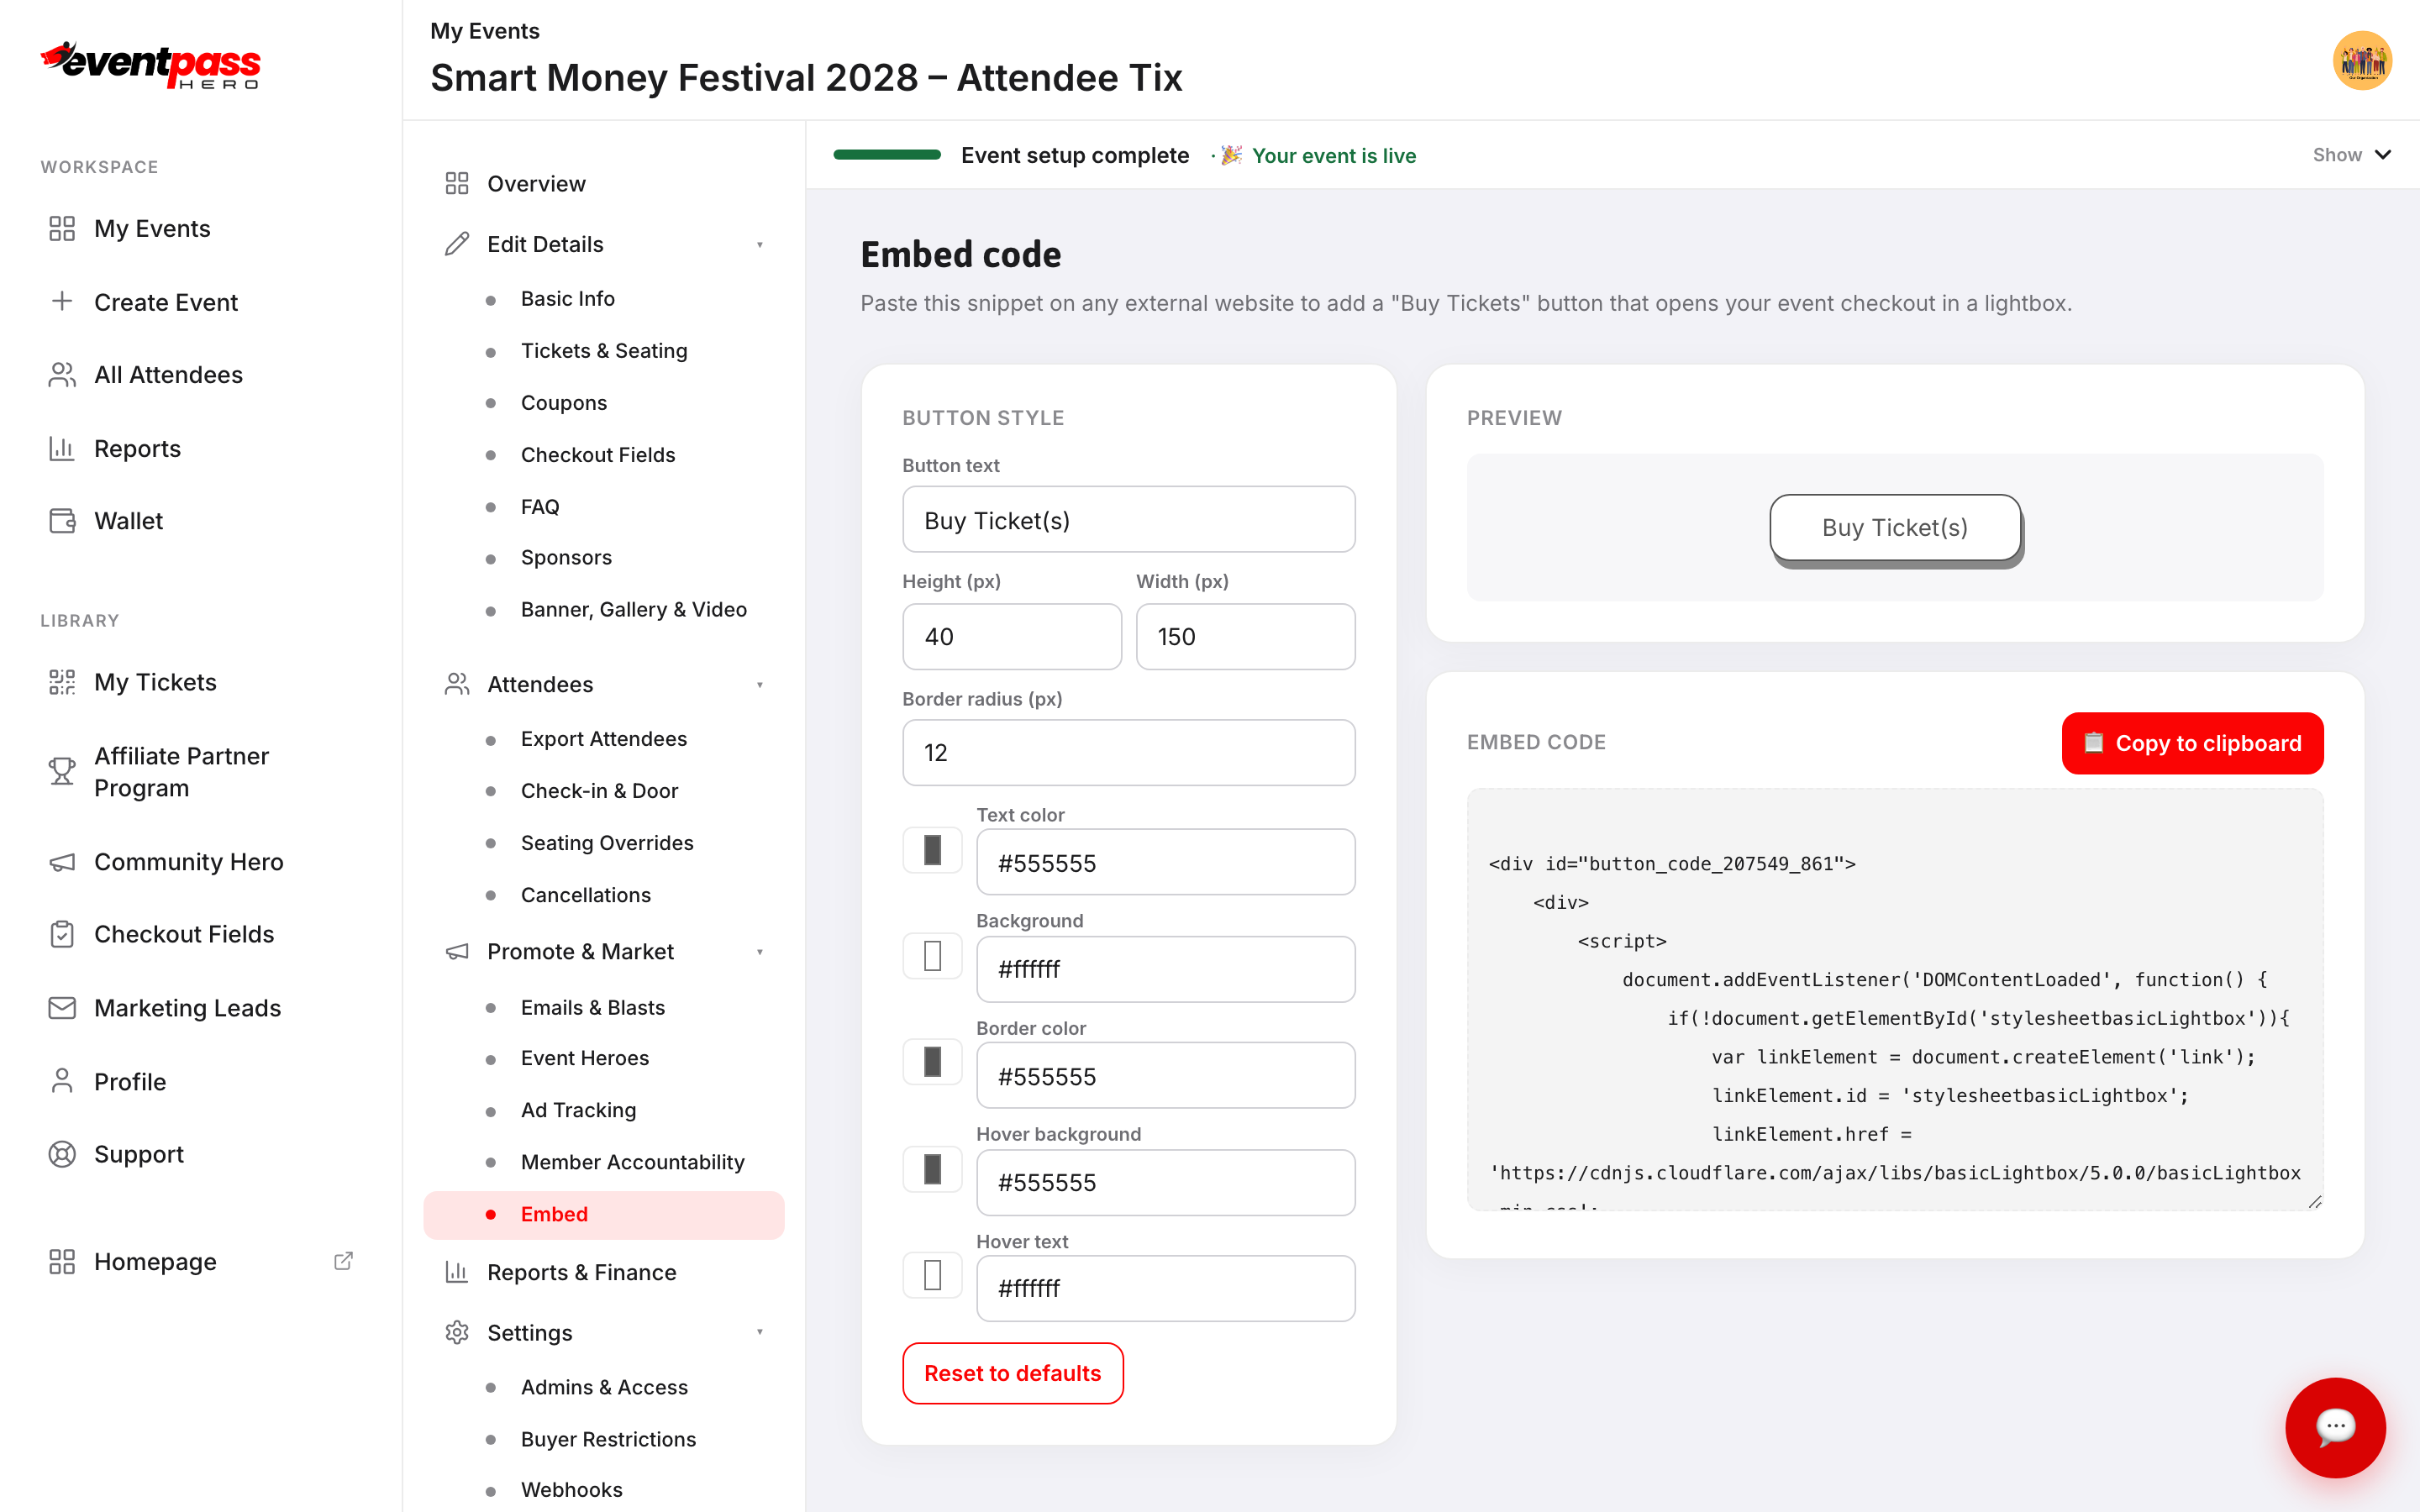
- 3. Customize the button under Button style: adjust the button text, height, width, border radius, text color, background color, border color, hover background, and hover text. The preview updates as you type.
- 4. When you're happy with the look, click 📋 Copy to clipboard.
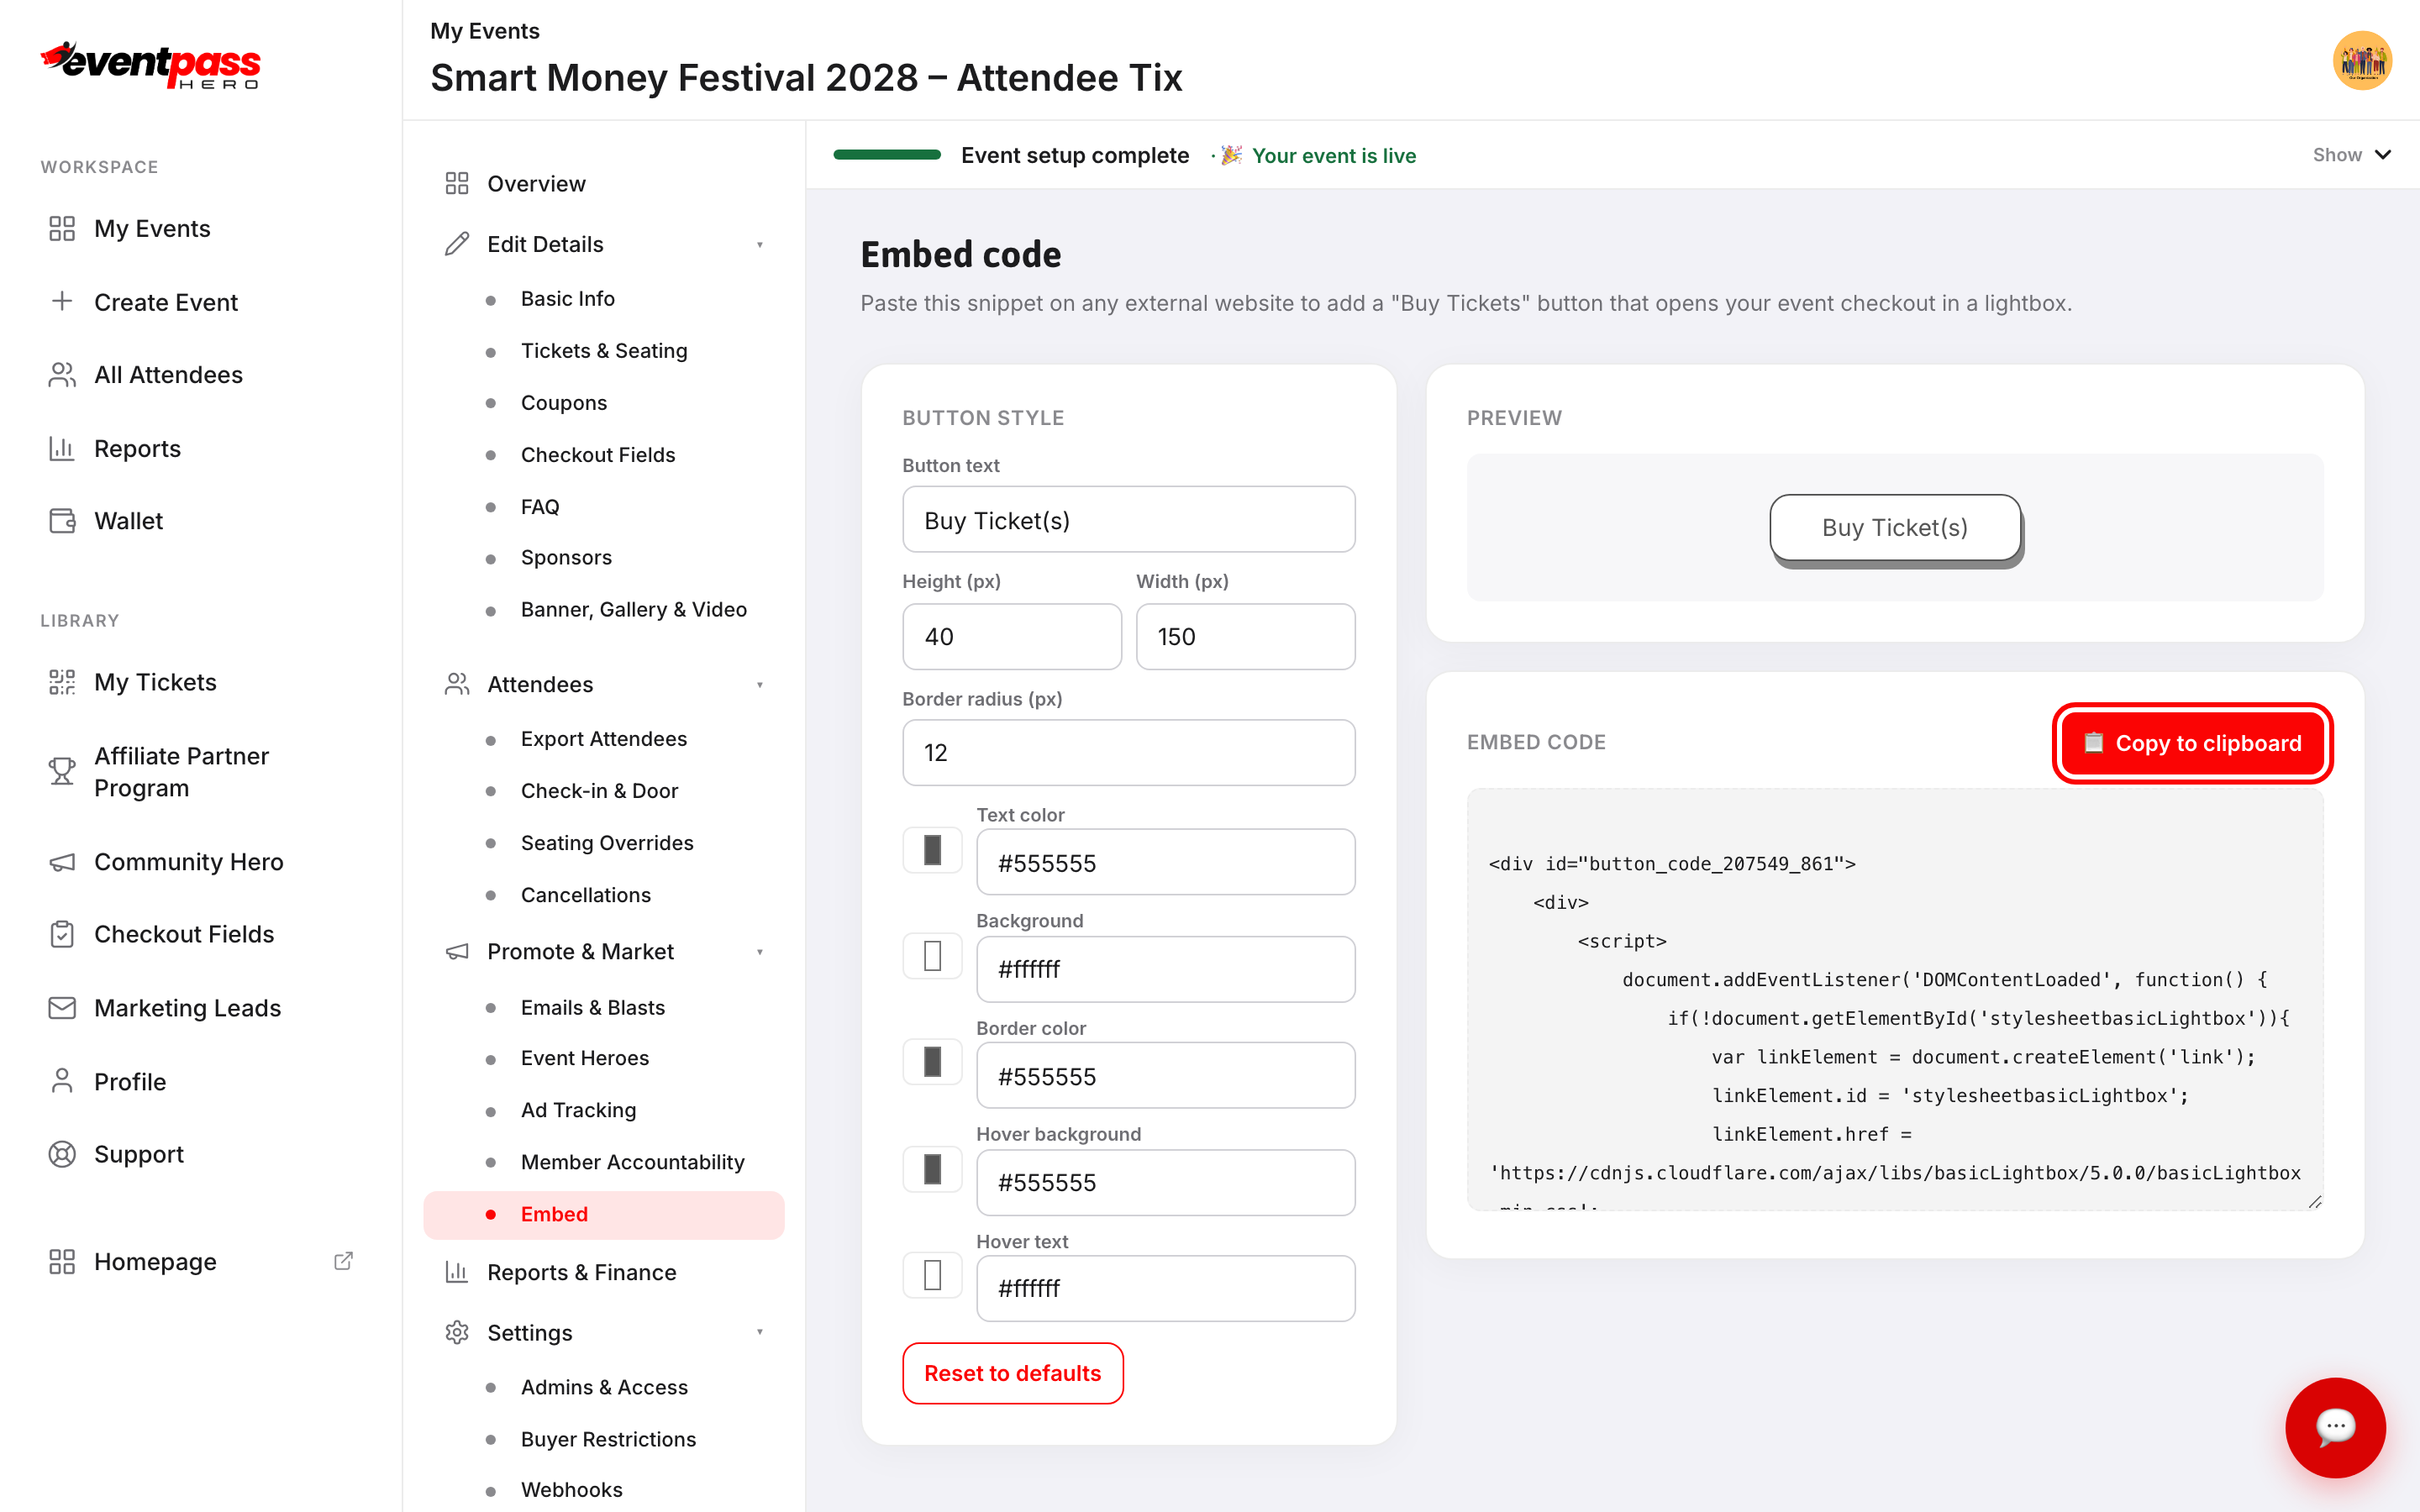
- 5. Paste the snippet into your website wherever you want the button to appear. The code works anywhere you can add raw HTML — a page builder, a WordPress block, a website template, or a hand-coded page.
What the buyer sees
When a visitor clicks the embedded button, the EventPassHero cart opens as a modal overlay on your page. They pick tickets, pay, and receive their confirmation — all without leaving your site.
Troubleshooting
- The button doesn't appear on your site — your page builder or CMS may have stripped the script. Make sure the editor lets you paste raw HTML. Some WordPress editors switch to "visual" mode and encode the script tags; switch to HTML / Code mode before pasting.
- The cart opens but shows a different event — each event has its own embed snippet. Confirm you copied the code from the correct event's Promote & Market → Embed screen.
- You want to match your brand colors — use the Button style fields to set exact hex values for background, text, and hover states. Click Reset to defaults if you want to start over.
Last updated 2026-08-14 · All FAQs & video tutorials