

Connect Stripe and Get Paid
If you're selling paid tickets, connect Stripe first — it's how your ticket revenue reaches your bank account. The setup lives in your Wallet, takes a few minutes, and is handled by Stripe's secure onboarding: EventPassHero never sees or stores your banking details. Once connected, payouts are automatic every day, on a 2-day rolling settlement — funds typically clear about two business days after each sale.
Step-by-step
- 1. Sign in and open Wallet in your dashboard sidebar.
- 2. In the Stripe Connect card, start (or resume) the setup. Stripe walks you through your business category, address, identity, and bank account — the Wallet lists exactly which items are still needed until your account is fully verified.
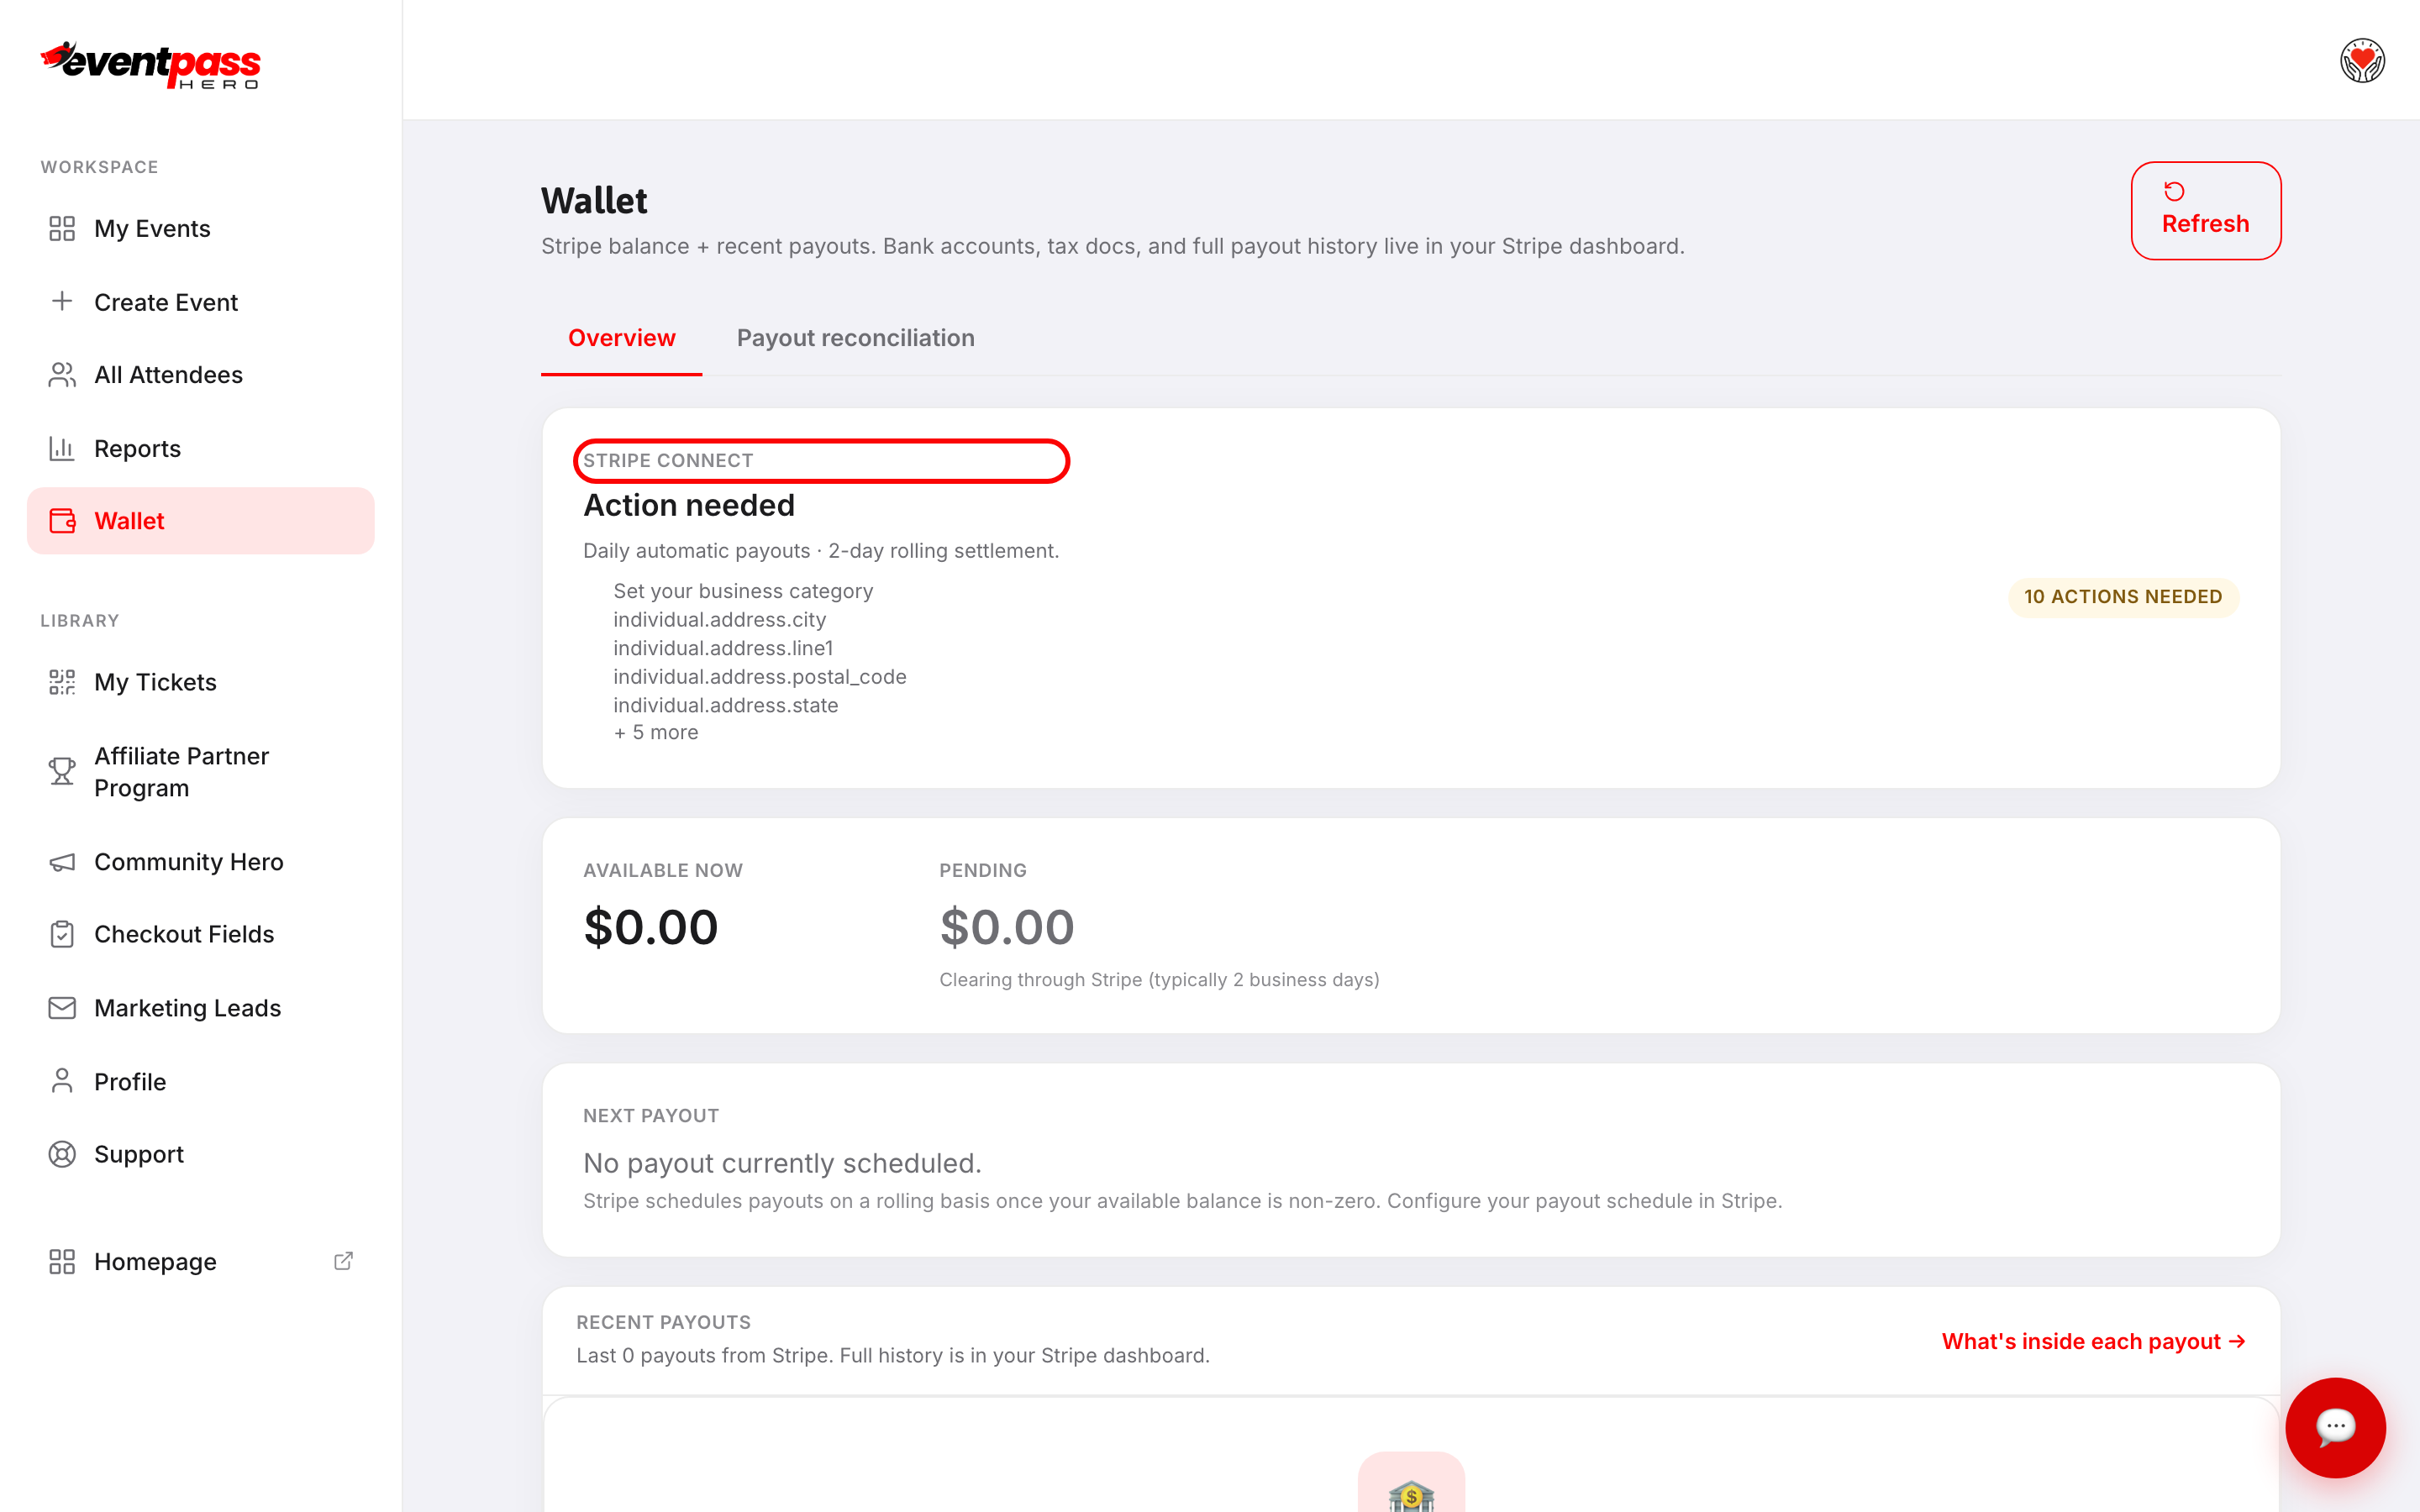
- 3. Finish every item on Stripe's checklist. When nothing is left, your account is live — buyers can pay, and payouts flow.
What your Wallet shows once connected
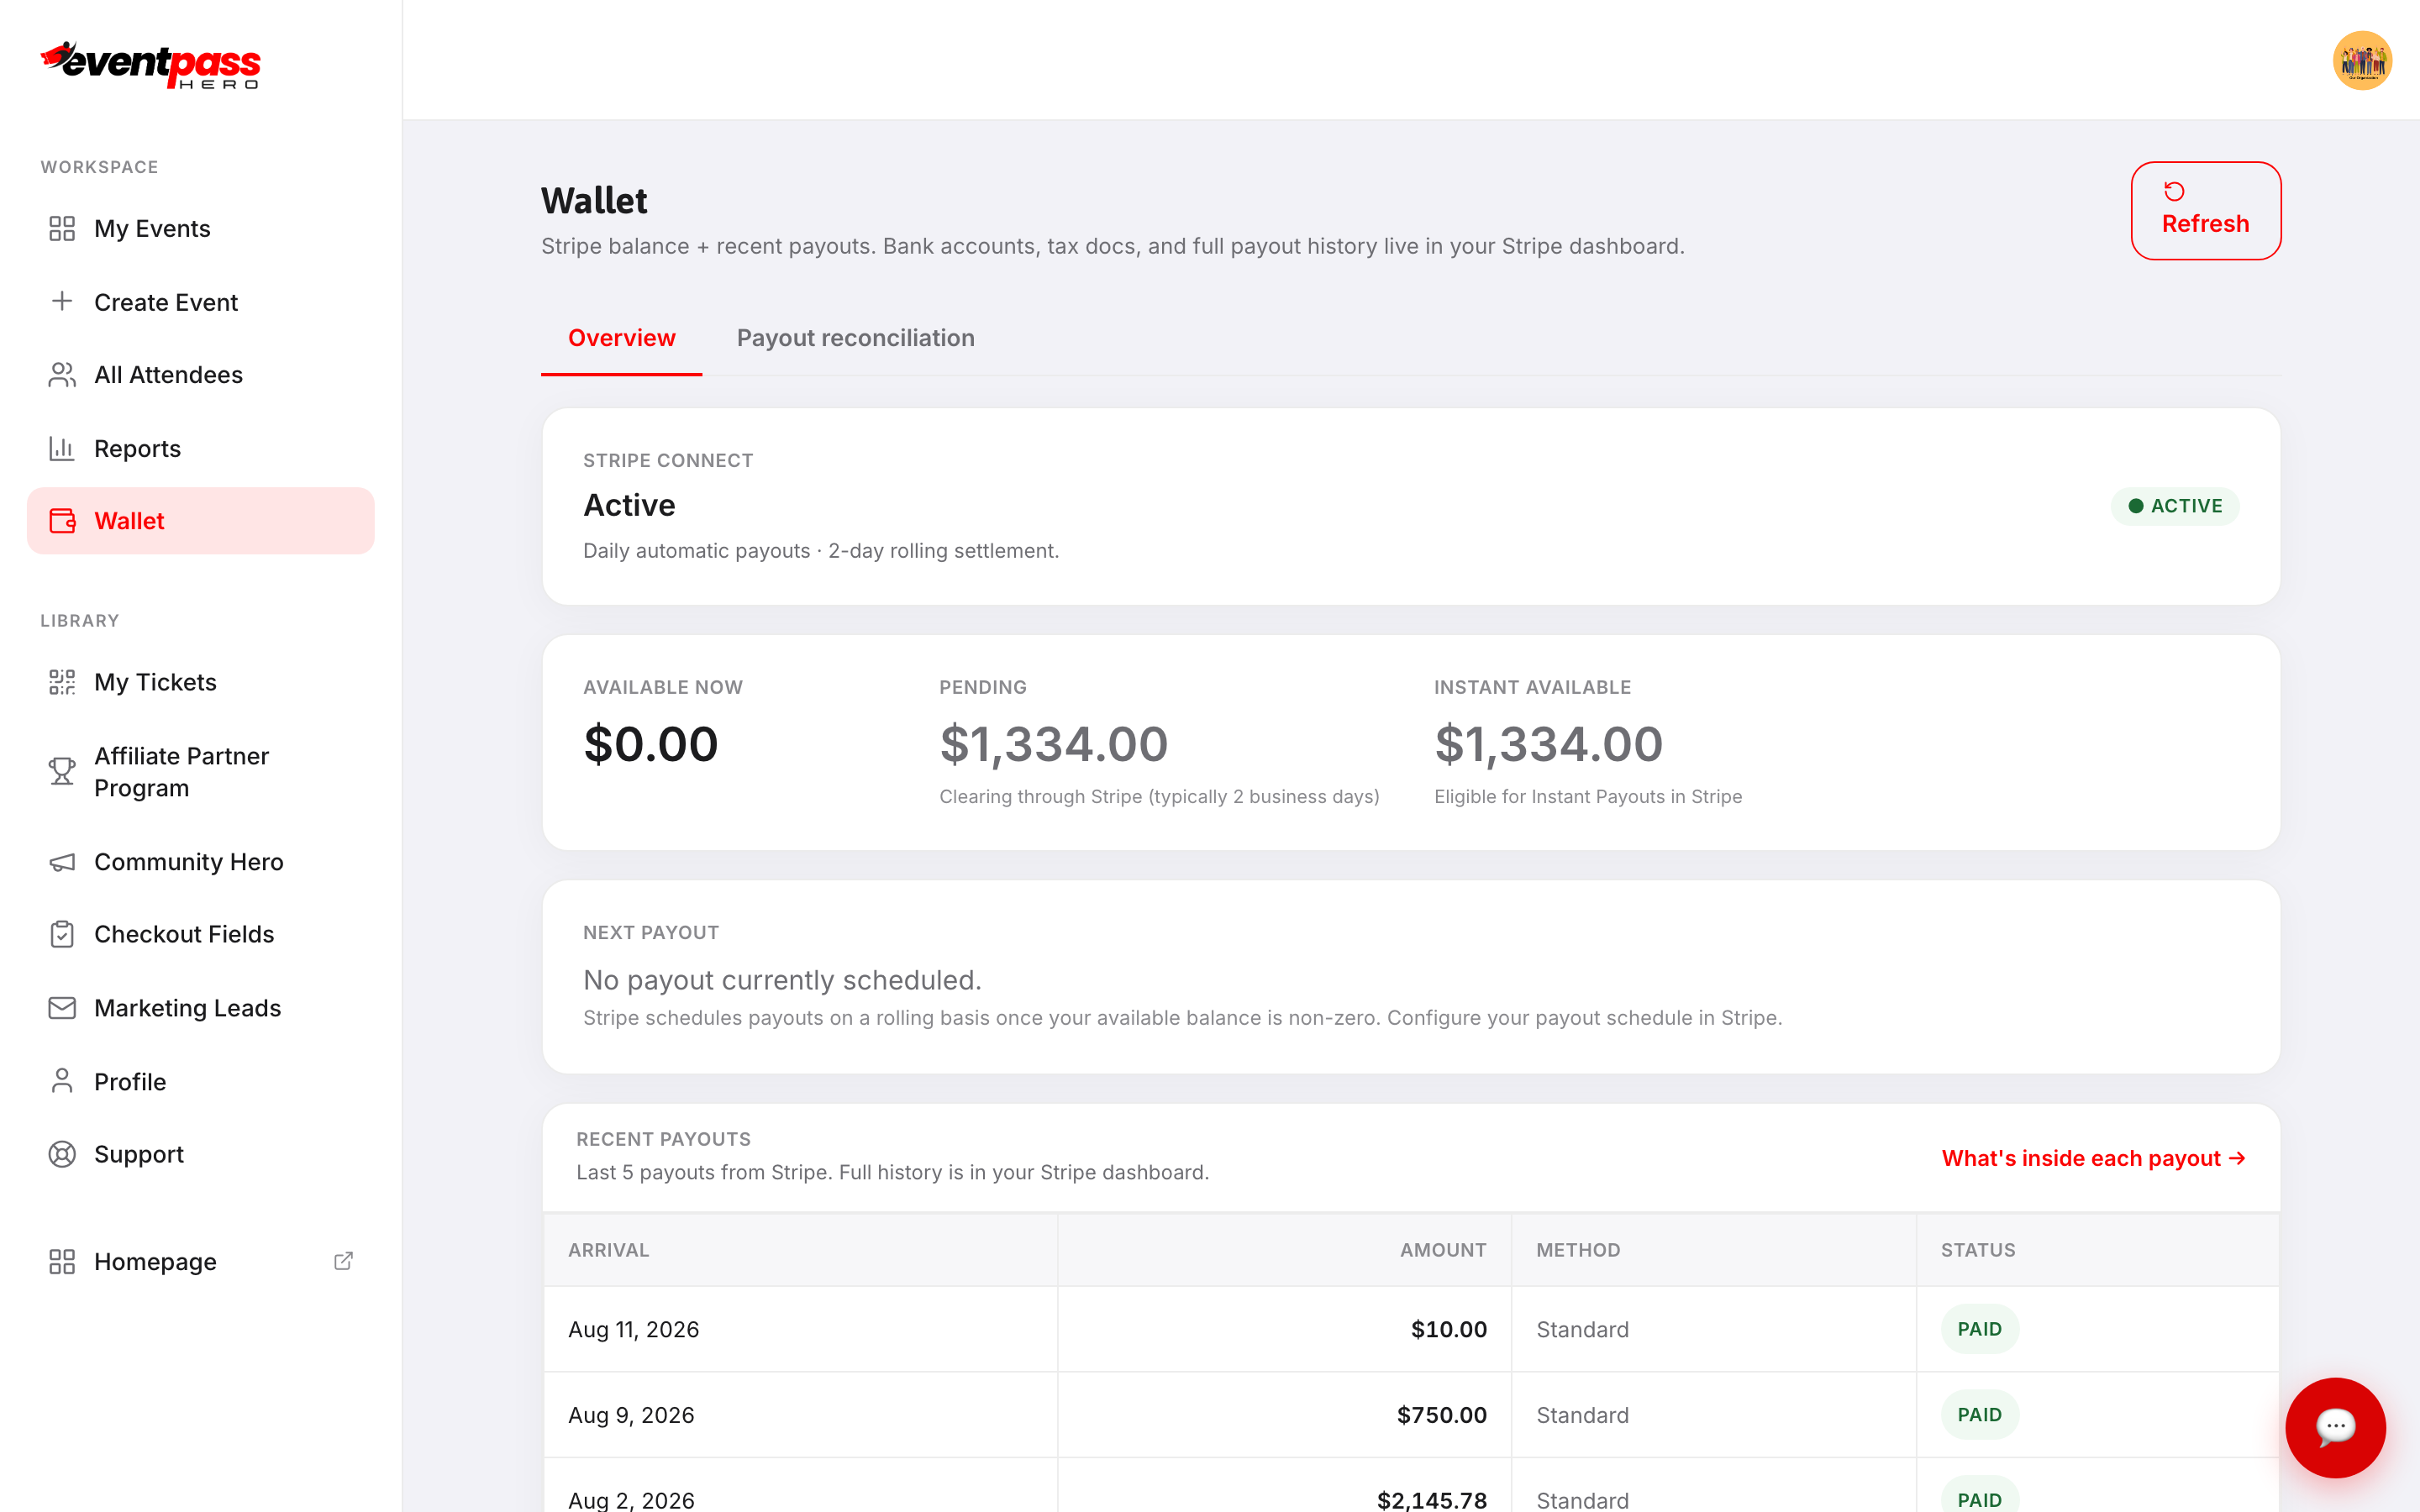
The Overview tab is your money at a glance: Available now, Pending (clearing through Stripe, typically 2 business days), your Next payout, and Recent payouts. Bank accounts, tax documents, and full payout history live in your Stripe dashboard, one click away. The Payout reconciliation tab breaks down exactly which events and orders are inside every Stripe deposit.
What happens if I don't connect?
Free events work fine without Stripe. But if any of your ticket types are paid, the cart blocks purchases and shows buyers "The Stripe payment processing setup has not been completed" with your contact email — so connect (and clear every action item) before you start promoting. Paid events also stay off EventPassHero's Browse Events list until your Stripe account can both take payments and send payouts.
Troubleshooting
- The Wallet shows "Action needed" — Stripe still requires items (business category, address fields, identity, or bank details). Each one is listed in the Stripe Connect card; finish them all to go live.
- Buyers report they can't pay — your Stripe account is unconnected or has outstanding requirements. Open Wallet and check the Stripe Connect card.
- A deposit doesn't match your sales — open Payout reconciliation to see the orders, events, and any refunds netted inside each deposit.
Last updated 2026-10-11 · All FAQs & video tutorials